There were a lot of factors to consider when it came to doing my own wedding makeup. I scoured the internet for tips and tricks, but at times the answers were contradictory. I thought I had a good plan in the beginning, but as I practiced doing multiple looks, I realized I needed to make some changes along the way.
Today, we’ll cover the things that should be decided on in advance and what I ultimately chose to do. The conclusions I came to won’t be the same for everyone since it depends on each individual’s personal tastes, skin type, skin texture, skin tone, undertone, priorities, etc.
Although I was inspired to create this post with weddings in mind, this topic is for anyone with an upcoming special event/occasion where photographs will be taken. I was not in a position where I could afford to forget something and run to grab it at the last second, so hopefully these topics will help others avoid having to make last minute decisions and purchases too.
DISCLOSURE: All makeup products in this post were purchased by me with my own money. The only affiliate links in this post are for a few of the brushes mentioned towards the end. Non-highlighted links in bold blue font (Example) are standard non-affiliate links. Links marked in bold black font with a light blue background (Example) are affiliate links. This means that I would make a commission if purchases were made directly using my link. Whether you click to shop through them or not, I appreciate you visiting and I hope you find the information I’ve provided to be helpful!
Red – Titles/Topics, Purple – Products Used, Green – Additional Options to Consider
Deciding Between Looking Better in Person or Looking Better on Camera

We had a micro wedding (less than 25 people) and the majority of the guests were non-makeup wearers or neutral-color wearing minimalists. I was concerned with looking overly made up in person compared to the group, but also recognized that full coverage and full glam faces result in the most photogenic pictures. I would love to look as natural and fresh-faced as possible, but I think I look the prettiest with “a beat face,” so to speak. So, I decided that I ultimately would start researching ways to look best in photography since pictures last longer and can even serve to replace memories in the minds of those who see them. If it was possible, my plan was to still try and find a balance between the two goals. This balance involved using other techniques such as color-correcting so I could use less concealer and foundation to hide my skin discoloration, using underpainting techniques to have my sculpting attempts look as natural as possible and reduce the need for as much powder on the surface layer, using full-coverage makeup paired with brushes that apply less product so that I could build up to the minimum amount of makeup I needed in small layers instead of packing it on heavily all at once.
In the age of social media, it’s safe to assume the majority of people prioritize how makeup will look on camera versus how it looks in real life, as discussed on the Mixed Makeup YouTube Channel. However, this is still a question everyone has to ask themselves because the degree to which direction one leans will dictate how they have to proceed with the next steps.
After Choosing to Prioritize How One Looks on Camera…
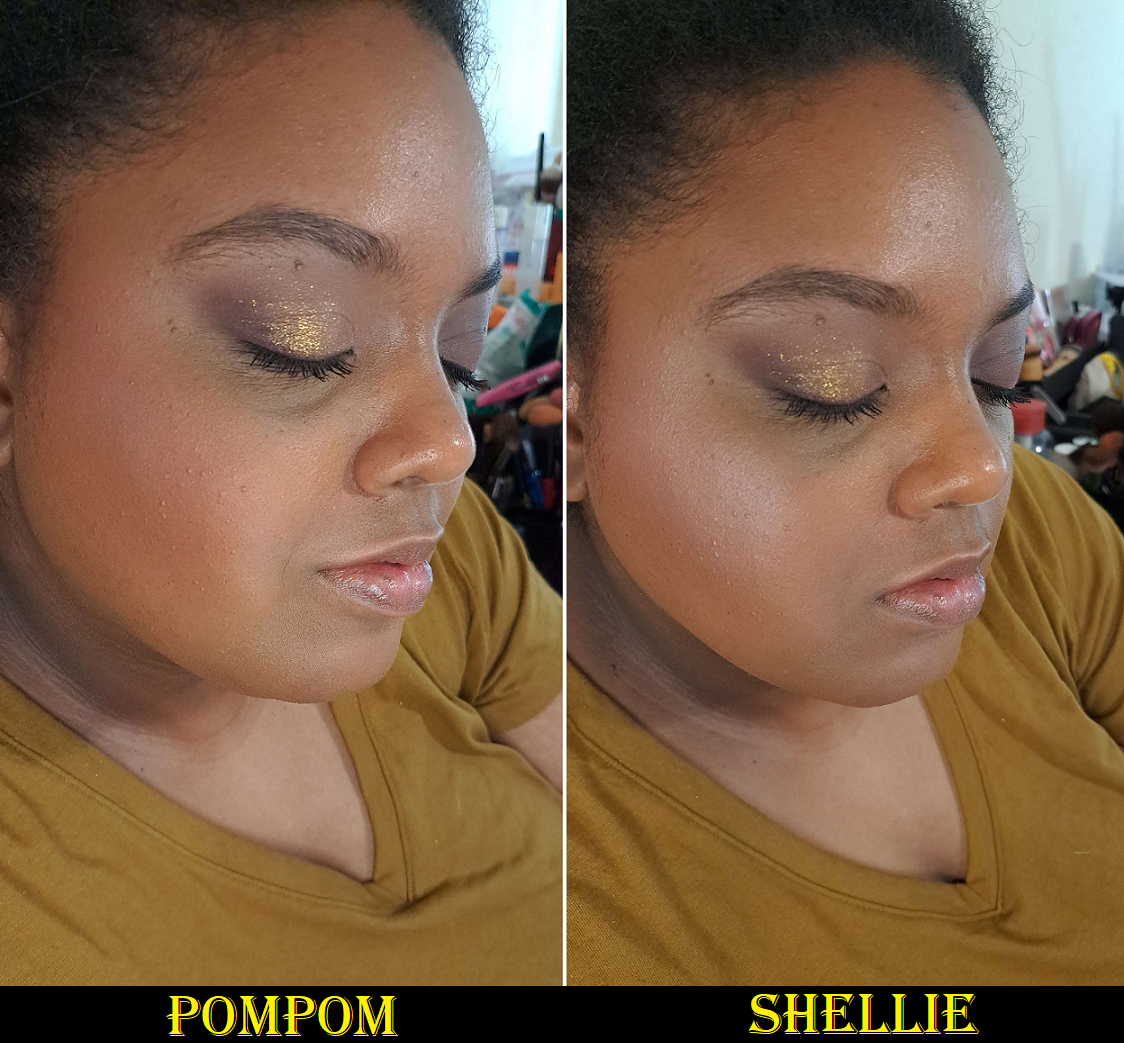
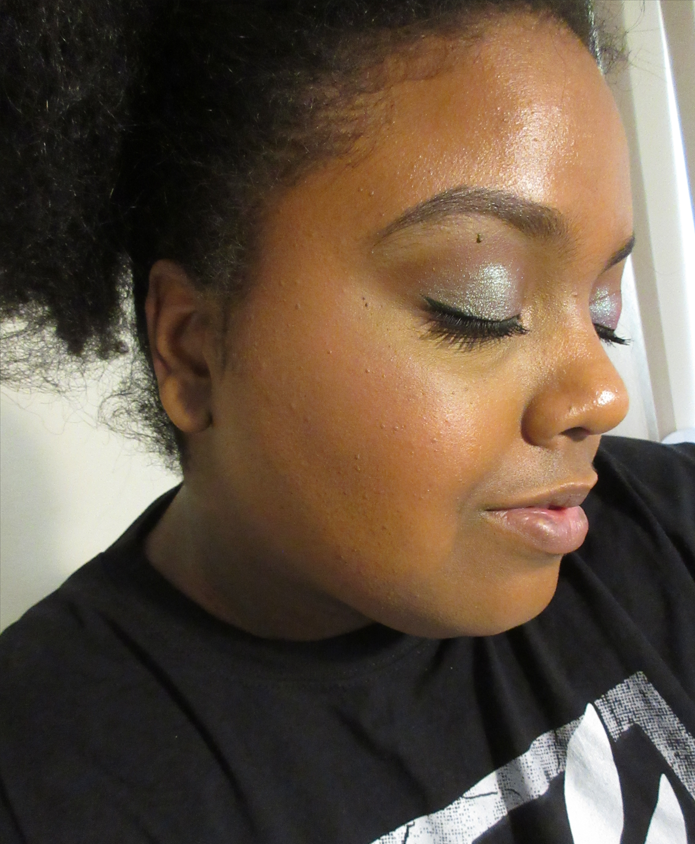
When I do a full-face in the type of soft tones that are typical of bridal makeup, I don’t feel satisfied with my appearance. So, looking natural was less of an option for me. In addition, if I wanted things like blush to be seen on camera, I had to get comfortable packing on way more than usual because blush gets washed out so easily. As described by Kackie of Kackie Reviews Beauty, the key is applying makeup in a way to add more dimension that the camera can pick up even when pulled back. I had to practice applying more than usual, taking pictures, and then adding more and photographing that to learn how much would actually be needed on the day. Blush, highlighter, and eyeshadows were the things I had to work on amplifying dramatically in order to get photos I was satisfied with (at least on my own camera).
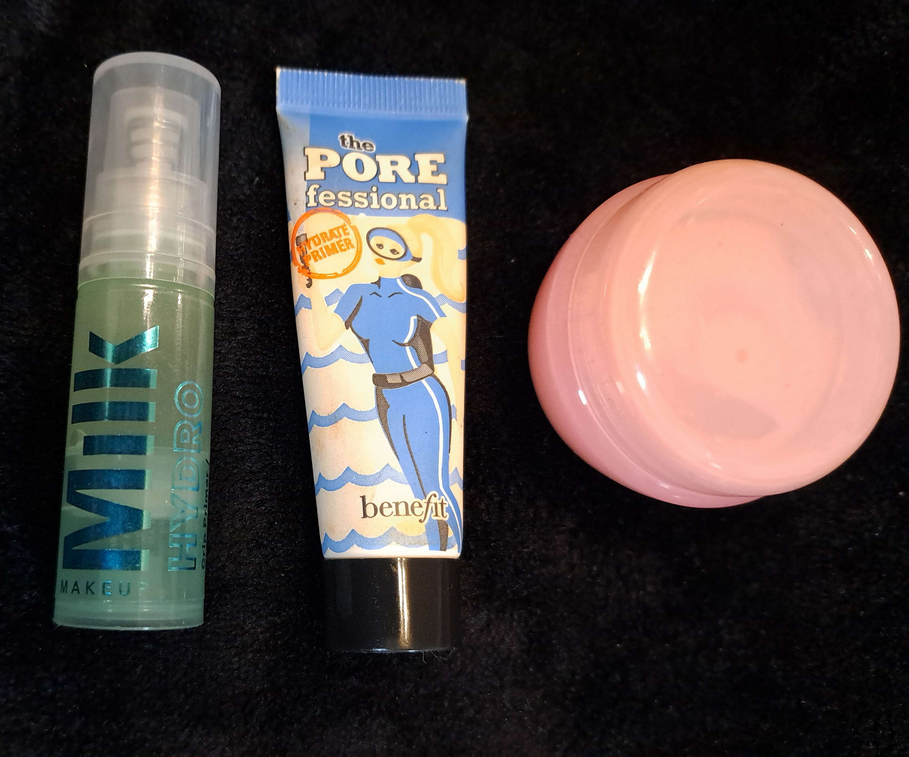
One of the first big decisions I had to make was deciding what finish I wanted for my skin. A matte base with strategically placed glow seems to be the consensus for what photographs the best. However, I did not anticipate the climate when I chose what products to bring with me when I moved overseas. The products that looked the best on camera for me in Florida were extra dry looking on me in Germany and I didn’t bring my dewier foundations because I have them in my darker summer shade. This led me to buy a new foundation (N°1 DE CHANEL Revitalizing Foundation), the only one that mimicked the appearance of natural oils peaking through my face, and it remained that way through the end of the night. It basically looked like a natural-finish foundation on my dry skin. I used the Glossier Futuredew, to ramp up the glow in typical places I highlight, the MILK Hydro Grip primer for hydration and lasting power, and the Benefit Porefessional Hydrating primer in my T-zone for a smoothing effect without a silicone texture. I have all three of these products in minis (and a travel container).
I did have the Nars Light Reflecting Foundation with me, but my research scared me away from using it. Since Nars is an artist brand, I always assumed their products looked fantastic on professional cameras, but I kept coming across warnings against using too many light reflecting products. Considering how dark it is in Germany, I knew the chances of flash being used was high, so I didn’t want to look crazy on other people’s cameras either (even though Nars’ foundation is supposed to be photo-friendly and produce no flashback, but I didn’t know if that would still be the case if paired with other light reflecting products). So, I didn’t use that one just to be safe. Skipping it turned out to be necessary because I tried using it in strategic spots and it still wasn’t luminous enough for my liking while not in Florida.
Lisa Eldridge was one example of someone who discussed light reflecting products in flash photography and Pete Coco Photography cautioned against using shimmers in studio settings, but I saw more mentions of light reflection from various articles and blogs.
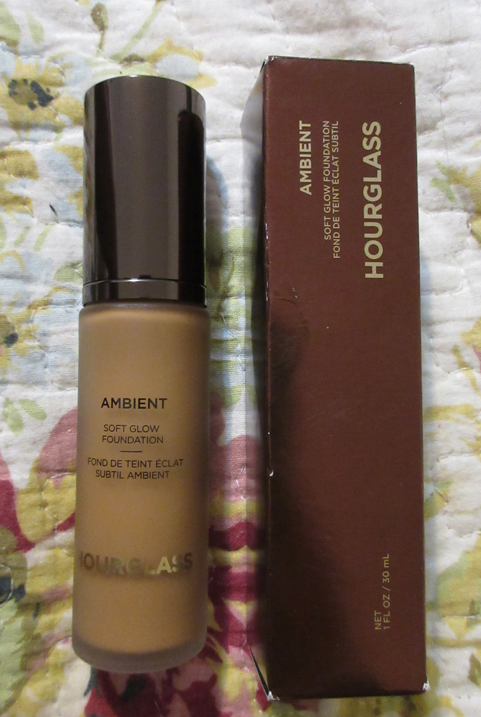
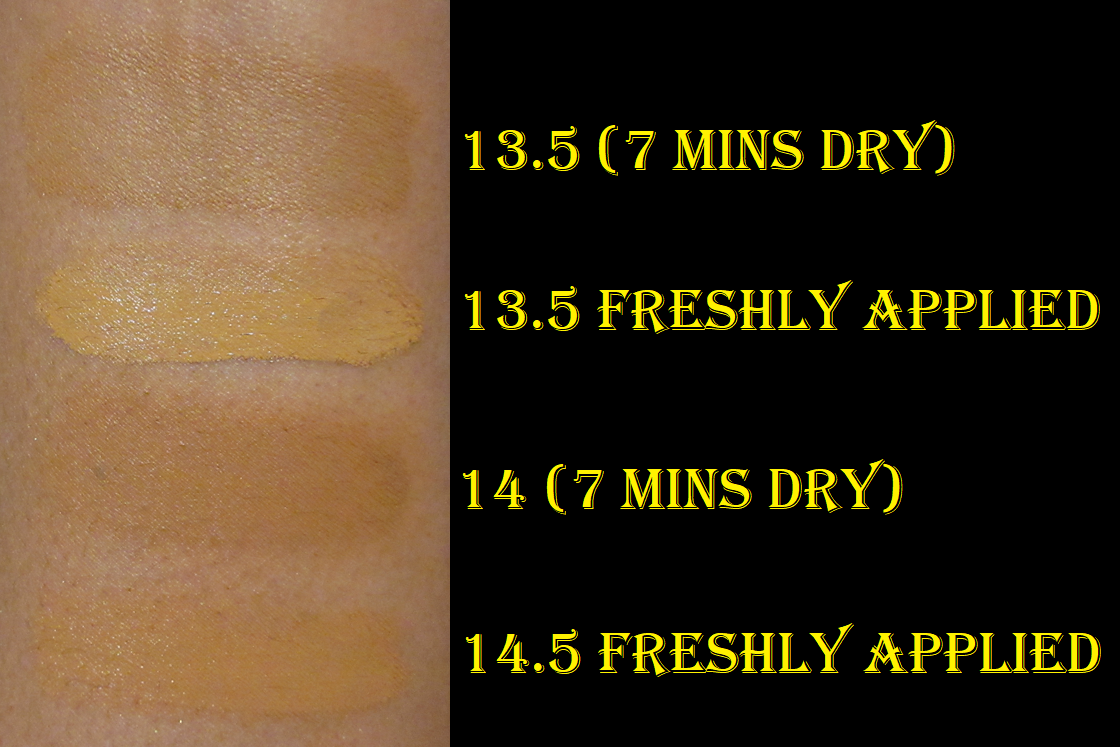
For those curious, the top foundations I wanted to use if the climate was more like Florida would have been the Lisa Eldridge Seamless Skin Foundation or Hourglass Ambient Soft Glow Foundation (this one only starts to look good for me if oils break through and my skin is prepped for maximum hydration including using a facial oil). The Lisa Eldridge foundation is extremely similar looking to the Chanel one I opted for, but without as much luminosity.
I also own two lighter coverage products that make my skin look beautiful in person: the Fenty Eaze Drop Blurring Skin Tint in Shade 18 and the Rose Inc Skin Enhance Luminous Tinted Serum in Shade 100. I was looking for high coverage, but if I had to recommend another option it would be the one from Fenty. I normally dislike their foundations, but this newer one finally agrees with my dry skin. The Rose Inc one unfortunately can come off extra warm colored on camera. Sometimes I look orange in photos even though I don’t in person. It’s also random when it happens as well. I’m not sure if it’s some interaction with a specific product I might sometimes pair with it. So, that’s why I don’t recommend that one.
Deciding On the Color Scheme and Undertones of the Makeup
I had quite the dilemma trying to figure out what colors I wanted to use as a person with warm undertones who was planning to wear cool toned accessories and have blue and purple flowers in my bouquet. I like wearing eyeshadow that matches what I’m wearing in some way, whether it’s clothing, a purse, jewelry, etc but I never like how cool toned eyeshadows look on me as much as warmer ones. At the same time, I didn’t want the winter aesthetic I planned for my look to clash with my natural warmth and make me look extra warm by comparison. I did a test run using my go-to makeup and just switching to a cool toned blush, but I didn’t like the outcome. My second solution was to wear neutral makeup to bridge the two types of looks, but after doing another test run, I just didn’t feel my makeup was as pretty as it usually would be.
Experts say that although anyone can wear any color they want, we tend to find shades in our undertone to look prettiest on ourselves. For instance, Lisa Eldridge says it’s nice to match the wedding scheme/theme, but not if it’s against your coloring. Ultimately, I felt that if I didn’t wear the kind of shades that were natural for me, I would have regrets looking back at pictures thinking my everyday makeup looked somehow better than what I chose for my own wedding.
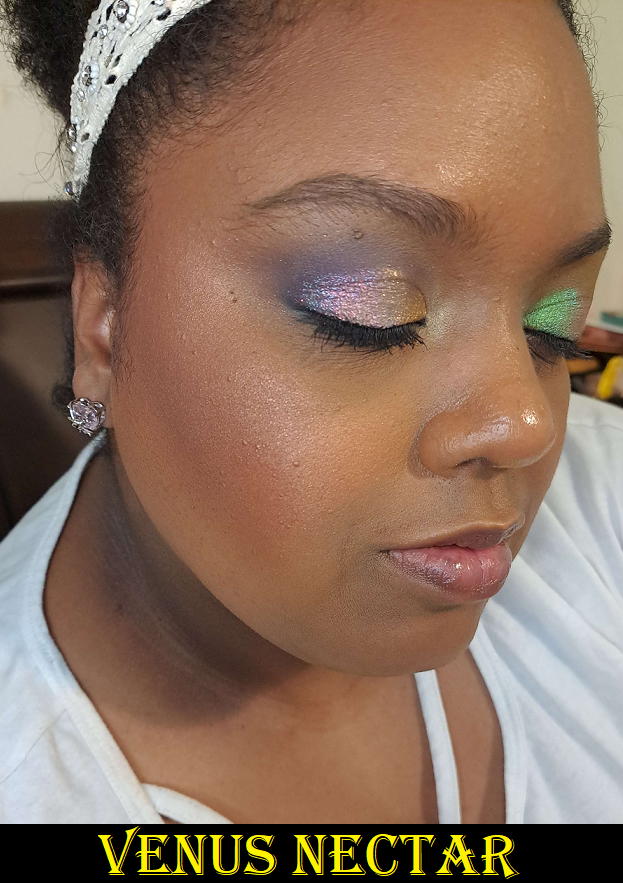
Many makeup artists recommend trying to look like an enhanced version of yourself, and not looking like someone else. This concept is what helped me solidify the decision to use warm tones, just ones that didn’t veer too far off from neutrals. This idea of trying to look like myself also had me wondering how I could possibly incorporate a pop of color into my look because that’s “me” too. Even when I’m on a nude colors kick, I still end up popping on a multichrome or some other colorful indie brand’s eyeshadow. Considering the wedding colors were blue, purple, and ivory/cream/whitish (we couldn’t really nail that one down), I thought it might be a good idea to add a blue-purple multichrome into the eye look. I really wanted for it to be one from Clionadh Cosmetics like Etched or Spire, since it’s my favorite brand, but the reason I love theirs is how intensely they stand out. In this situation, every technique and position I tried to place the multichrome was just too much.
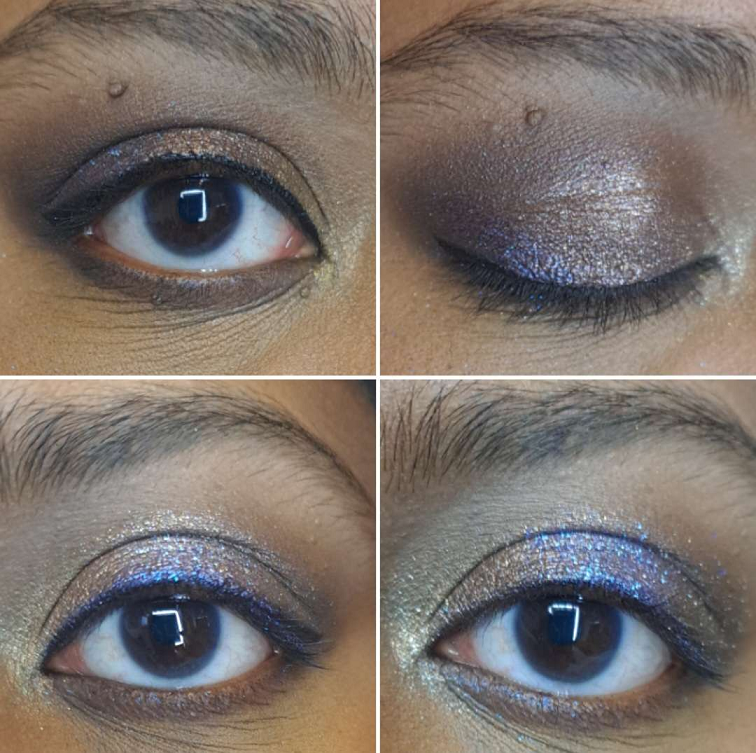

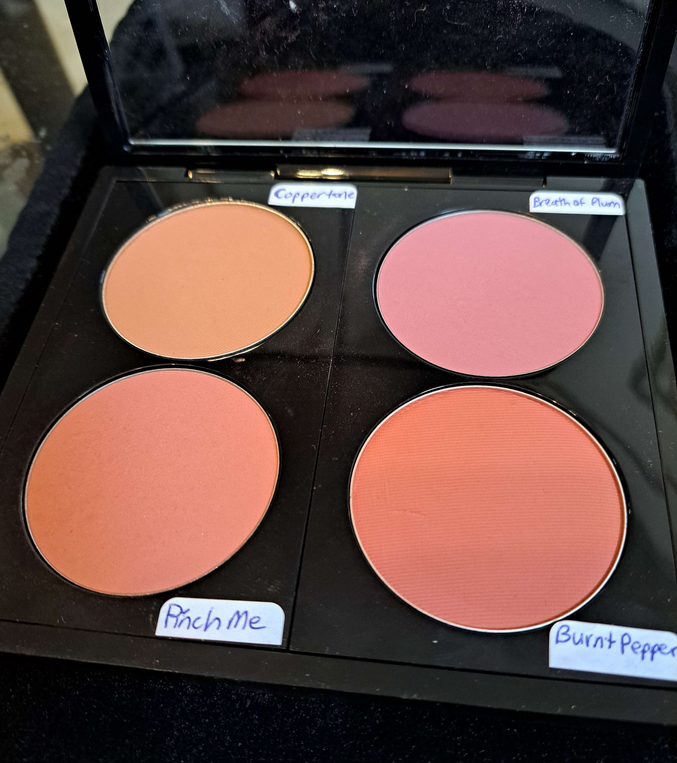
Because all my other makeup was in natural tones, my eyes were instantly drawn to the spot with the multichrome and stole attention from the rest of the look. Eventually, I was recommend by someone on Instagram to try putting the tiniest dot in the center. This worked in low light in a very pretty way, but the second actual lights hit my eyes, it was still too much for what I wanted. Ultimately, as much as incorporating color into my looks is something I’m known for doing, I wanted something classic and timeless for my wedding. So, I decided to go back to the neutral glam idea for eyeshadows and using my slightly warm tones of makeup for everything else. My blush was still a mix of everything. I used a liquid blush and then ended up using powders on top further into the makeup process. For those curious, it was three shades from MAC: a whisper amount of Breath of Plum for a slight cool-toned wintery cheek look, a normal amount of Pinch Me as the main color and a natural looking pink on me, and the tiniest bit of Burnt Pepper to add a little more warmth that compliments my undertone and depth of my skin color.
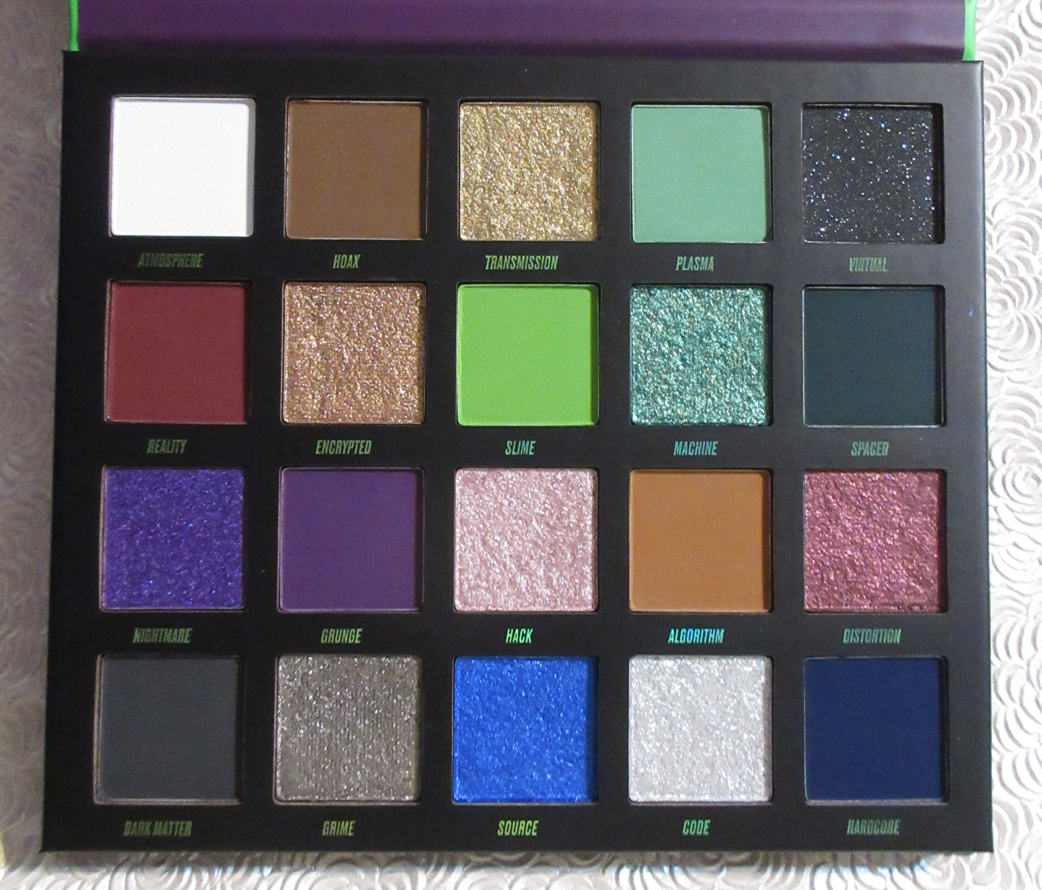
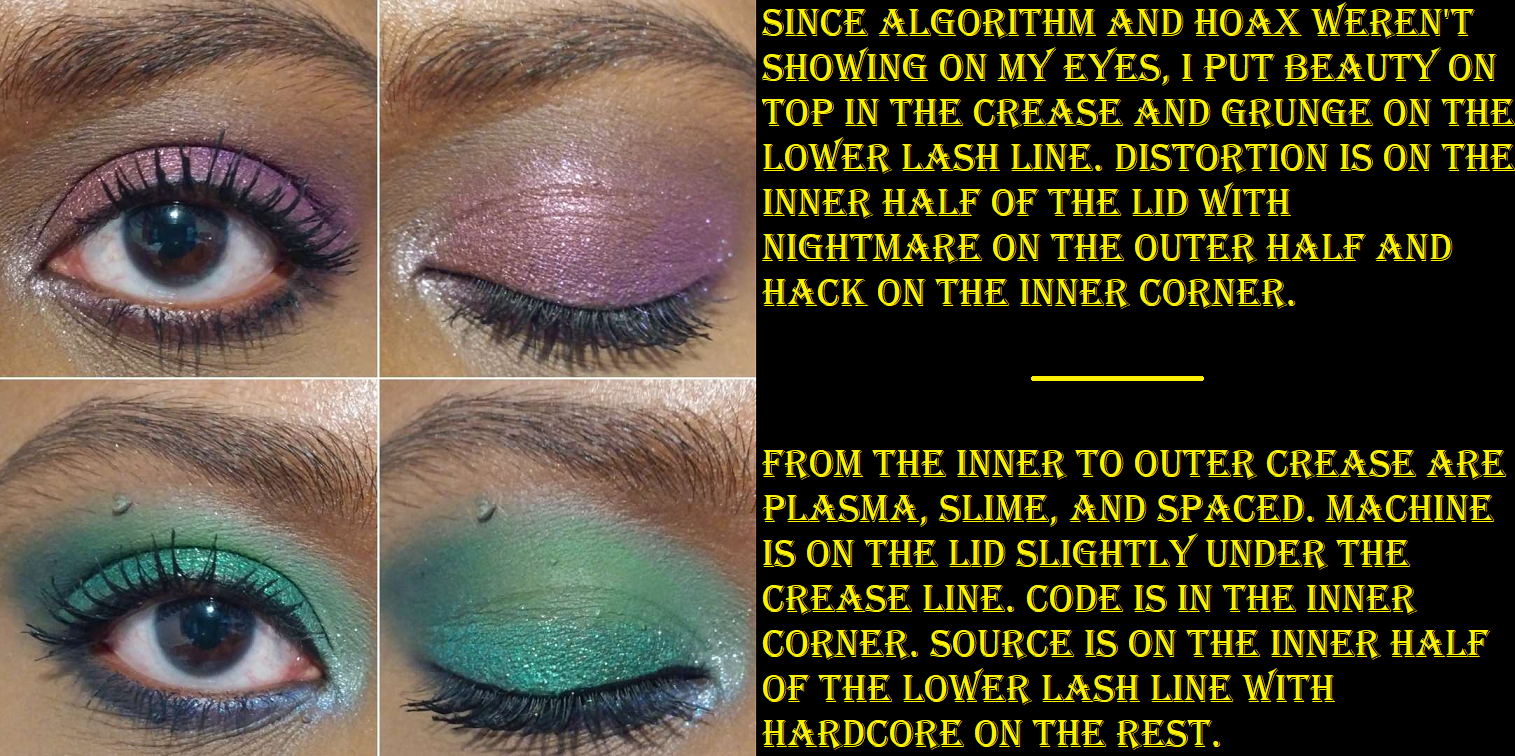
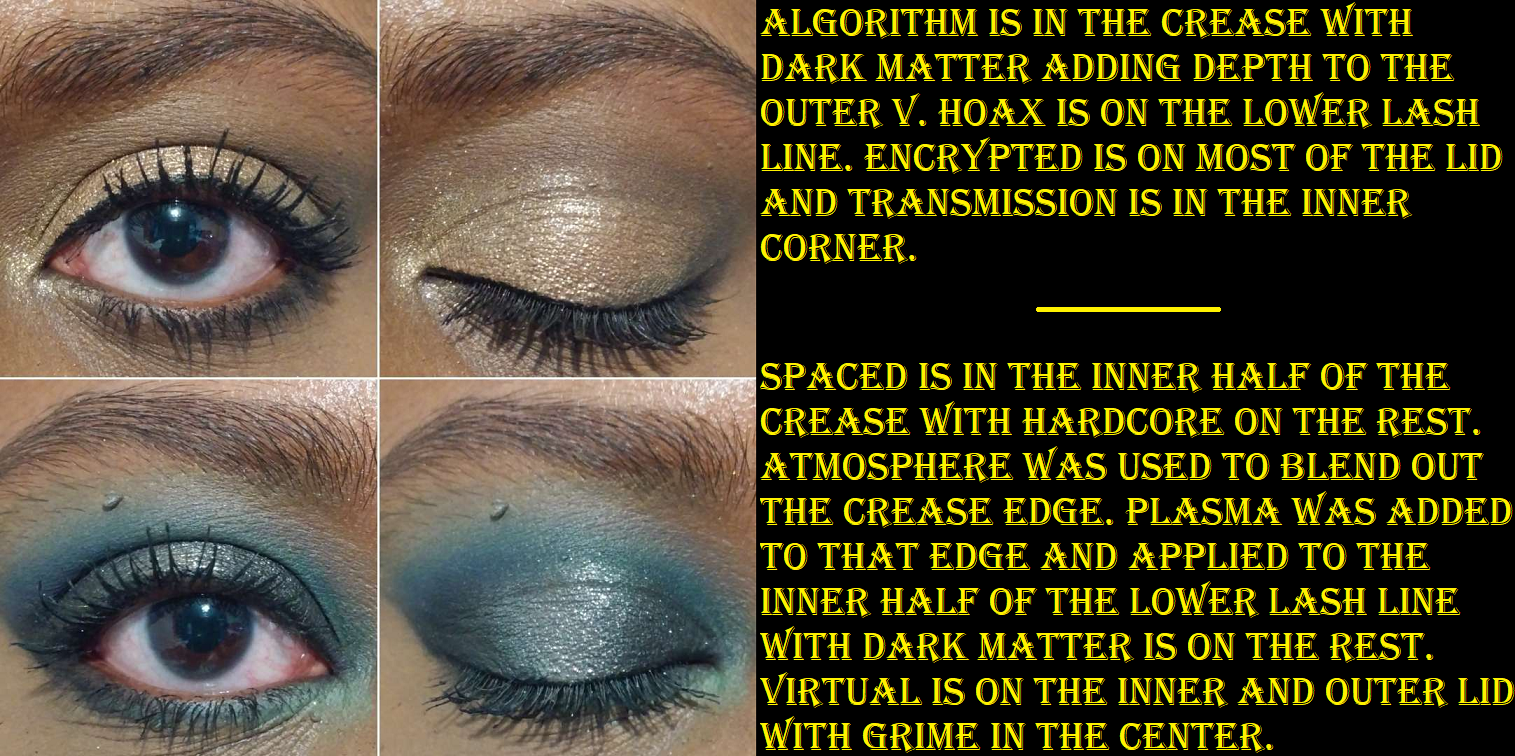
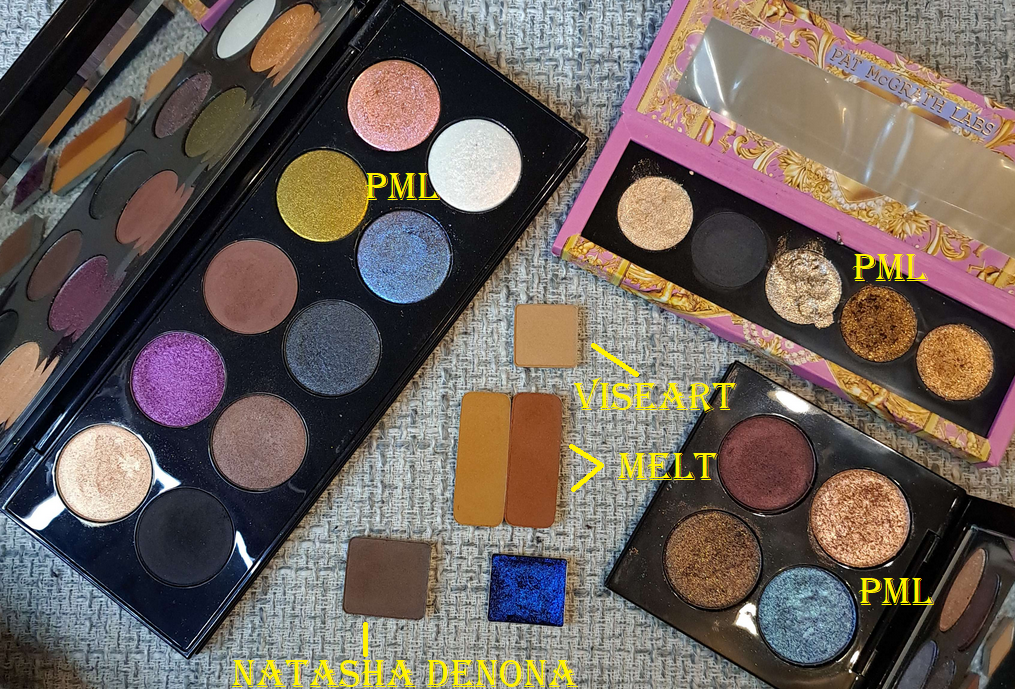
The eyeshadows I ended up going with were mainly from Pat Mcgrath Labs. I intend to do a part 2 to this post, which I can hopefully complete and upload within a few weeks. In there, I’ll post more details on the step-by-step process.
Making Sure Base Techniques are Down Pat
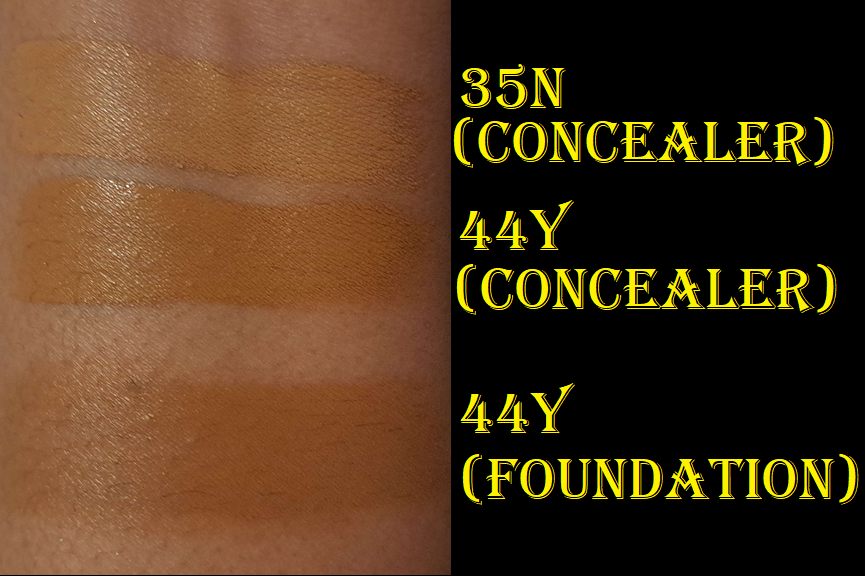
After using my various primers, the next step for me was to color correct the areas of hyperpigmentation. Most of the time, I don’t bother with color correcting because I prefer to just lean on full coverage concealers for that job. However, I wanted to avoid my base makeup looking heavy, since I knew I would be putting more layers of product than usual.
I only had two options with me: the E.L.F. Camo Color Corrector in Orange and the Huda Beauty #Fauxfilter Color Corrector in Mango. Although I prefer Huda’s on a regular basis, the ELF one worked better with the KVD concealer, as well as me wanting more intense color-correcting from using a darker color.

I would normally recommend using a color-corrector under the eyes too for those who have intense dark circles like I do. In my particular case though, I already know the ELF formula creases/gathers like mad in areas with lines, which is why I only use it in smoother areas of my face. So, I had no choice but to skip that step on myself. For those that don’t have discoloration issues like I do, color-correcting is not a necessary step. The most coverage one can achieve using the least amount of products is better, so if you can skip it, then please skip it. Ultimately, even I would have skipped this step, but I tested out how my makeup looked with color correcting versus going without it and the results spoke for themselves. I decided it was a step worth doing because I wanted as close to a flawless base as possible.
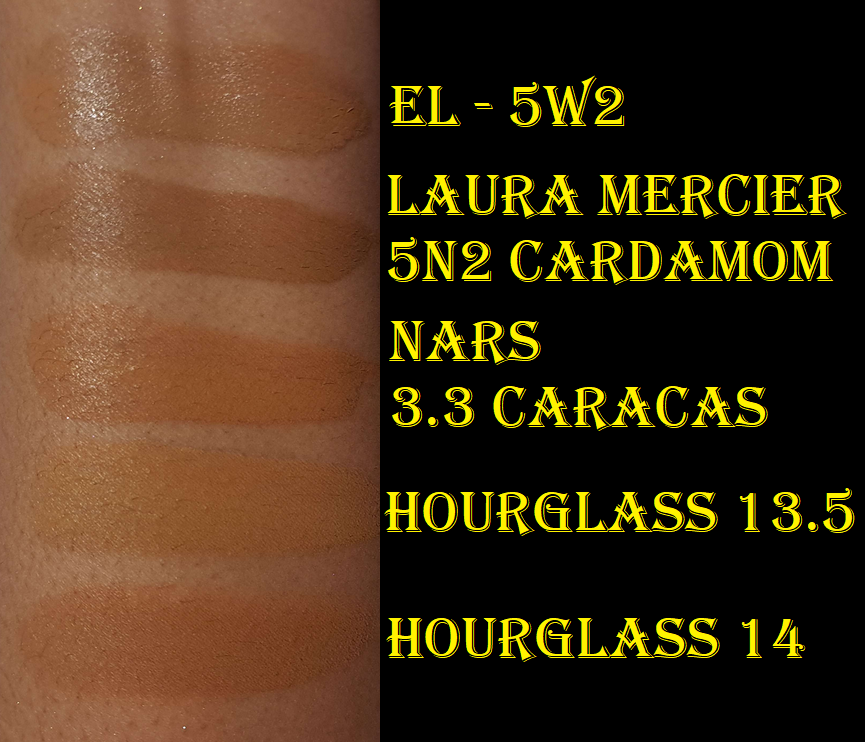
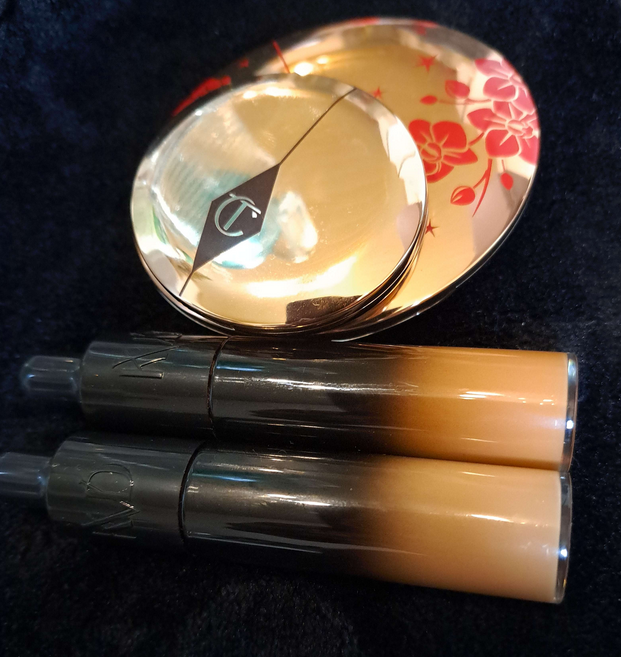
Although I settled on a foundation, the color match wasn’t as spot-on as I hoped, considering it was a bit more orange rather than yellow/golden and just slightly darker. I had purchased shade BD121, so my only other option was to buy BD91 to mix with it. The brand makes shade BD111, but it’s exclusive to the Chanel website and was sold out. Thankfully, using a ratio of roughly 2 parts BD121 to 1 part BD91 gave me a better color match. At least, that’s the mixture I used on the outer perimeter of my face and then used BD91 by itself in the central part of my face for a more natural gradient of color. My foundation application did not come first immediately after priming and color correcting though.
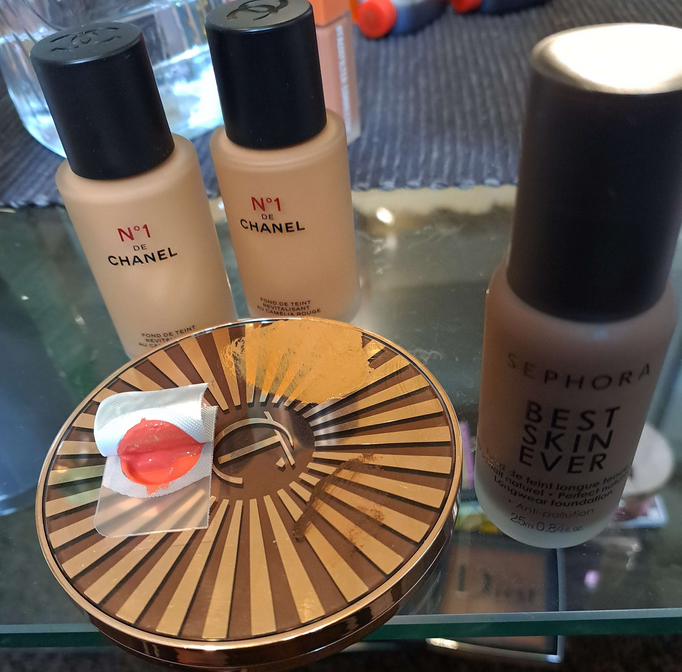
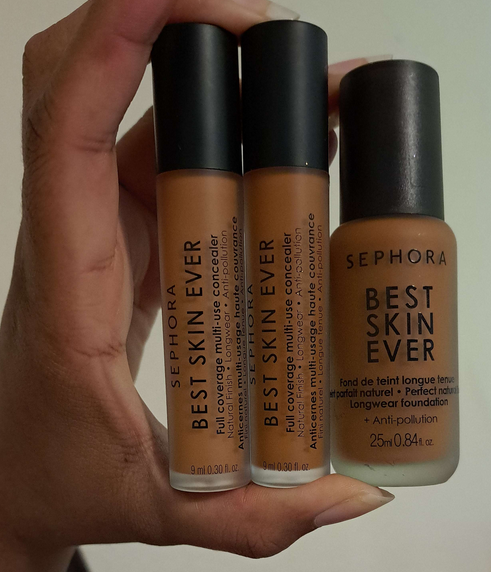
The other technique I wanted to utilize was under-painting. I have a naturally round face, besides it being chubby. Trying to create a chiseled look is by nature going to be easier for those with a clearly visible bone structure. Although I still have slight indent in my cheek area, I have an undefined jawline made weaker by having a rounder face. There’s only so much one can do to make a believable contour on a face like mine. One of the most believable options, if done correctly, is underpainting: to do the contouring and highlighting as a cream or liquid step first before applying foundation on top (and following it up with powder products afterwards too). Funnily enough, I learned about this technique about ten years ago when under eye concealers weren’t full coverage enough for me. I don’t think it’s necessary to do a full-face of underpainting like you see in TikTok and around social media as a fad, only the specific areas that need extra help to again minimize product usage. So, I bought the darkest shade of the most affordable foundation I could get my hands on (that I knew would work well). This was the Sephora Best Skin Ever Foundation in 68N. I would have preferred for it to be cool-toned, but “cool” shades in the darkest colors tend to be red instead of blue-grey so I figured neutral would be good enough. I could have used a concealer as well, but considering how much I spent on those Chanel foundations (even though they were discounted), I wanted to save as much money as possible. I could have also tried to use an actual cream contour, but I figured using a foundation would look even more natural on the skin and potentially blend better as cream contours can sometimes be too emollient. The 68N shade worked well enough for my cheekbone and jaw area, but since my nose is a lot more yellow than brown, it looked a little more red in that spot that I like. So, I just had to apply the product even more sparingly and make sure to use more greys when I contoured with powder later.
Besides applying contour, I also used a Rare Beauty Soft Pinch Liquid Blush sample of Joy as an underlayer of blush to help ensure longevity for the whole day. Plus, this particular shade is bright without being overly vibrant, which tends to work well for me. Using this underneath wasn’t overkill when I used the MAC blushes later. In fact, I still had room to go heavier with my blush.
After the liquid blush is when I would apply my foundations. I think some people recommend doing highlighting with concealer (product several shades lighter to bring those areas forward and not the shimmery type of highlighter) underneath foundation, but the KVD Good Apple Concealer formula that I used can sometimes melt/fade away with other products. The foundation on top of this one would have been covered up too completely, so I applied the mixture after foundation. I could have tried to use a different concealer for underpainting, but I was running out of time and just wanted to stick to what I knew. I began practicing applying the makeup on an off nearly two months before the wedding (with more consistent daily testing in the final three weeks). It’s not useful to test out all new products at once, since it would be too hard to tell which products were interacting badly with others, or were only working well depending on what it was paired with. I could only test a few combinations at a time. So, even the two months wasn’t as much time as I thought. In retrospect, three months would have been ideal for me.
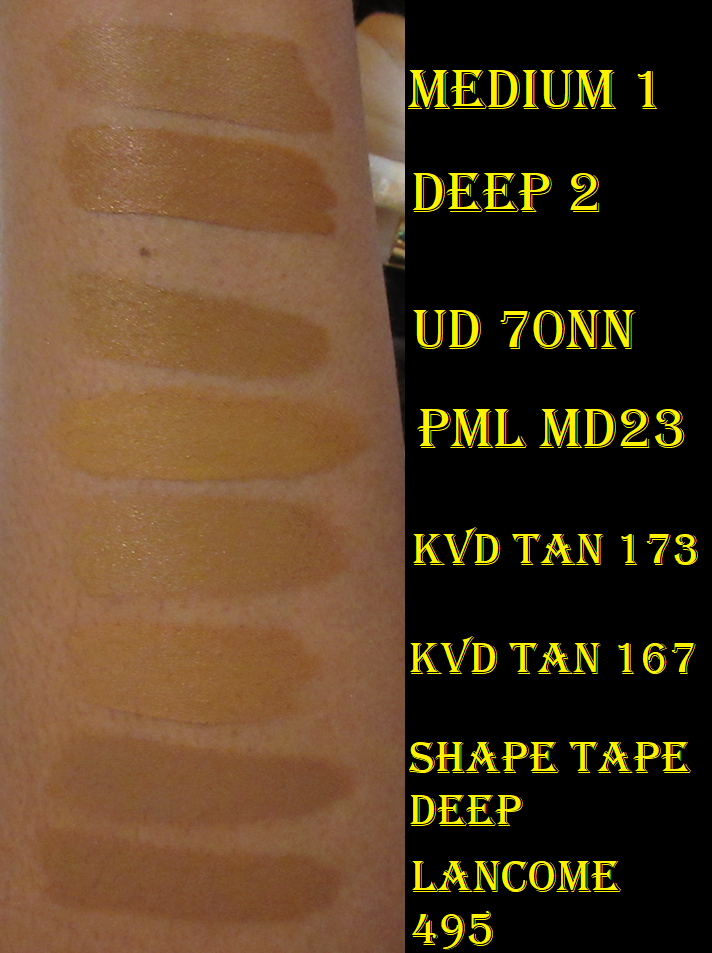
The theme of this sections is to make sure the base techniques are nailed. Part of that was my realization that in all the bridal makeup photos I liked, they really utilized highlighting for color in addition to the glow factor. However, I’ve never liked an overly brightened under eye on myself. When I was younger without so many lines to worry about drawing attention to, that was a different story. So, I had to think about what’s more natural for myself and my style rather than just sticking to the template of instructions on how most people do wedding makeup. I thought perhaps I could use my typical Tan 167 all over and apply my new Tan 161 (this specific shade was on sale which is why I chose this one for my highlight option) on top in strategic spots to highlight with, but I didn’t like the outcome. It was still too stark of a contrast for me to be comfortable with no matter how great it could have potentially looked on camera. What worked best for me was applying my near skin-tone shade 167 and then using a combination of 167 and 161 mixed together as the highlighting concealer color on top. The transition was more natural, which I ended up liking a lot better than using 161 alone (though I did use 161 alone to highlight my brow bone area). I then set my concealer with the Charlotte Tilbury Airbrush Flawless Finish Powder in either Medium (which I bought in the travel size) or a combination of Medium plus my usual shade in Tan. I tested out plenty of different powders and the one that worked the best to keep the KVD concealer creasing the least and not fading at the end of the night was this Charlotte Tilbury powder. The Huda Beauty Easy Bake Loose Powder was a close second since it worked so well with other concealers I was testing at the time (Fenty We’re Even Concealer and L’Oréal Infallible Full Wear Concealer). However, the results of the KVD and CT combo won out.
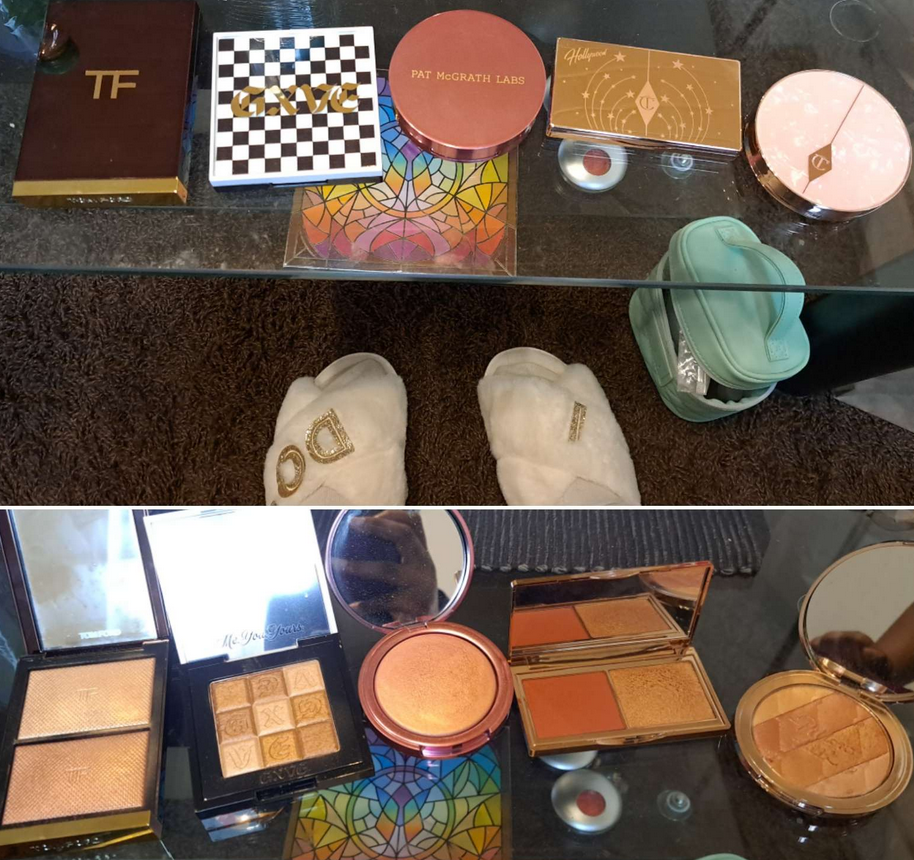
I would normally use the back of my hand as a spot to mix shades, but since I wanted to have leftover mixtures reserved on the side for touch-ups, I started to wish for a makeup mixing palette or plate. Since I didn’t bring any with me and didn’t want to buy one, I used the top lid of the Charlotte Tilbury Cream Bronzer compact (pictured in the foundation photo above). It has a surface that’s easy to wipe down with a makeup wipe or makeup eraser cloth. Also, when I mixed with my brushes, I got too much product on the bristles, so I started using the brush handle to mix shades and then wiped off the handle onto my microfiber cloth. That way, I’m able to pick up smaller amounts of product with the bristles and even switch to a smaller brush for spot applications where needed.
Securing the base is important, but so is recognizing whether the recommended techniques have to be tweaked to your specific preferences and what makes you the most comfortable. It’s okay if you hate contouring to skip doing it. It’s okay to go with a sheer coverage foundation and then just use concealer in areas that require more coverage. The most important thing to do is to practice techniques as much as possible before the wedding or special event if you’re doing your own makeup. Sometimes products don’t perform the way we remember them and the last thing you want is to discover that on an important day. You want to thoroughly test your full look in every step in order to make sure you can replicate the same results every time, in every type of lighting, and in every weather scenario.
To Bake or Not to Bake, Setting Spray vs Fix+
Continuing the theme of getting used to wearing more makeup that usual and utilizing techniques I normally don’t, I had to decide whether or not to utilize the baking technique. Since I already narrowed down my concealer, it was just a matter of doing a wear test all day to see if my makeup looked better with or without baking. As it turned out, with my products and my skin type, baking really wasn’t necessary, or at least not in the traditional sense of loading a ton of powder on and then dusting it away after five minutes or so. I ended up not even needing to powder my whole face since I was utilizing setting sprays too.
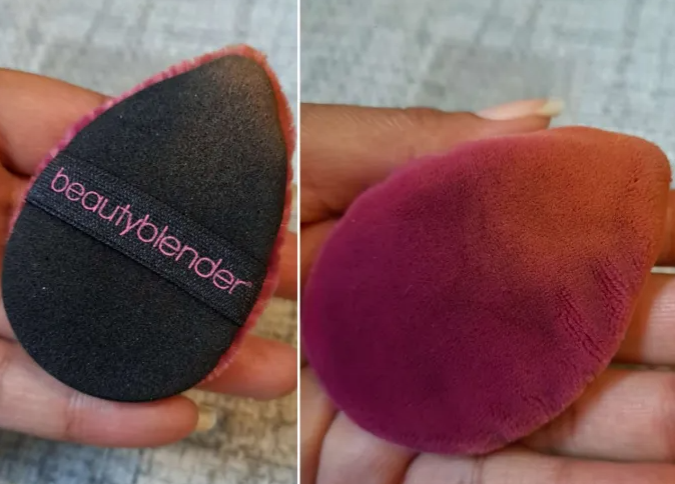
My process was applying my concealer to my under eyes and face area before using my normal brush to powder-set those spots. As the days were counting down to the wedding, I started to utilize more skincare such as using the Lisa Eldridge Skin Enhancing Treatment Cleanser as a mask, which made my skin more hydrated and strangely enough need more setting powder under my eyes. So, after setting my concealer I would wait until I noticed creasing before patting the creases back out with my Sonia G Jumbo Concealer Brush, and then using the Charlotte Tilbury powder with my Beautyblender Power Pocket Puff to lightly apply a thin layer in the areas I highlighted with the concealer mixture (skipping hyperpigmentation areas that didn’t need extra powder) and also slightly under my contour to sharpen those spots and “clean them up.” The puff still came in handy because some days during the trials it was even necessary to go as far as to spray the silicone side of the BB puff with setting spray, press that into the concealer creases, reapply a little more concealer, and then set it with powder using the velour side of the puff. This was during the trial days I started using different skincare that I should have been testing much earlier in the process. So, this is all I need in terms of baking, but those that have combo or oily skin will probably need to take additional steps to lock the makeup into place.
The puff also comes in handy while on-the-go. Instead of me needing a face powder brush and an under-eye powder setting brush (plus technically I could use other areas of the puff for other types of powder products), I just needed this on hand in the “Emergency Bride Kit” for touch-ups.
After I apply my liquid and cream layers, I set my face with setting spray, finish applying all my powder products, and then set my face again. I tested a few sprays before I moved, but the only one I brought with me was the One/Size On ‘Til Dawn Waterproof Setting Spray. I had the mini size and as I started testing, I got paranoid that I would end up using it all before the wedding and it’s not available for purchase in Germany. So, I ended up buying the Sephora Makeup Setting Spray for my trial runs. What I like more about the Sephora spray, besides the lower price, is that it’s unscented. The One/Size spray has a slightly floral, but not overwhelming smell.
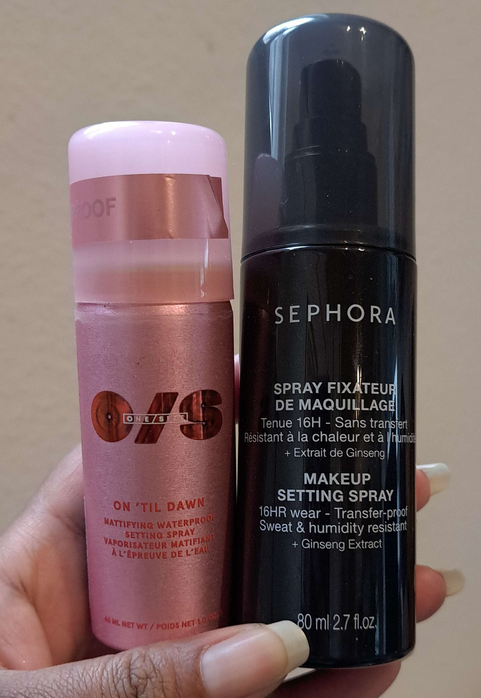
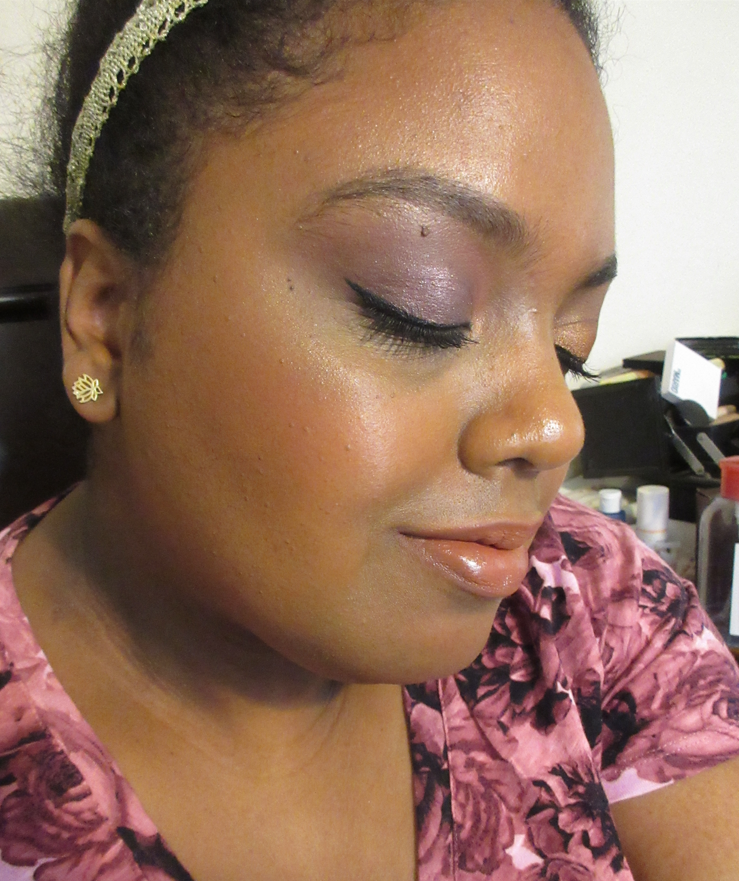
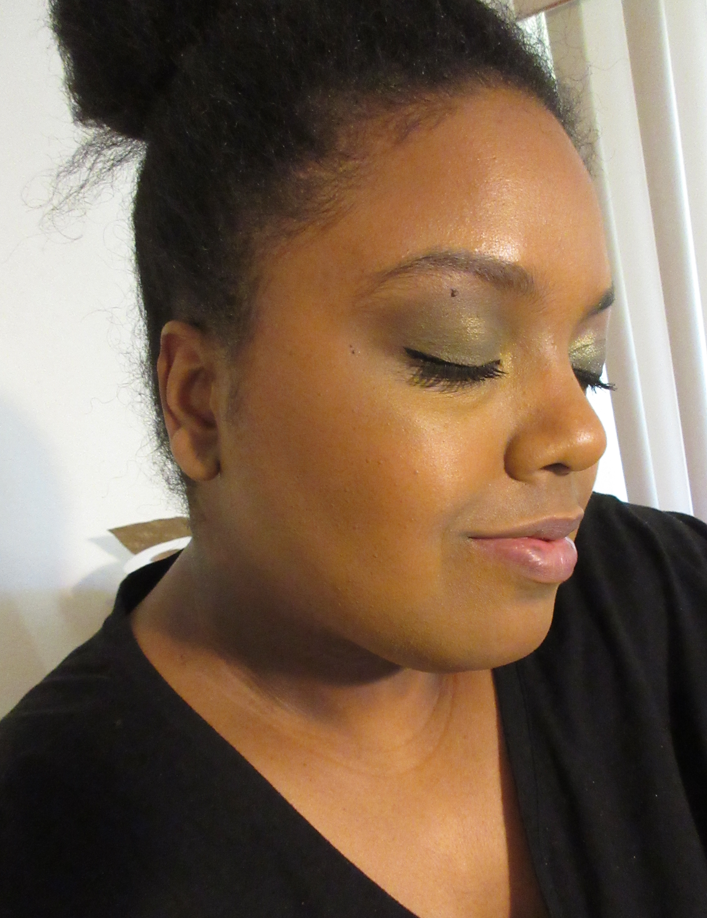
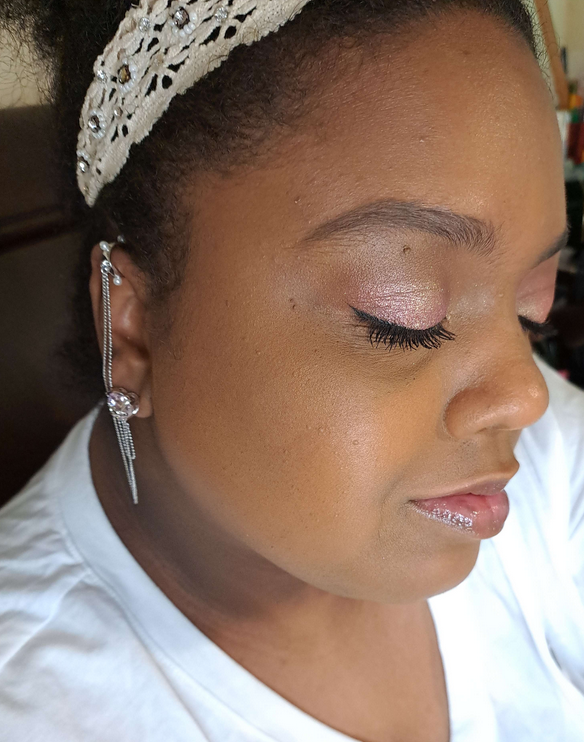
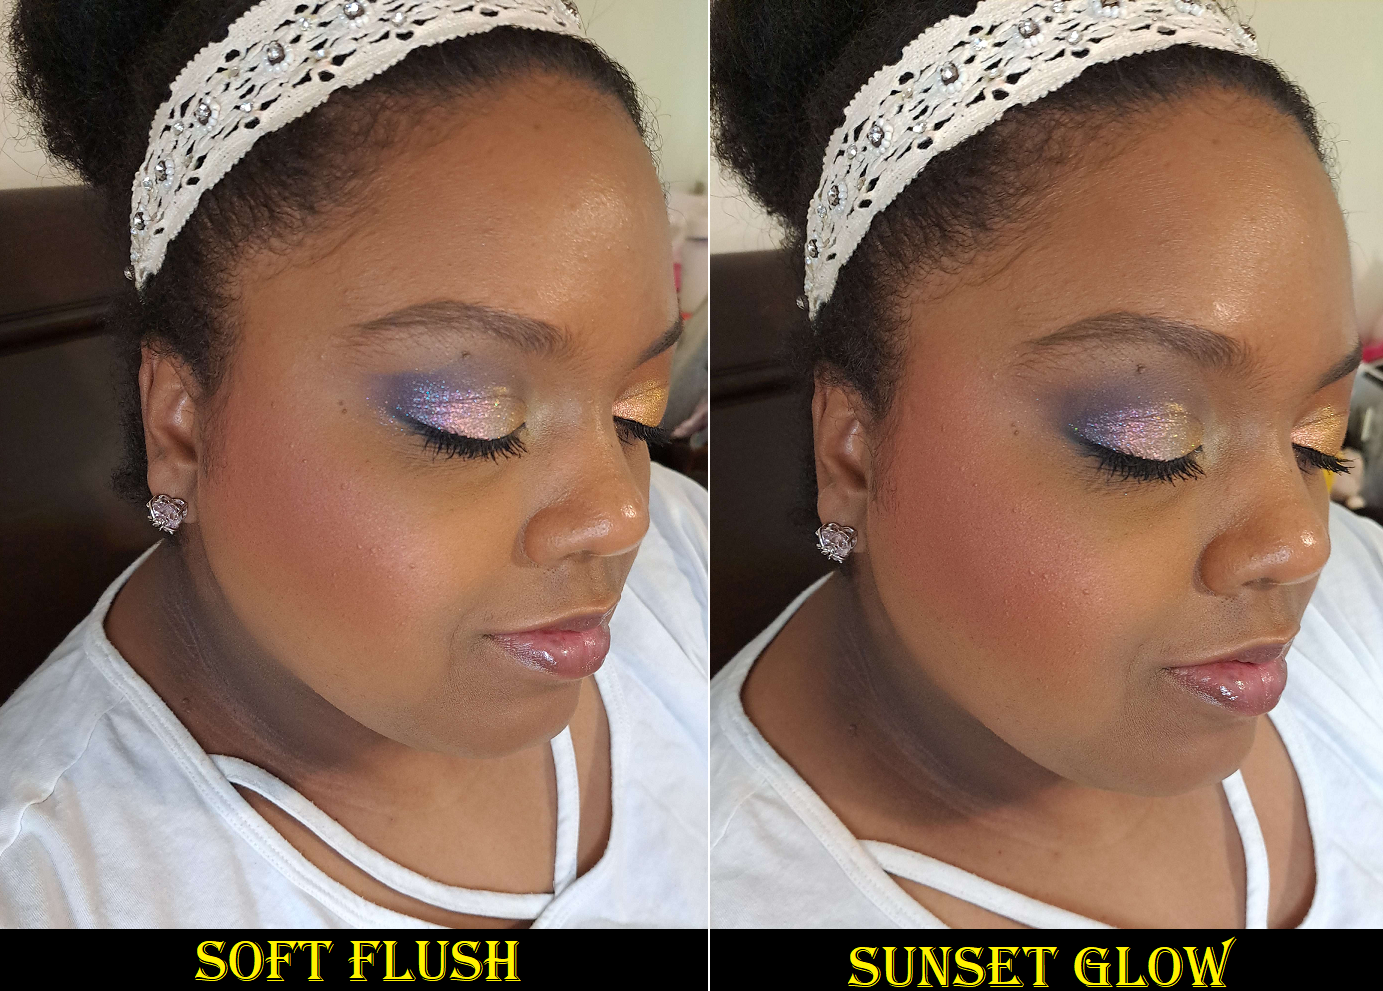
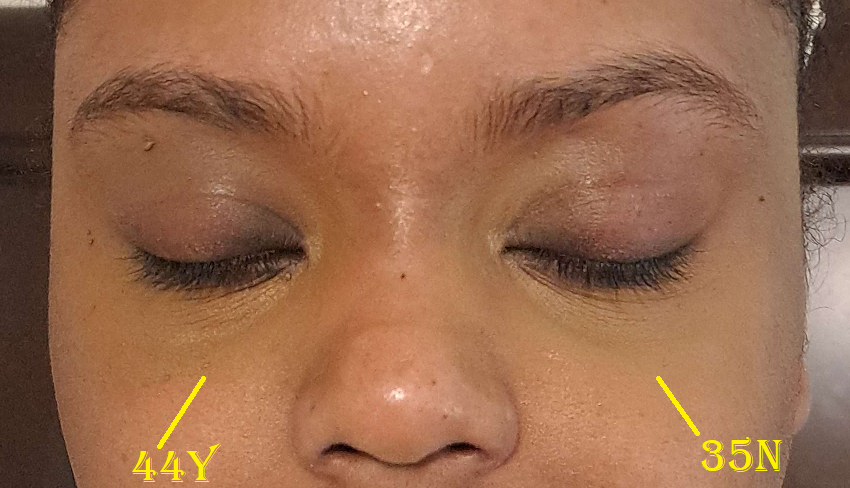
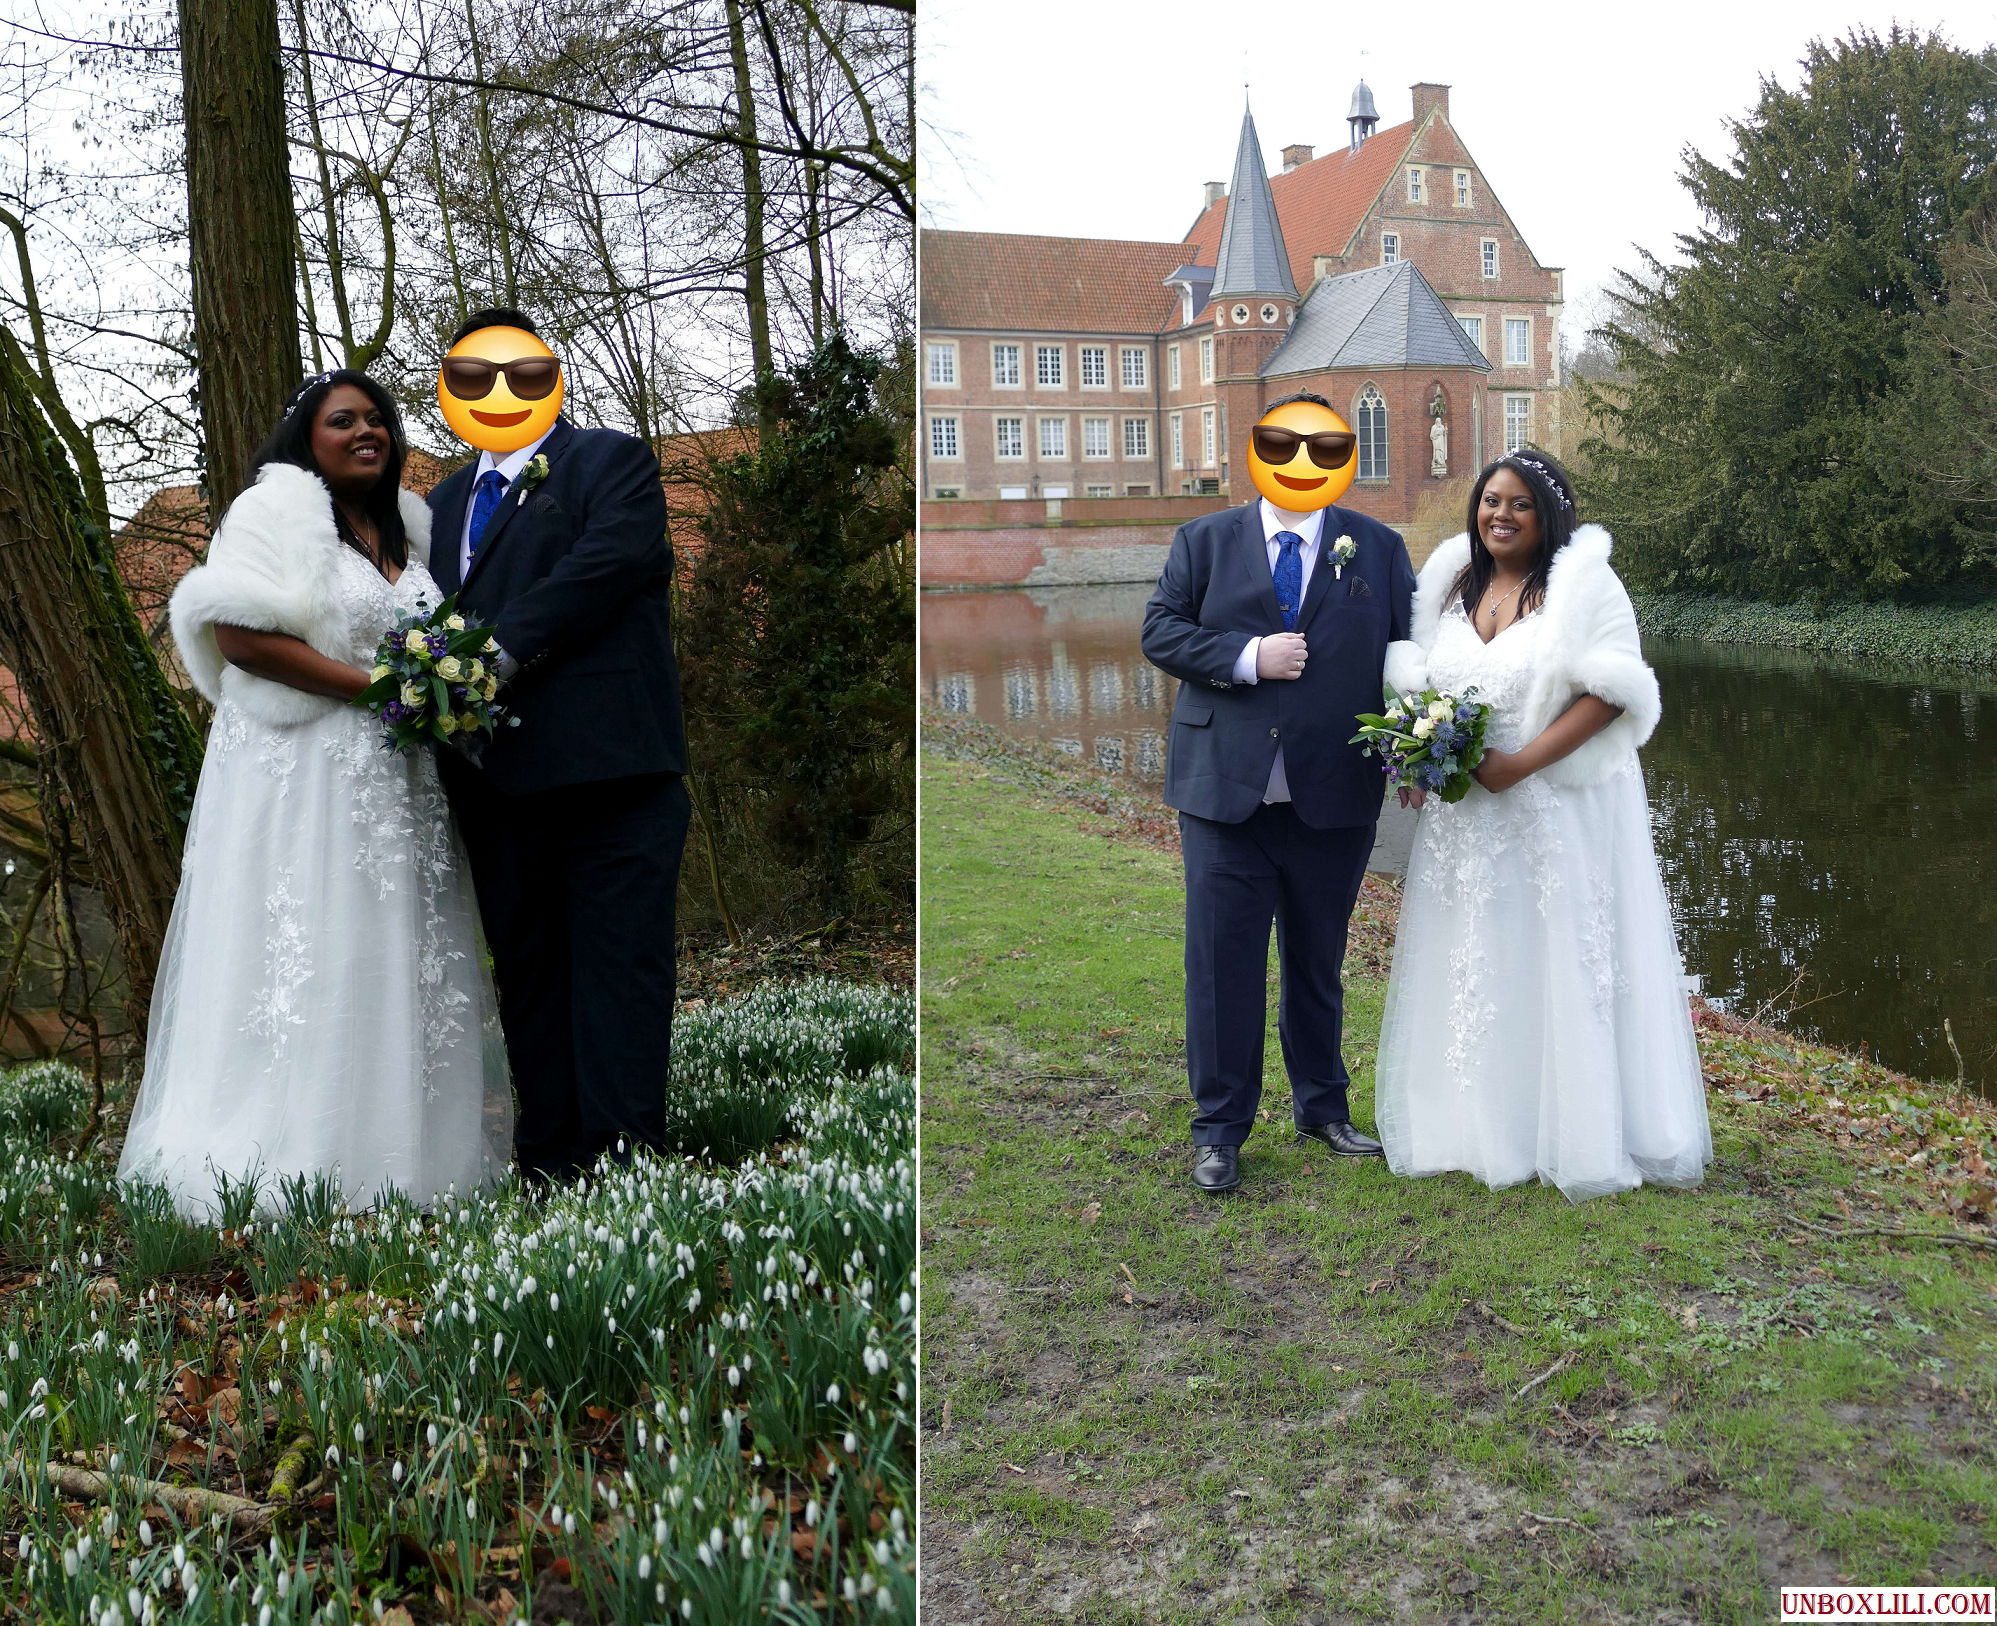
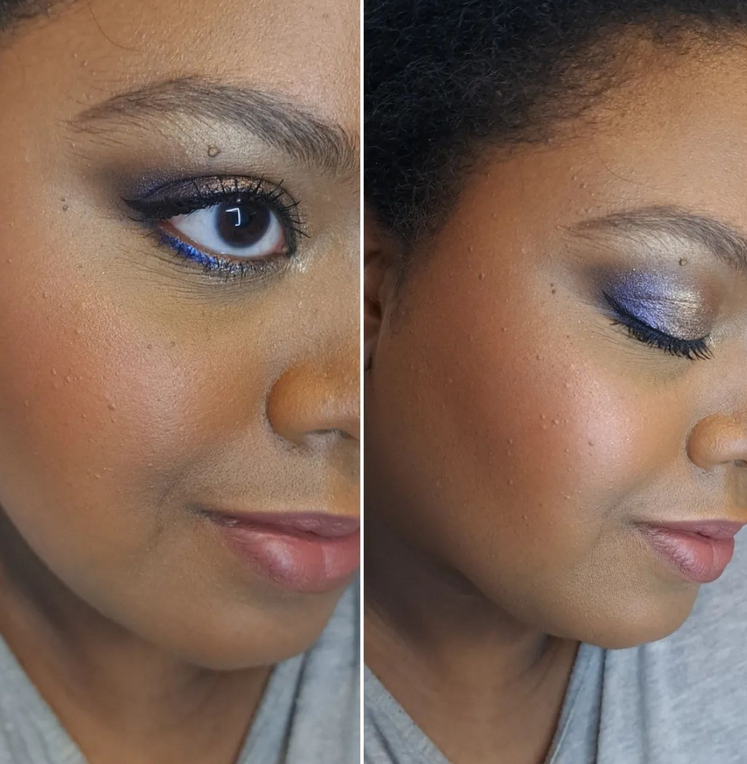
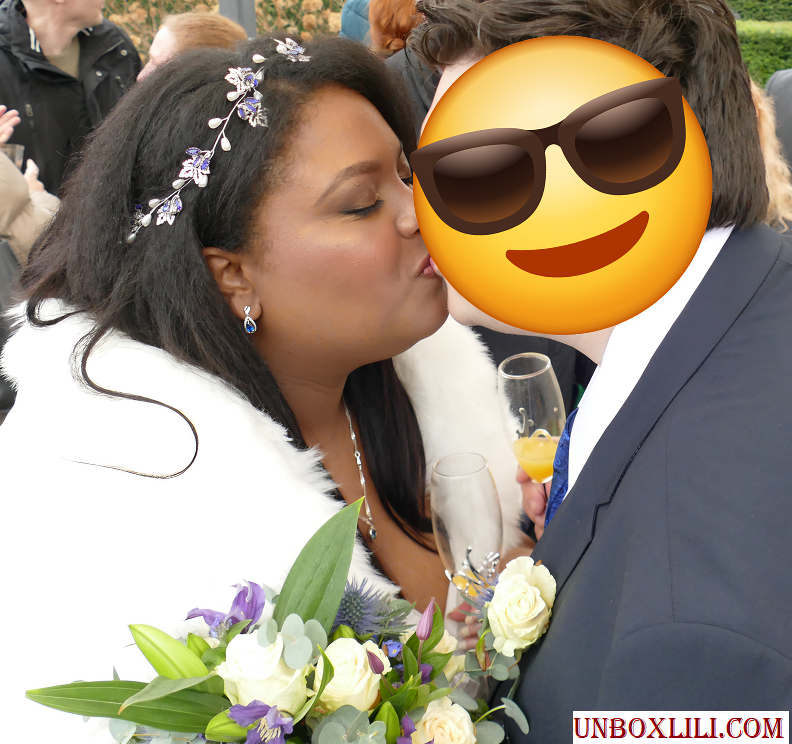
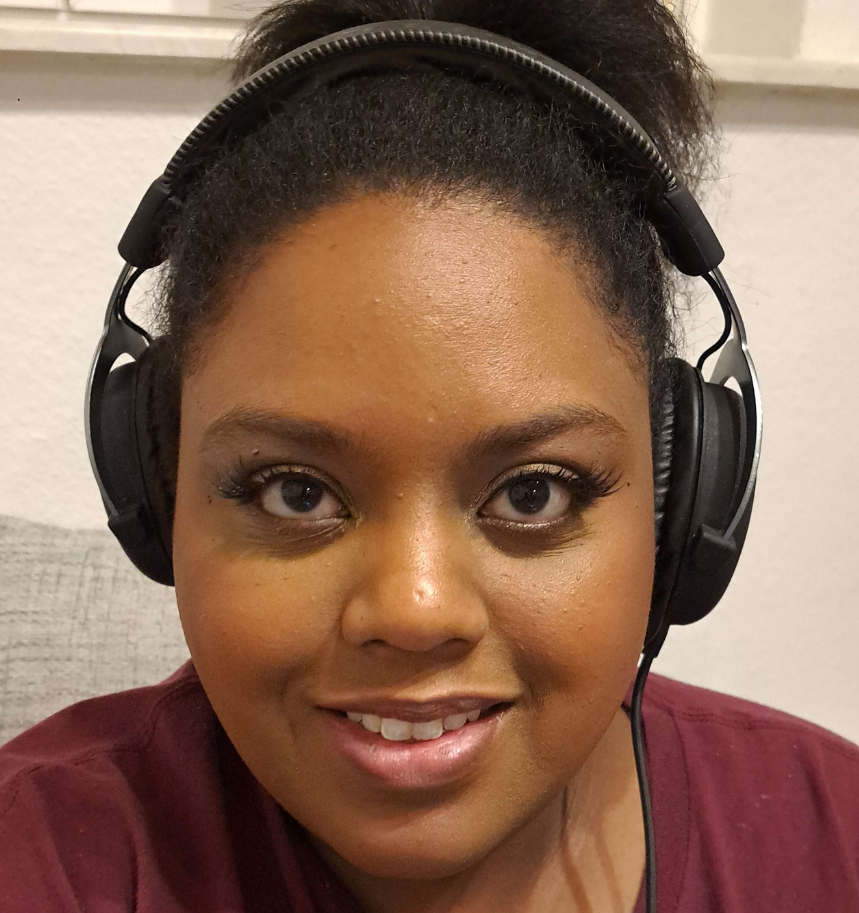
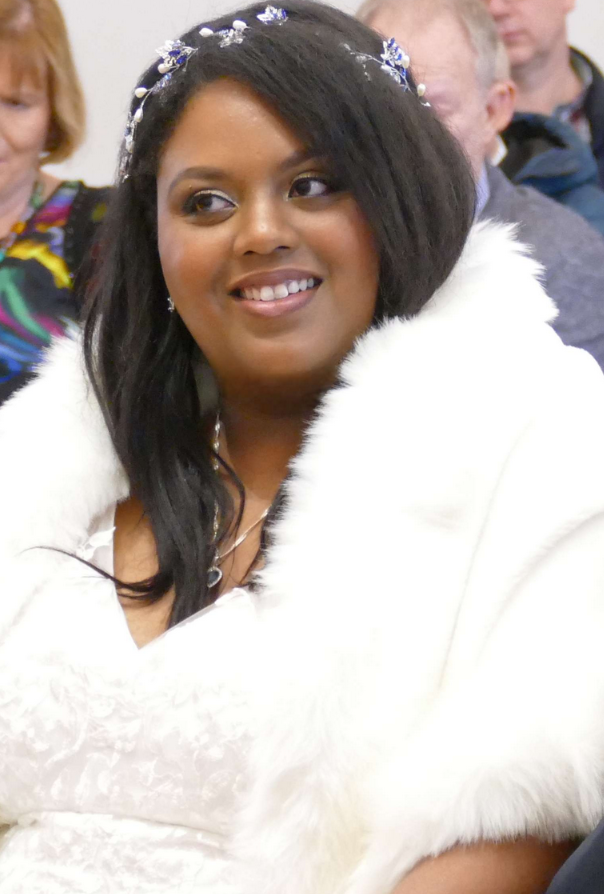
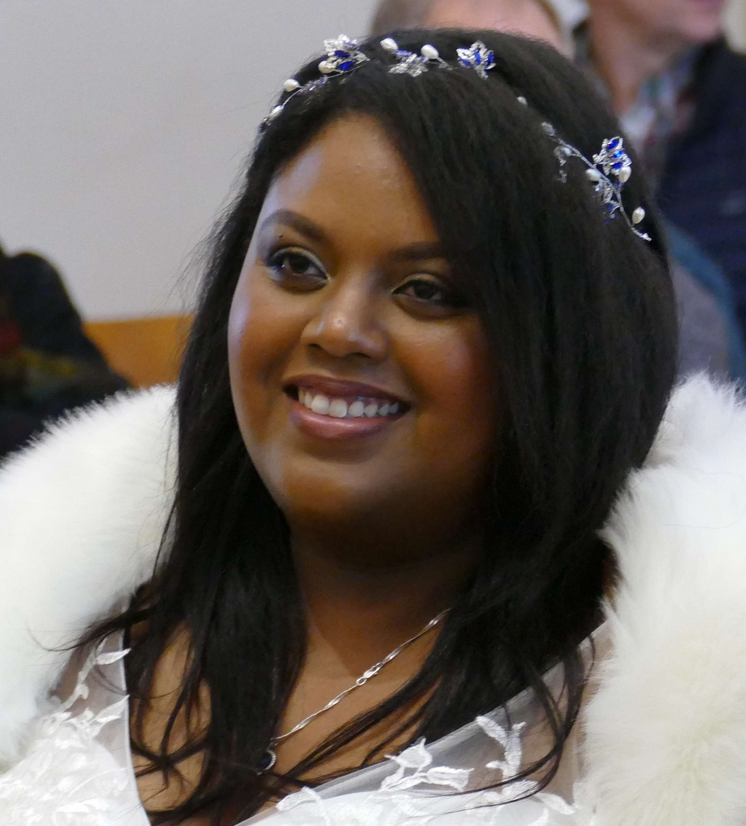
I’ve tested both of the waterproof claims by splashing water on my face and have seen how the water rolls off my face without leaving streaks in my makeup. In terms of making things transfer-proof, that wasn’t the case with One/Size unless I just wasn’t using enough of it. The Sephora Spray only seemed to make my makeup transfer-proof that was in lighter layers and on lighter makeup days. It didn’t seem to work with a full face of everything. I haven’t tested the One/Size spray in the same scenario of a lighter makeup day, so perhaps they are equal. On my actual wedding day, I still stuck with using the One/Size product. We ended up doing a second day of photos, so the picture below shows what I looked like by the end of the night. On my wedding night, I got home at nearly 3 am, so I don’t have a photo for that. All things considered, I think it held up pretty well. It rained on the actual wedding day, but my makeup didn’t budge. I just transferred some of my nose contour onto my husband’s nose. I had to wipe it off him a few times, but it didn’t transfer any further after that.
I always use MAC Fix+ if I want to dampen my shimmer eyeshadows. It can make the face look hydrated, which is what I need, but sometimes it can cause makeup to not last quite as long and break down a little faster. So, I was too scared to use it on my face (nor did I have the time to test it with everything), so I just used it for my eyelid shades. At one point during my trials, I tested spritzing my highlighters with setting spray and my sample of Fix+ to see if I could intensify the look without leaving a stripe on my face. I ended up deciding to just skip that step as the Charlotte Tilbury Face Architect Glow Glide Highlighter worked well enough as a base highlighter. Others might prefer using a liquid highlighter, but powder products are always easier for me and I was planning to do a technical enough makeup application, so I’d accept easier options wherever possible. Throughout the practice days, I used some combination of multiple other highlighters shown below. On the actual day, I ended up sticking to just Charlotte Tilbury by adding the Pillow Talk Multi-Glow highlighter and I used the Tom Ford Shade and Illuminate Highlighting Duo on my shoulders and collarbone. Since I ended up wearing a faux fur shawl/stole and my hair was down, that final step ended up being pointless. It couldn’t be seen on my body. I also forgot to spray setting spray to those spots on my body afterwards, which could have potentially helped lock the highlighter into place.
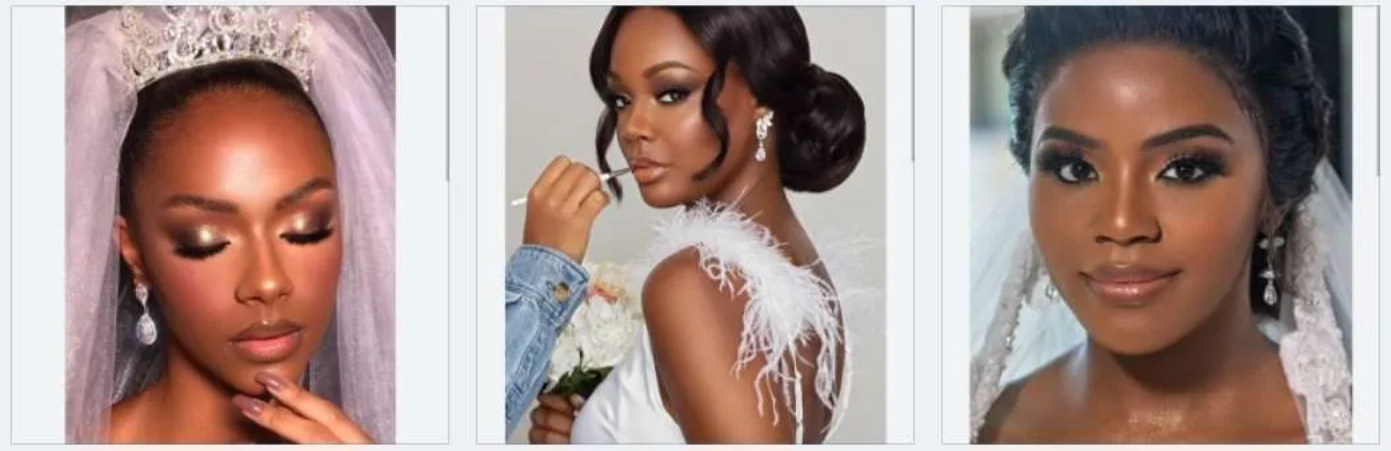
Although I didn’t end up glowing as intensely as the models in the inspiration photos I procured from Google, seen below, I was still happy with my makeup choices. I applied highlighter to my brow arch, slightly above the brows on either side of the forehead, one specific spot on the bridge of my nose that I build up with contour and another spot lower down, and the tops of my cheekbones.
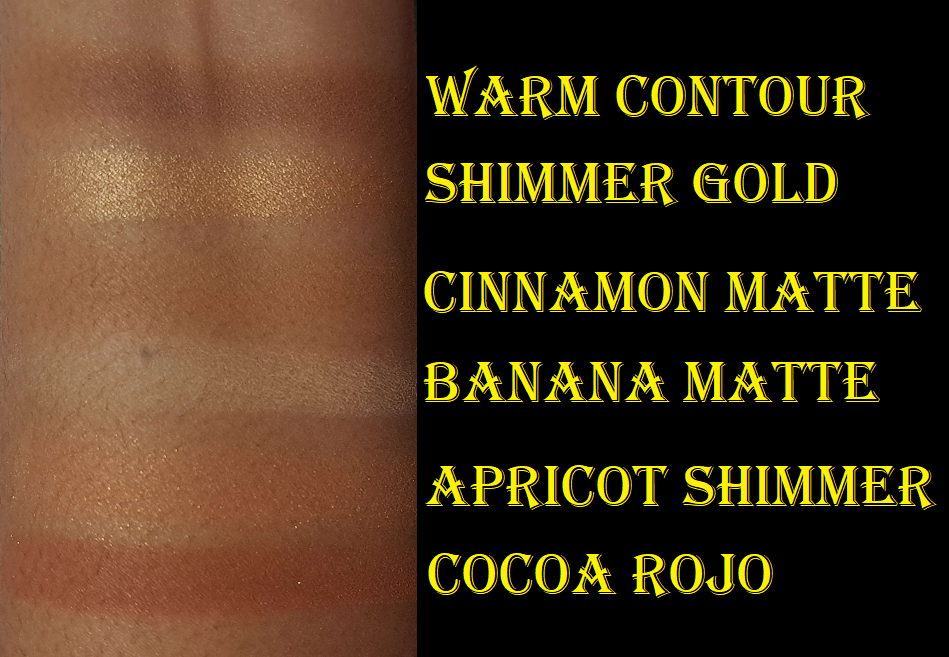
I mentioned earlier that I used the underpainting technique to contour. Then I used the powder contour in the Kaleidos Symphony Trio for more depth. It’s not grey toned enough to give an actual shadowed effect, so I added a mix of Feel + Real from my Hindash Beautopsy Palette to create the shadowing for my jawline, under the cheekbones, and nose contour. I didn’t use the Kaleidos powder on my nose, only Hindash’s product because I didn’t want it to be overkill in person.
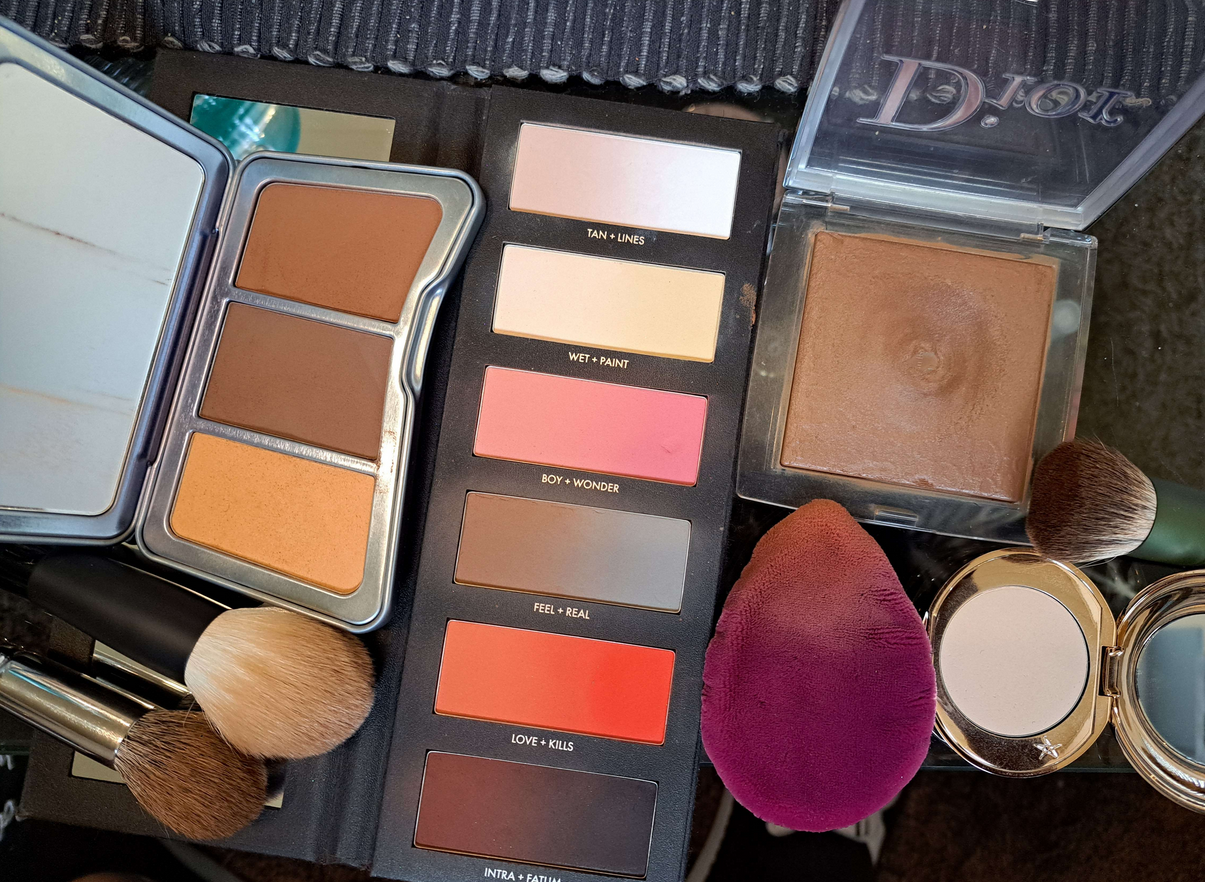
When it came to bronzer, I was dead set on using the Hermès Plein Air H Trio Healthy Glow Mineral Powder because it’s the highest quality powder one that I own. However, in test photos I kept feeling like I was looking too warm toned. With a few days to spare, I tried some of my other top powders like the Glowish Soft Radiance Bronzer Powder, but that one was too red toned. Ultimately, the one best suited for my undertone is the Charlotte Tilbury Beautiful Skin Sun Kissed Glow Bronzer in Tan. Even though it’s a cream product, it went next to and slightly on top of my powder contour with no issues. This meant that my bronzer was going to be natural looking in person and likely too subtle to see much of it on camera, but it was a better alternative for me than having my face pull too orange.
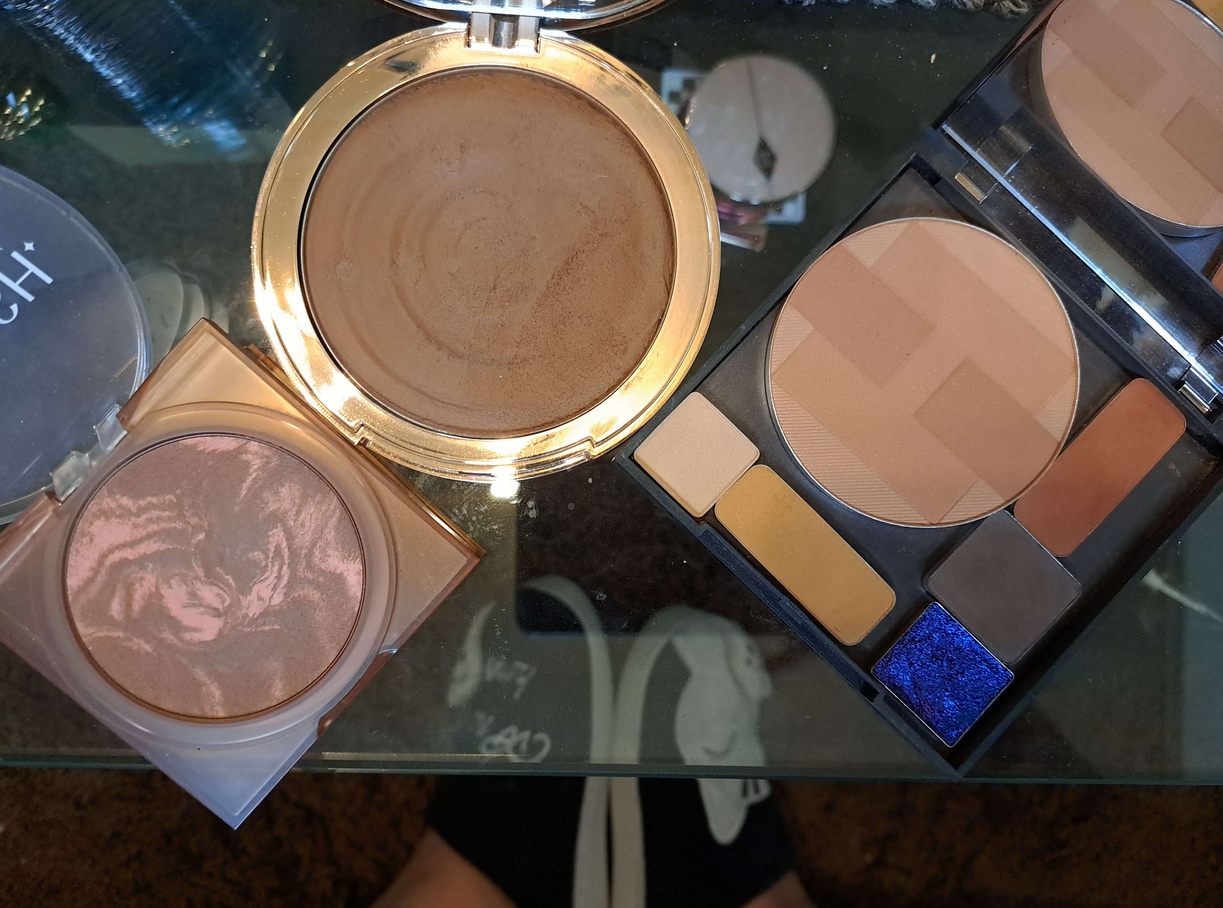
I finished my face with my Dior Face & Body Powder No Powder. It blurs imperfections and helps blend the makeup seamlessly into each other. I didn’t use it all over my face, just in key areas that I wanted to touch up. If I had a sparkle-free version of Ambient Lighting Finishing Powder from Hourglass in my shade, I would have considered using that instead or in conjunction with the Dior product. Finishing powders can do wonders for a makeup look, but be sure to test in photos whether the sheen might or might not be too reflective for flash photography!
Waterproof Tests are Required

I’ve always hated waterproof mascaras because of what a pain they are to remove, but I was so certain I would need one for the wedding. I have plenty of favorite mascaras, but according to customer reviews I’ve seen online, apparently getting a waterproof version doesn’t mean it will perform as well as the normal formula. Some of the most beloved mid-range and high end mascaras have terrible reviews for their waterproof counterparts. So, I decided to try exploring the higher rated drugstore waterproof mascaras that I was familiar with in the original form. In my testing, the L’Oréal Voluminous Lash Paradise gave volume, but not as much length and was prone to clumping. The L’Oréal Bambi Eye Mascara gave length, but not much volume. I was debating whether or not to try using both, but it ended up not being necessary because I got the results I wanted from the Essence Lash Princess Waterproof Mascara.
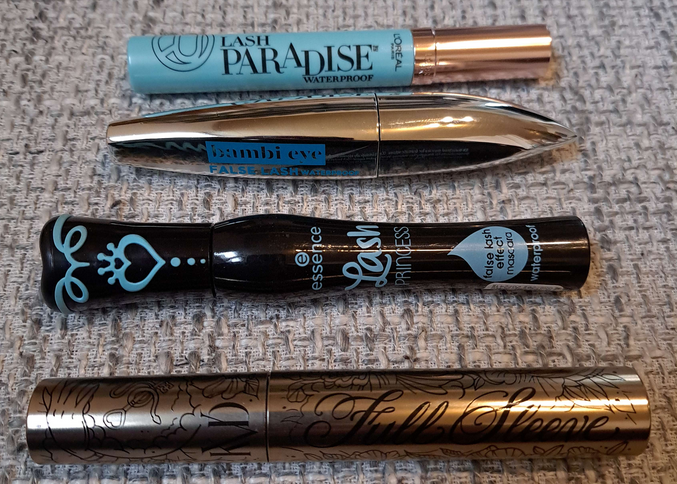
Another alternative I considered was the KVD Beauty Full Sleeve Long + Defined Tubing Mascara. I love the length and volume of that one, and in theory tubing mascaras aren’t supposed to come off easily unless under warm water. While the KVD one seems to be harder to remove than other mascaras with regular temperature water, it can still be done. So, I didn’t want to risk a circumstance where I would have even the slightest chance of having my mascara come off. So, I stuck with using the Essence mascara.
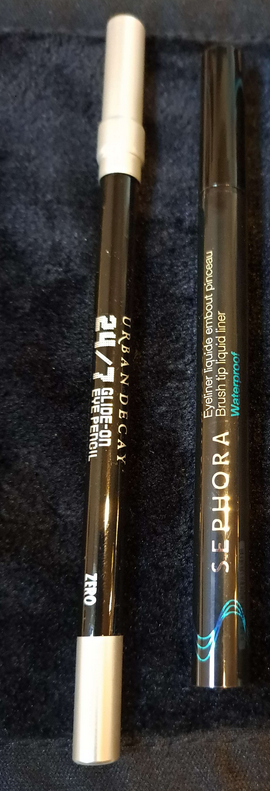
When it comes to using eyeliner, I have a few that are supposed to be waterproof (Stila Stay All Day Liquid Liner and One/Size Point Made 24-hr Liquid Eyeliner pen), but they aren’t as effective when my eyelids get too oily. I’ve always had great results from Sephora’s waterproof liners, so I purchased the Sephora Collection Hot Line Brush Tip Waterproof Liquid Eyeliner. It definitely did the job. I didn’t end up crying, but there was a bit of rain and both the mascara and eyeliner held up completely all day and night.
For the tiny spot I wanted to smudge on my outer lower lash lines, I used the Urban Decay 24/7 Glide-on Eye Pencil. I don’t find them to be as waterproof as my other liners, but I can’t get the smudge effect with those, so this was my best option. One thing I should have considered was getting colorful eyeliners to put on my lower lash line instead of regular eyeshadows. It’s possible I could have still ended up with a mess if I had actually gotten teary-eyed. I lucked out, but that might be something to consider.
I’d like to note here that another option for waterproof eyeliners could be those false lashes eyeliner pens. I went back and forth debating whether or not I wanted to wear fake lashes for the wedding. They look amazing on camera, but they are an absolute nuisance for me to wear, especially for an extended period of time. My eye shape, with my super rounded upper lash line, doesn’t hold onto even extreme lash glues very well. Within an hour max, either the inner or outer corner will lift up. The majority of lashes are too short (in width) for my eyes because I need extra length to account for the higher degree angle of the rounded curve of my eye. If I want to rock a half-lash, I have to use 3/4 length lashes. Then, even if I put the eyelashes properly on my lash line, I can still see them in my field of vision. I still thought that if I practiced putting them on enough times, I could make them work. I also heard of the recommendation to cut the lashes into 3 pieces (also from Mixed Makeup) instead of 2. Since splitting them in half never worked for my eye shape, I was willing to give smaller ones a try. My lashes ended up looking like the Cynthia doll’s hairline from Rugrats!
Even when I tried to use the pieces just on the outer lash line, it was so hard to get them to look even since I don’t have perfectly symmetrical eyes. Plus, it’s my inner lashes that need the most help, but it would look just as strange if I had lashes there and nowhere else.
Ultimately, for all the hassle it would cause me on the wedding day, I decided to skip the false lashes. I figured I could just try to cheat the look with more coats of mascara and extending the eyeliner out a bit more. This trick worked well enough for my satisfaction. From all the trials though, I did figure out that the House of Lashes Lash & Dash Glue Liner pen makes for a tough to remove waterproof liner even without putting lashes on top of it.
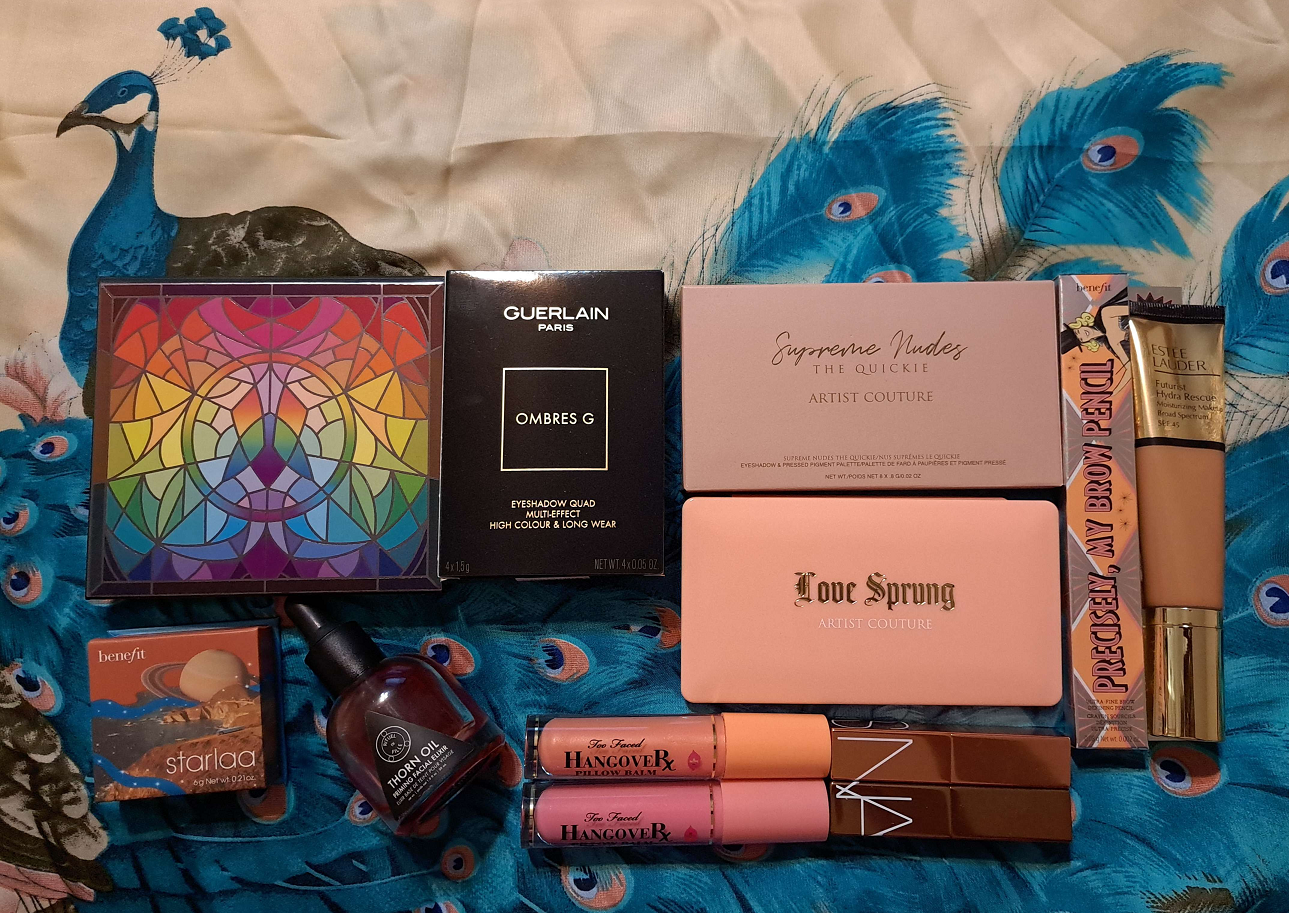
Brow products are never exciting to me, so I almost forgot to mention that the brow product I used is the Benefit Precisely, My Brow Pencil Waterproof Eyebrow Definer in shade 5. Although I don’t recall if I’ve purposely tested the waterproof claims, I know from experience that I’ve never had my brows run or smudge when using this product, so I didn’t think twice about using it on the day.
The last waterproof or transfer-proof thing to consider is the lip product. I’m sure most spouses-to-be would be grateful not to have lipstick transfer onto them. However, I didn’t go that route because my lips were in too poor of condition, even with using masks. There are some great waterproof lip liners that I could have used to cover the entirety of my lips instead of opting for a liquid lipstick, but I decided I didn’t want to go that route either.
My lip combination was to use the Coloured Raine Botanical Collection Lip Liner in the shade Decadent. It’s darker than my natural lip line to give me a slight shaping effect. I consider it a transfer-resistant product, but it only claims to be long-wearing.
I then filled the insides with the Lisa Eldridge Velveteen Liquid Lip Colour in Muse. This isn’t like most liquid lipsticks that dry out the skin like crazy, but that also means it’s a low-transfer product rather than transfer-proof or even transfer-resistant. The brand claims it’s “smudge-proof and budge-proof,” but that hasn’t been my experience.
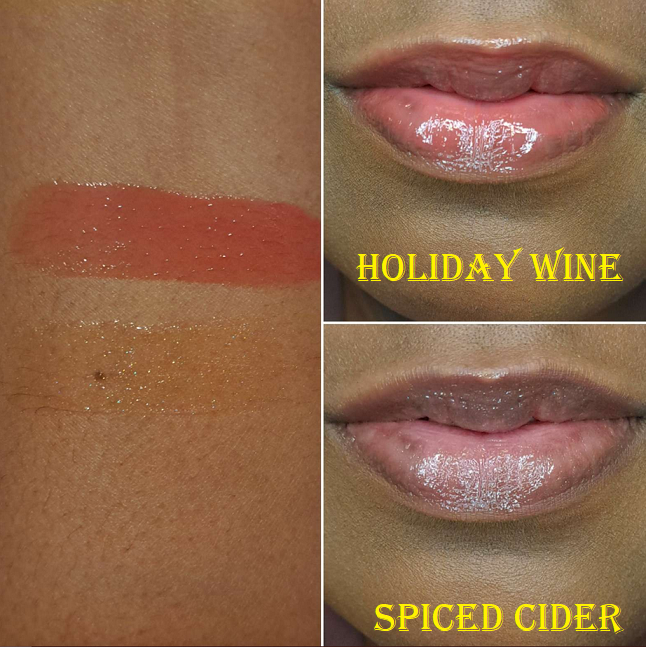
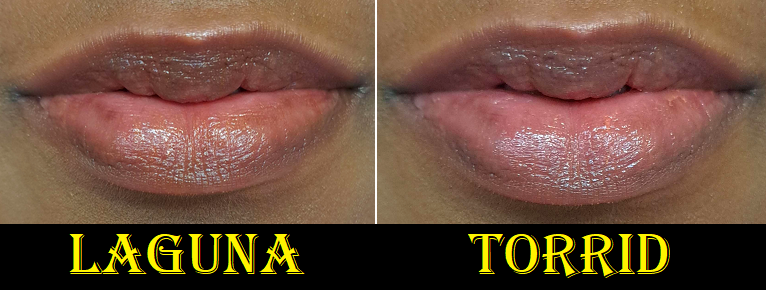
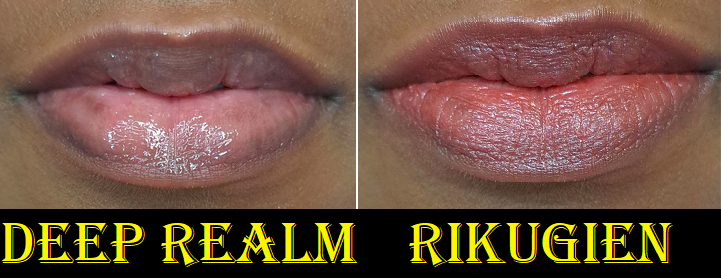
The final step for slight shine is from using my Nars Satin Lip Pencil in Rikugien. Unfortunately, it doesn’t last very long, but I wanted a little bit of shimmer and a slightly creamy look to the center of my lips. My husband hates lip gloss or any kind of sticky balmy product on my lips (which makes keeping them conditioned even more of an uphill battle). So, for his sake, I held off on using any gloss products until later in the night.
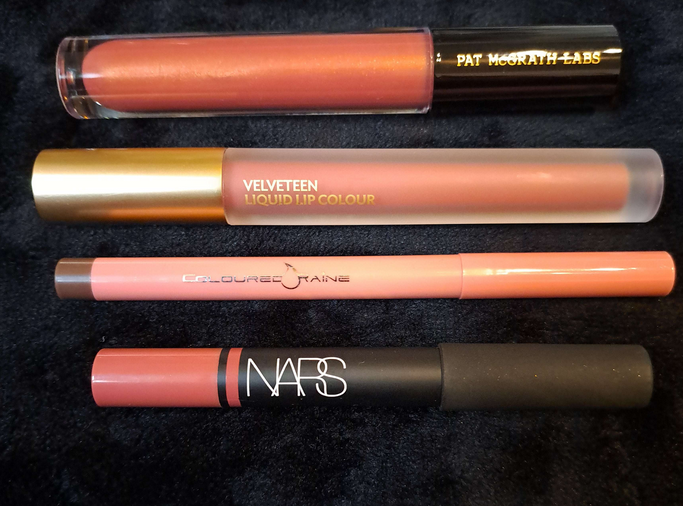
Many makeup artists commented that having some color and shine on the lips looks beautiful on camera. For that reason, I wanted to make sure I carried the Pat Mcgrath Lip Gloss in Bronze Temptation in my makeup touchup kit. On the second day of taking photos (because the weather was bad), I didn’t bother with the other products and just applied this gloss.
I chose the other three products because their tones of pink looked so complimentary with my blush. My PML lip gloss shade is a warm toned one, so that was something easy to carry with me to warm up the look if I wanted. The other lip product I considered swapping out instead of Lisa Eldridge’s was the Kaleidos Cloud Lab Lip Clay in Sienna. That shade went very well with my skin tone, but looked almost too natural. I wanted more of an impact since I don’t often wear colored lip products and usually stick to clear or slightly tinted glosses and balms. The Kaleidos product is also long-wearing and not completely transfer-proof.
Considering the amount of kissing throughout the day and night, the transfer onto my husband’s lips was minimal. It also helps that I was wearing pinks that weren’t ultra vibrant. Food was the culprit that removed most of my lip products.
Tools and Extra Makeup Helpers

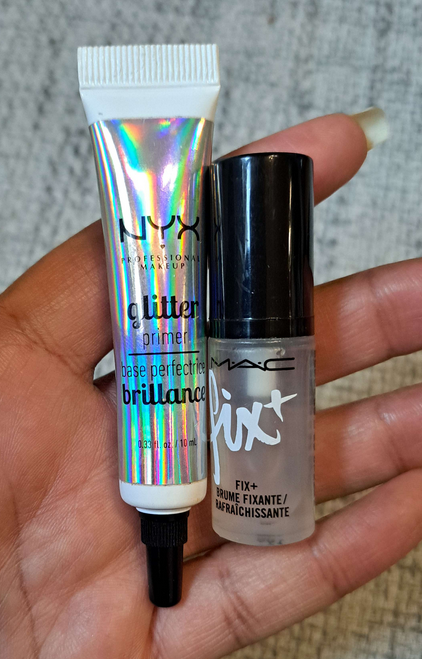
I mentioned the MAC Fix+ as something I always have on hand, but another one is the Nyx Glitter Primer to help make my shimmer eyeshadows pop and better adhere to my lids. For any mistakes that need to be cleaned up, I have Q-tips, but for more precise spots I like to use these tiny fine point cotton buds from MyKitCo called the My Small ‘On Point’ Buds. I dip them in a little micellar water, which my tried and true is the Bioderma Sensibio H2O. These are the types of things that are easy to forget when getting ready, that is, until they’re needed.
For my touch-up bag, I kept my skin-tone matching concealer and brush, the BB puff, the travel size mini CT powder, and the lip gloss. I was also gifted a slim compact with a magnifying mirror. I didn’t end up doing any makeup touch ups at all on the wedding day, but it’s nice to have things on hand in case there is an accident. Other random products in my Emergency Bride Kit were bobby pins, safety pins, band-aids, ibuprofen and pain meds (in case my back decided to act up which thankfully weren’t needed), hand lotion because of the constant dryness on my knuckles in this weather and taking pictures up close of the rings, eye drops with a backup pair of contacts, and tissues.
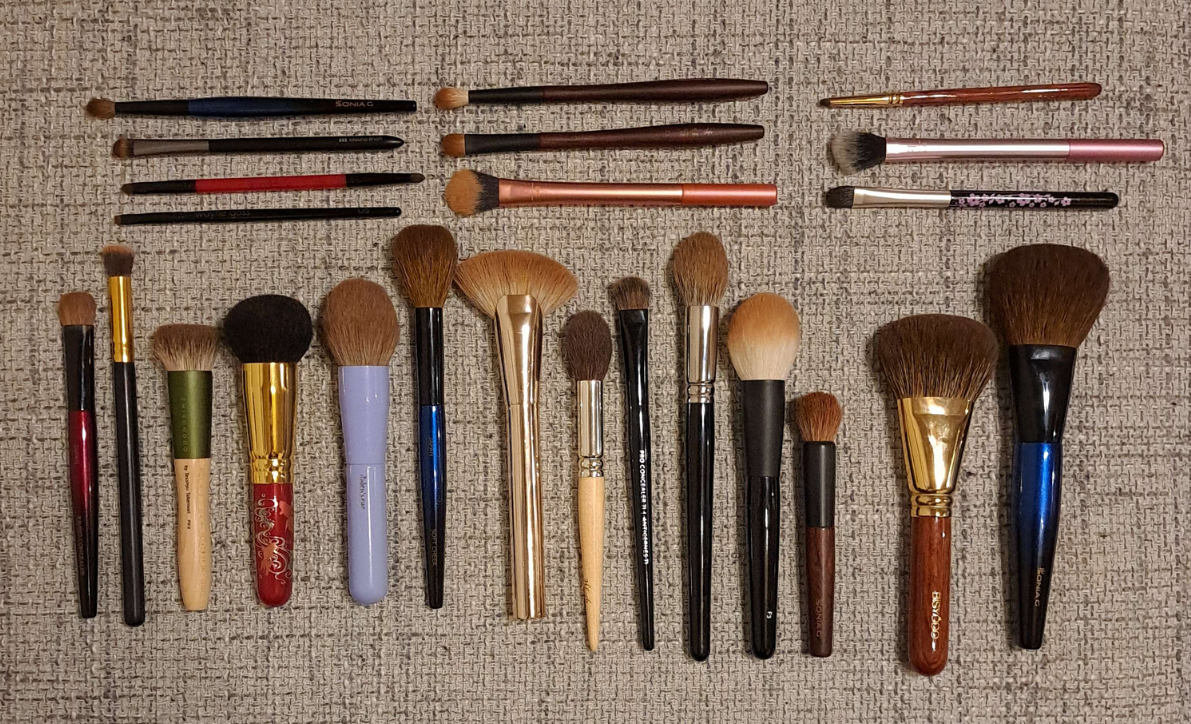
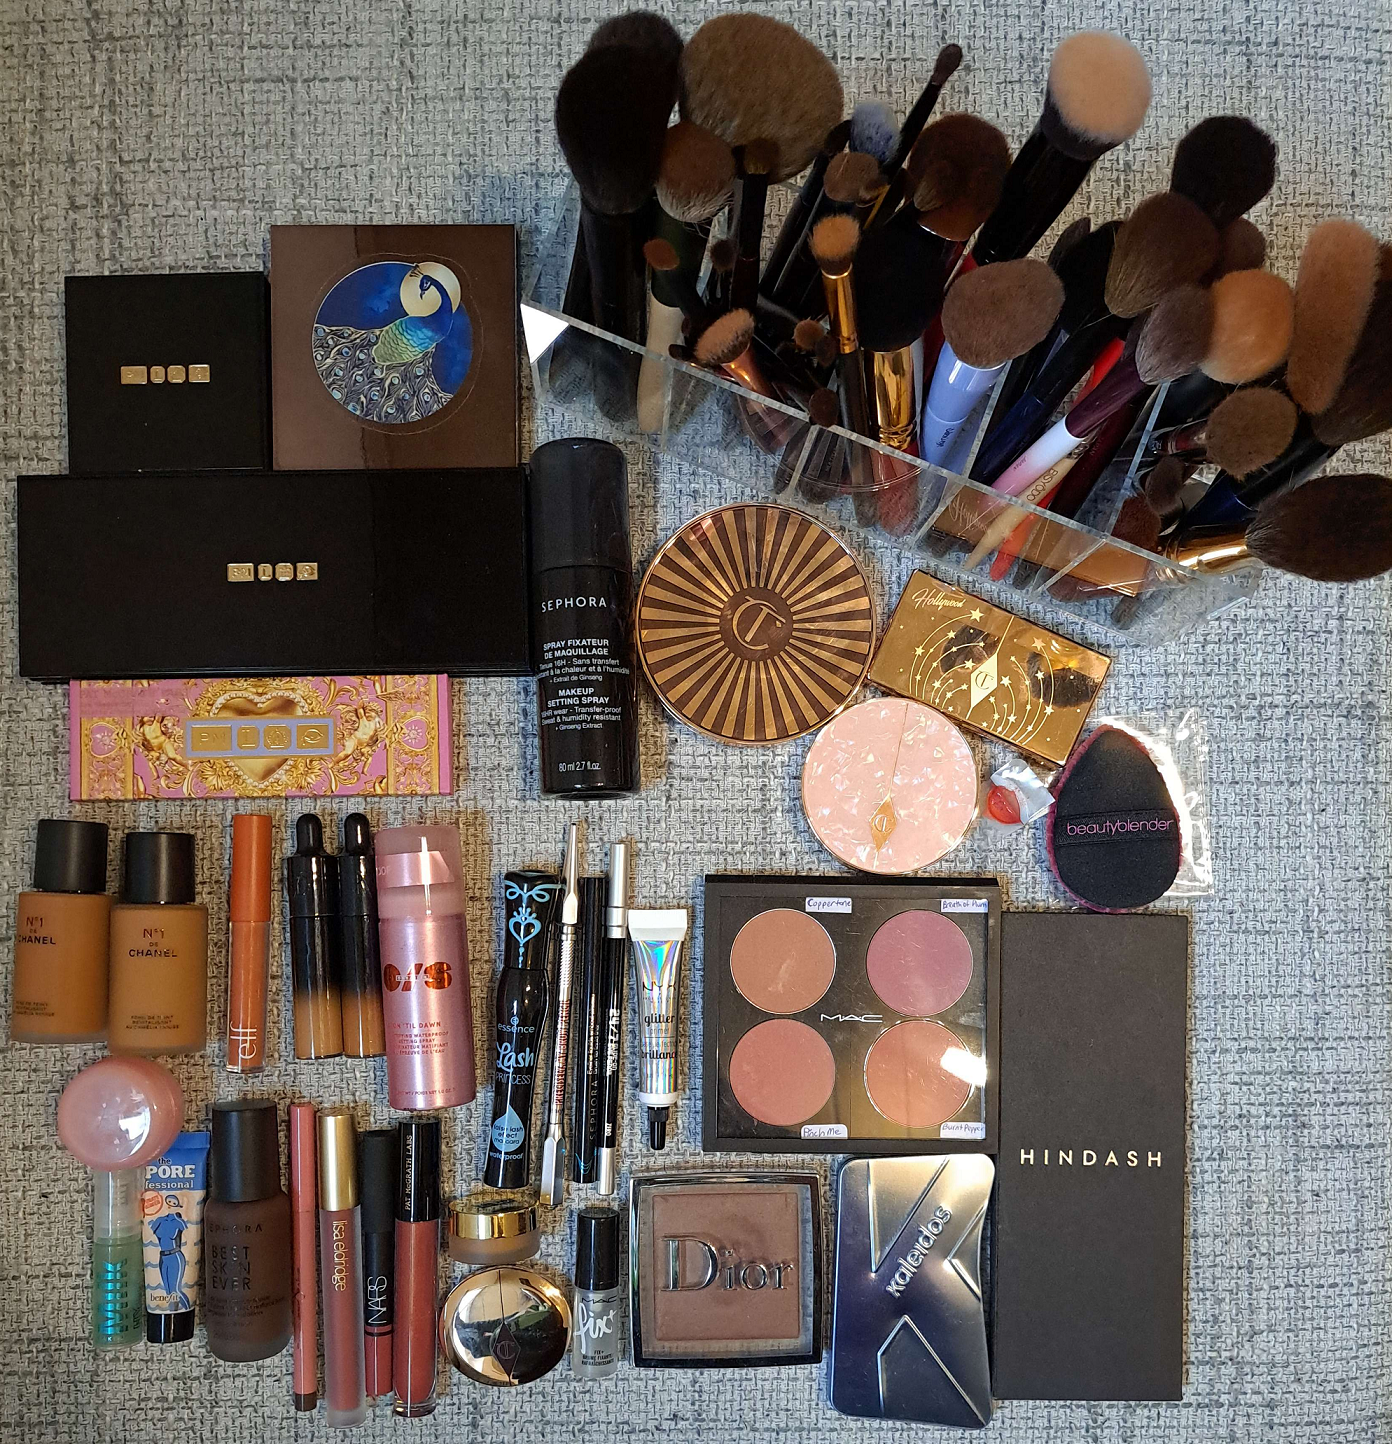
The photo above shows all the brushes I used on the wedding photo days!
Sonia G Mini Booster – Used for darker eyeshadow shades on the outer corner. Needed a small size blender brush for precision and for it to be not too dense to build up the color slowly.
Mizuho MB123 – For applying the transition matte eyeshadows.
Smashbox Double-Ended Smudger Brush -Used to apply shadows to the lower lash line, smudging the UD liner with the rubber side, applying the shimmer highlight shades to the brow arch and inner corner.
Wayne Goss 08 – Applying concealer under the brows and to clean up any other spots around the eye makeup.
Sonia G T4 – Extra blending to the eye look with no product on the brush plus blending out the nose contour.
Sonia G T2 – Applying/stamping powder nose contour.
Real Techniques Brightening Concealer – Used on the first day used to apply highlighter on the collarbone and shoulders, but the next was was used to set my under eye concealer with powder.
Bisyodo B-ES-08 Eye Shadow – Was intended to apply the Clionadh multichrome.
Real Techniques Setting – My usual under eye setting powder brush.
MS-4 Mai Sakura Eyeshadow – Brush to apply shimmers to the lids prior to using my finger afterwards to build up eyeshadow in strategic spots.
Sonia G Jumbo Concealer – My holy grail concealer brush because it gets the most coverage by packing on a lot of product at once, but it can still smooth things out.
Amazon Brush? – Used to apply eyeshadow primer to the lids and touch up concealer in other places.
Chikuhodo FO-2 – Used to apply the Dior Powder No Powder.
Eihodo WP PC-1 PUFF Makie Powder Brush Goldfish – Used to stamp on foundation mainly on the outer perimeter and over under-painted creams and liquids. The denseness and surface area size help with quick blending if needed and also aid in giving maximum coverage from not soaking up as much product.
OdensEye Blush – Used to whip across the face the lighter shade of foundation. Functions like a stippling brush.
Sonia G Soft Cheek – Applied powder blushes lightly, which was needed since I was building up three shades.
Patrick Ta Contour – Applied the CT cream bronzer and is a holy grail product for sculpting around my face.
Bisyodo CH-HC – Used to apply highlighter to the face in a light non-concentrated way, but without being dispersed in too wide of an area.
Sephora Concealer Pro Concealer #71 – Used to apply liquid contour (the deep foundation shade) around the face. The angle of the brush was helpful, but technically many other brushes could have been used.
Eihodo Outlet 153 Highlighting/Blush – Used to apply the contour shades from the Hindash Beautopsy palette over the areas that already had the Kaleidos contour. Was very useful for it’s small size considering the shape of the Beautopsy pans.
Wayne Goss F3 – Used to lightly apply the Kaleidos Symphony Trio contour under the cheekbones and along the jawline.
Sonia G Mini Base Keyaki Version – Used to apply the Rare Beauty liquid blush for under-painting.
Bisyodo B-F-05 Perfect Fit – Intended to apply powder bronzer in a slightly concentrated amount under the cheekbones, but I used it instead to do slightly more blending to the contour areas.
Sonia G Jumbo Bronzer – Intended to apply a lighter application of powder bronzer around the forehead, though on the actual wedding day I changed plans and opted for a cream bronzer instead.
Using the correct tool for the job is extremely important. To make things easier, I started narrowing my collection down ahead of time so that I wouldn’t be wasting time digging around looking for specific brushes. I knew which one (or ones) I wanted for each specific type of makeup. This came from practicing those makeup looks as often as I did. The backup brushes I also had on hand, but didn’t end up using, are in the photo below.
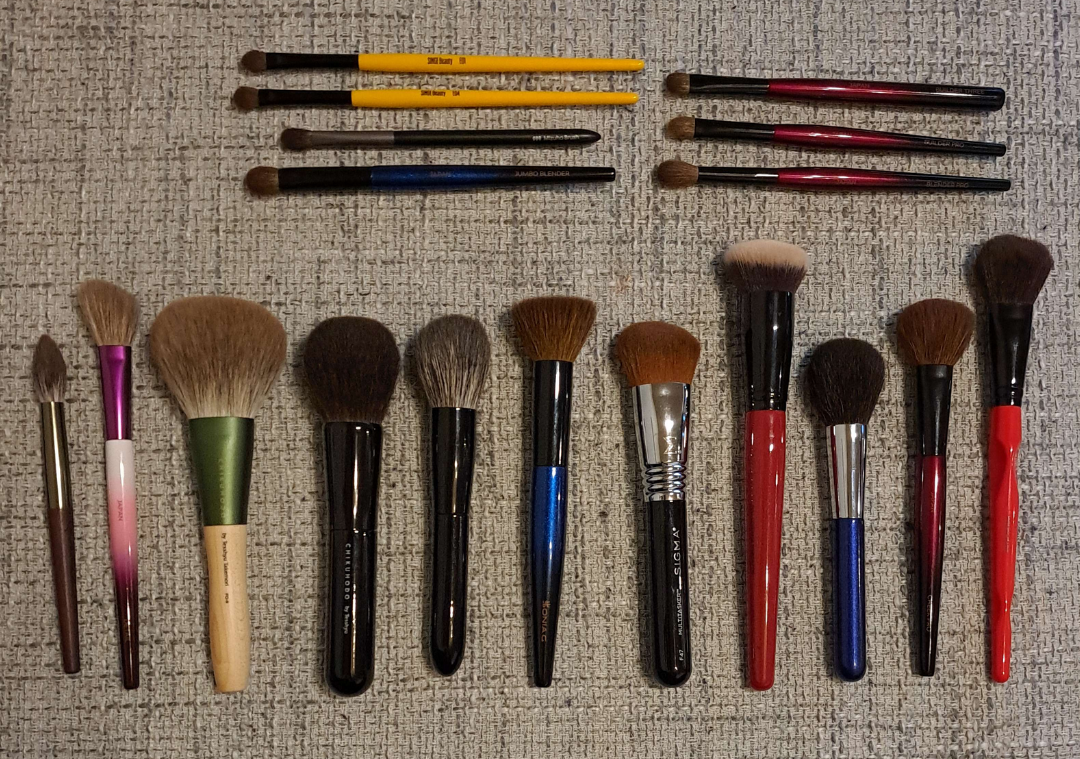
Another very important tip is to make sure the brushes are clean or “clean enough” before the big day. Gunked up old product on brushes can effect the performance of the makeup. Things can be harder to blend, not be color accurate, not apply as smoothly or in the right amounts.
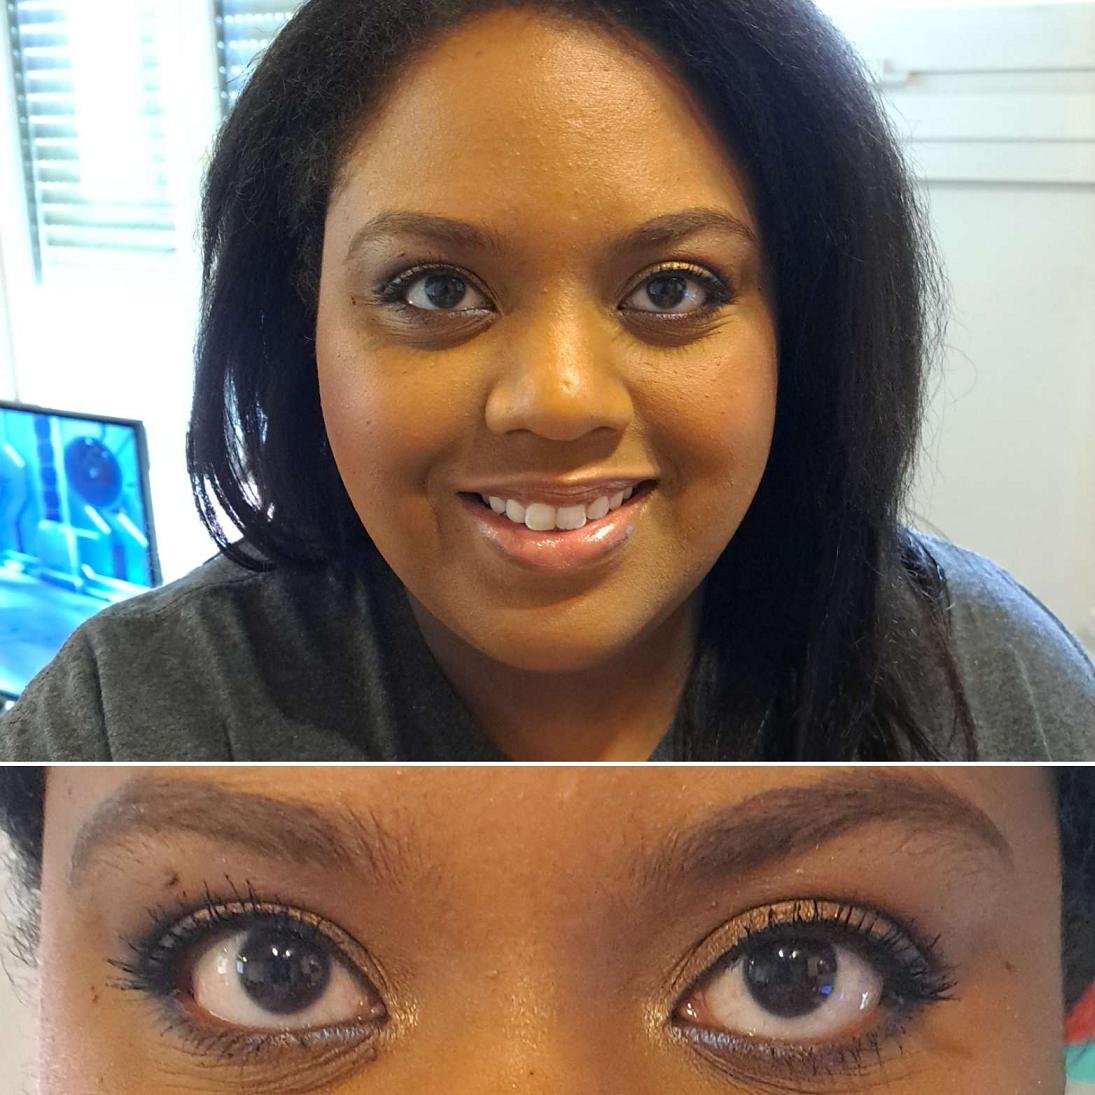
All this being said, and for all the effort and planning I did…the funny thing is that I don’t have up-close shots of my face! The photos below are the best I’ve been able to produce. We couldn’t get a professional photographer in time and a coworker of the family graciously offered to take pictures on her high quality camera for us. The pictures were often dark or on some setting I’m not sure what (I’m not very knowledgeable about photography myself). My focus was to apply makeup in a way that would stand out at far distances, and it’s a good thing I did because most of the pictures were taken from father back and the quality dips when trying to zoom in closer. I have some wedding photos that I ended up liking or loving after tweaking them a little, so I’m happy about that. However, I don’t have ones for blog usage that specifically showcase the makeup except the two below. Sorry about that! I had too much on my mind to really think about how the pictures would turn out after a while.
Like I mentioned in the eyeshadow section, I plan to post a Part 2 with step-by-step details on how I completed my wedding look. Over the next few weeks, I plan to create a few alternative makeup looks as well. I hoped to get it finished sooner, but I got bronchitis and was feeling sick for over a week. Then, I took two weeks off of blogging to finish the wedding planning. Unfortunately, we all got Covid immediately after that, which put me out for a while too. And now, since the beginning of March and for the next eight weeks I’m taking an intensive course so I can get A1 certification in German language, as is required for me to have in this moving process. So, my usual Monday postings will likely be interrupted again. I’ll be back as soon as I can!
-Lili ❤