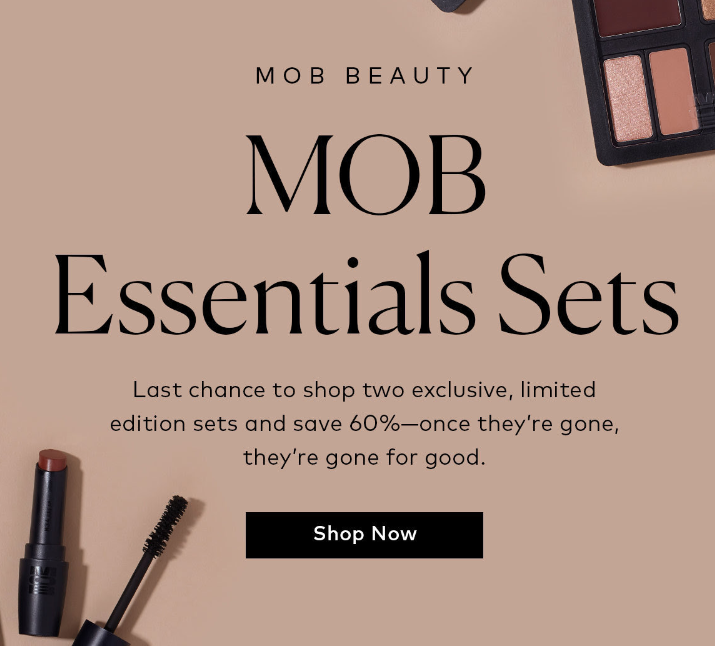
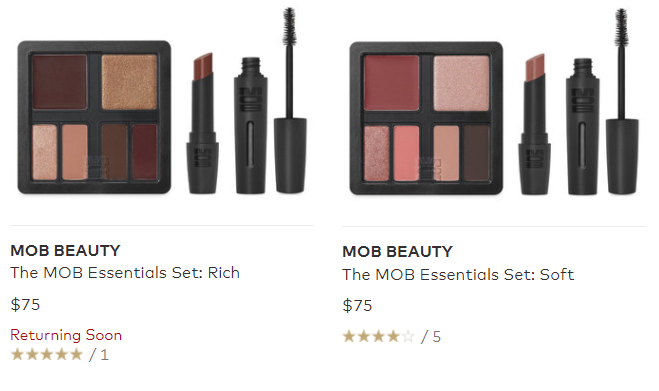
I first heard about the brand when it arrived at Beautylish as a pop-up with two pre-made sets. Neither one had enough colors I wanted in them to be worth purchasing, which is a shame because those bundles are a significantly better value. For $75, a customer can get a mascara, lipstick, and either the “Soft” or “Rich” 4+ pan palette. The best deal I saw from MOB Beauty’s own website costs $85 after using a promo code and involves creating your own custom 4+ pan palette that does not include a mascara and lipstick, just two free samples. I was especially tempted to get a pre-made set anyway, considering Beautylish was advertising back in March that once these restocked sets were gone, they’d be gone for good this time. Yet, here we are in September and there’s a “returning soon” notice for one of the sold out sets. I like Beautylish, but it appears that they pulled a ‘limited edition’ marketing stunt again.
Eventually, when the items became available individually at various places, I made separate orders to HSN, Beautylish, and the official MOB Beauty website to make these purchases as affordable as possible for a custom palette. If I had just stuck with my original 4+, it would have been fine, but I ended up spending extra by changing my mind afterwards because I wanted to try the cream formulas too, and the refills would be exposed to the air if I didn’t get additional packaging to store them. MOB Beauty is a “Clean” brand, but the part that really interested me about them is that they are big proponents of recycling and sustainability. In the next section, I will show the cardboard packaging that each product arrives in, which is great for that recycling factor, but because the refills are surrounded in post-consumer recycled plastic (50-100% PCR, PET or PP Resin with the percentage of PCR getting lower the larger the palette is), it’s not possible to store the pans in something like an empty magnetic palette, which is a system that the majority of people who want to make custom palettes use to do it. And once the refill outer packaging (40% FSC bamboo and 60% recycled paper) is opened, there’s no way to keep it properly sealed after because the sticker layer is what keeps it together. So, one ends up having to purchase either single compacts that will take up space or pay for the larger custom palette and have the smaller one sitting around in case someone wants to take a smaller set traveling and just being generally unused. The need to buy more empty palettes is the downside of the attempt to be sustainable. I appreciate the effort, but it’s far from a perfect system and it’s the customer that has to take on that additional cost because of the brand’s decision to make unique packaging that can only be used with their own products exclusively, similar to what Hourglass did with their “Curator” system. In addition, the outer packaging is easy to recycle, but there are additional steps for those wanting to recycle the makeup pans afterwards, as noted on the MOB Beauty website:
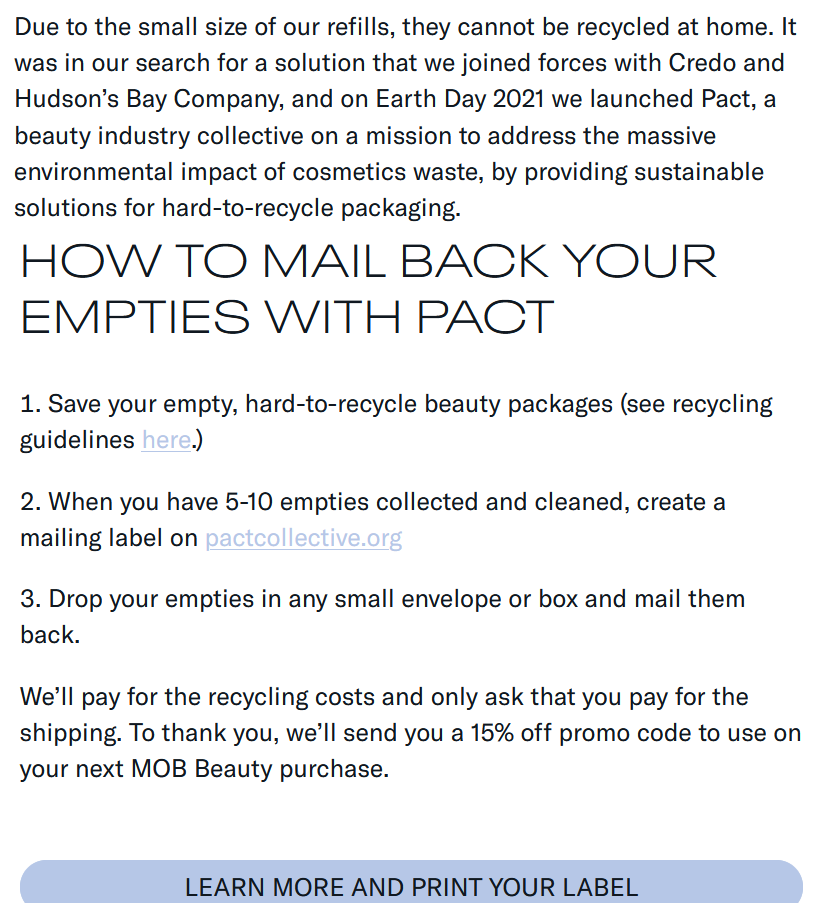
They can also be turned into a Pact recycling bin inside any Credo store in the US, provided you live near one of their ten locations within the country, or Hudson’s Bay store in Canada.
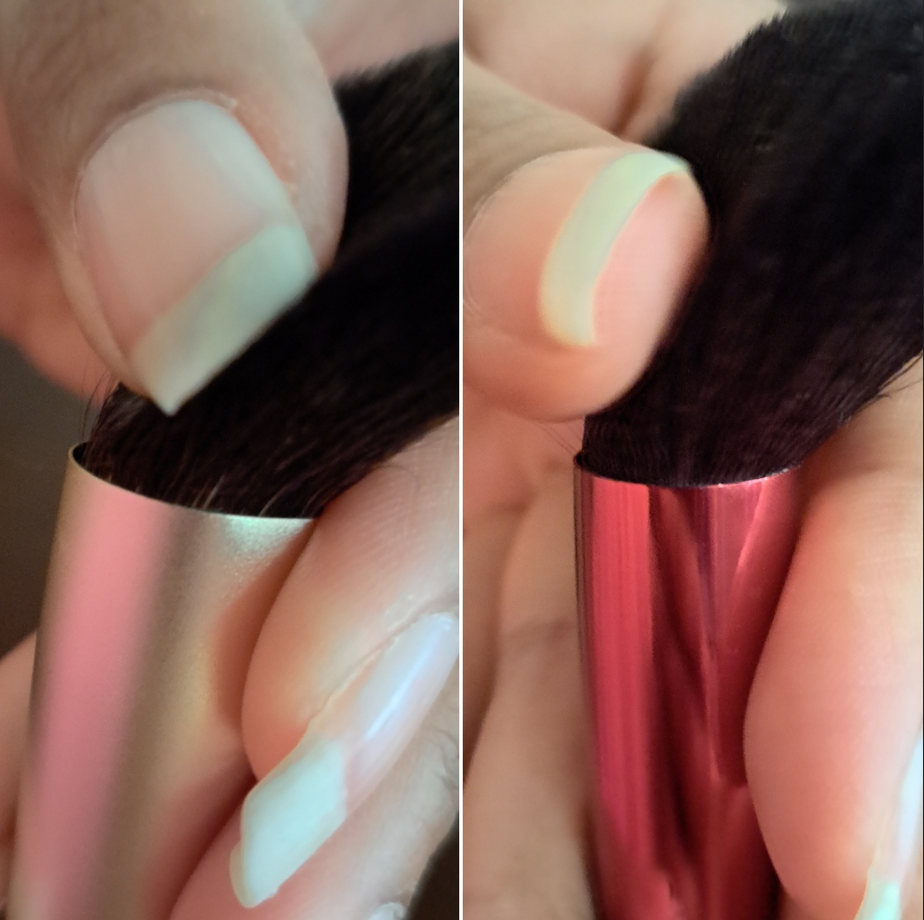
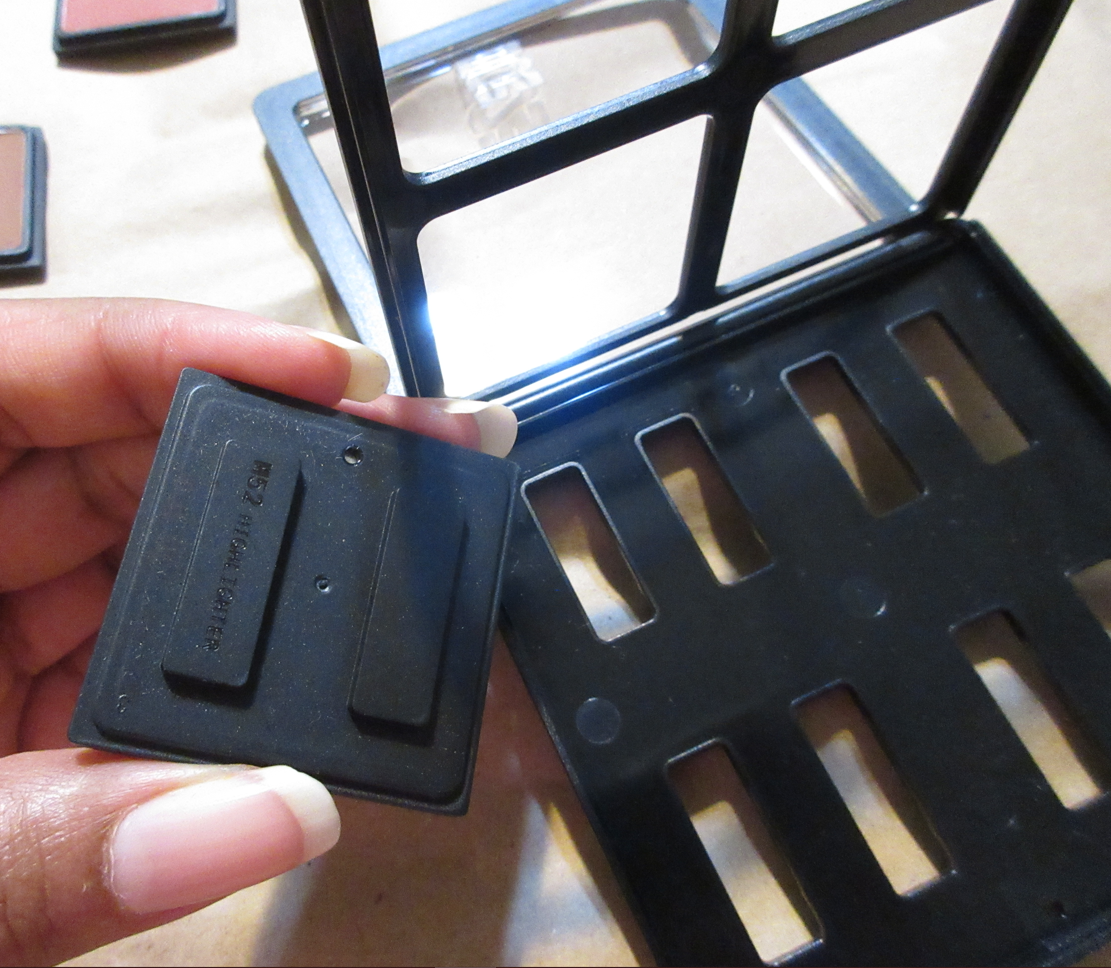
The refills have holes in the back, so one could potentially push the metal out of the plastic and commit to using the products exclusively in a Z-palette and avoid needing to buy MOB’s custom palettes, but they’re glued down. Also, since they are made of aluminum, they aren’t magnetic and would need a metal magnetic sticker to be attached to the bottoms of them in order to not slide around in a magnetic palette. The mini samples of mine were glued to the cardboard since they don’t come with the plastic bottom like the others. So, I peeled off the label stickers with the shade names and cut them into small squares before I unstuck the pans and attached those stickers onto the backs of them to at least keep the glue from sticking to things before plopping them into a Z-palette, even though they’re free floating in there. I just needed to keep them somewhere they wouldn’t get lost while I was testing out the products, and I could continue to test for an extended period instead of just once. Again, I’m not sure what a better alternative would be. I give the brand kudos for being perfectly upfront about everything though and that they have clear instructions on how to recycle these properly.
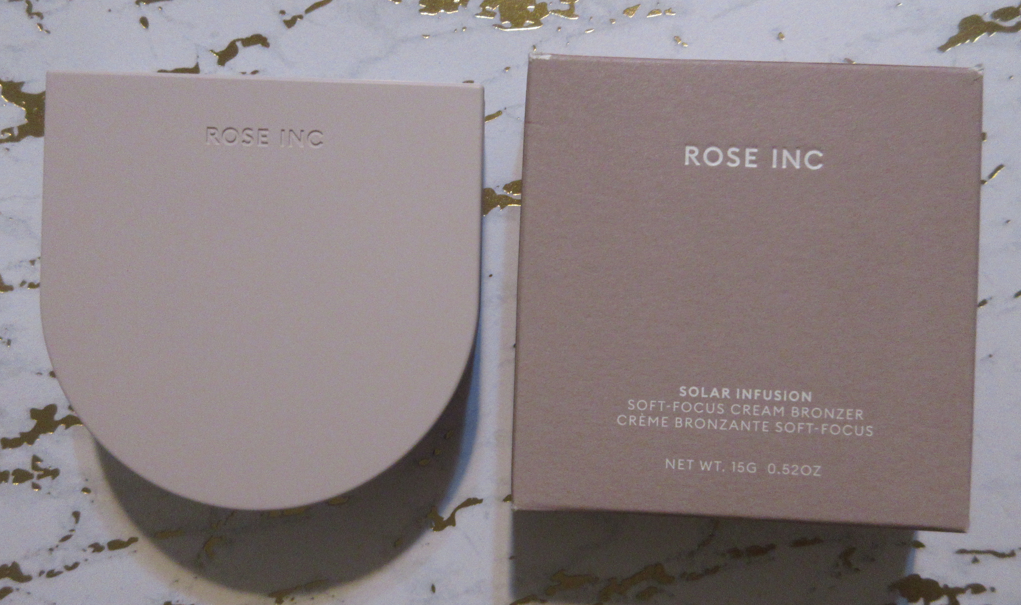
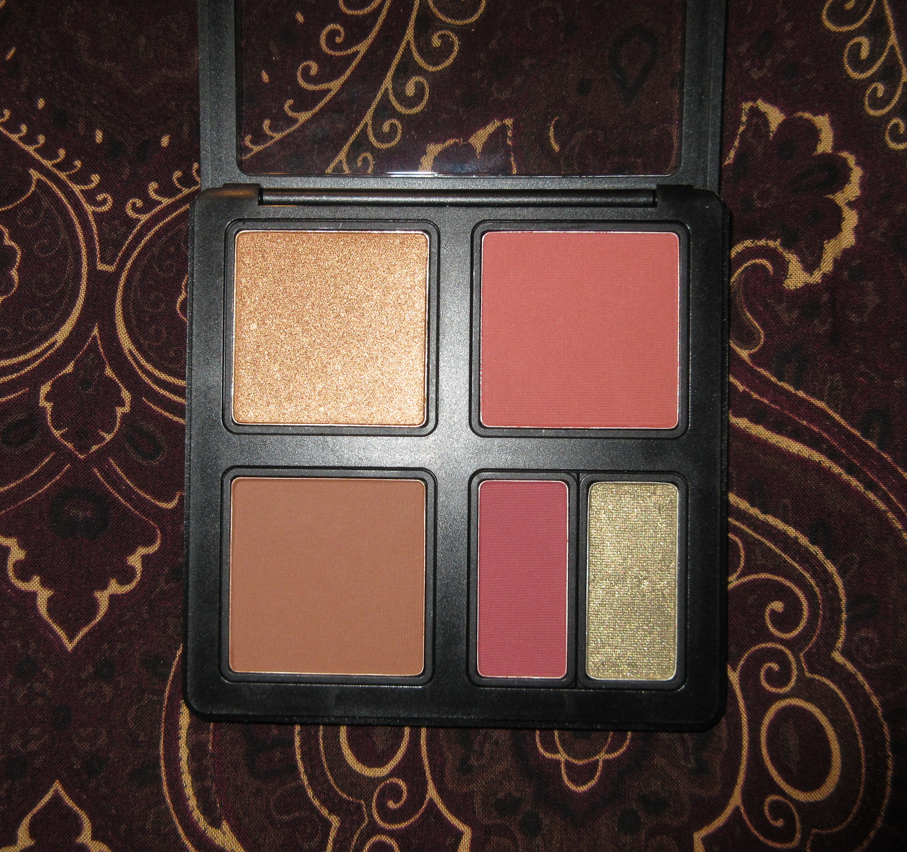
Custom Palette Packaging and Components
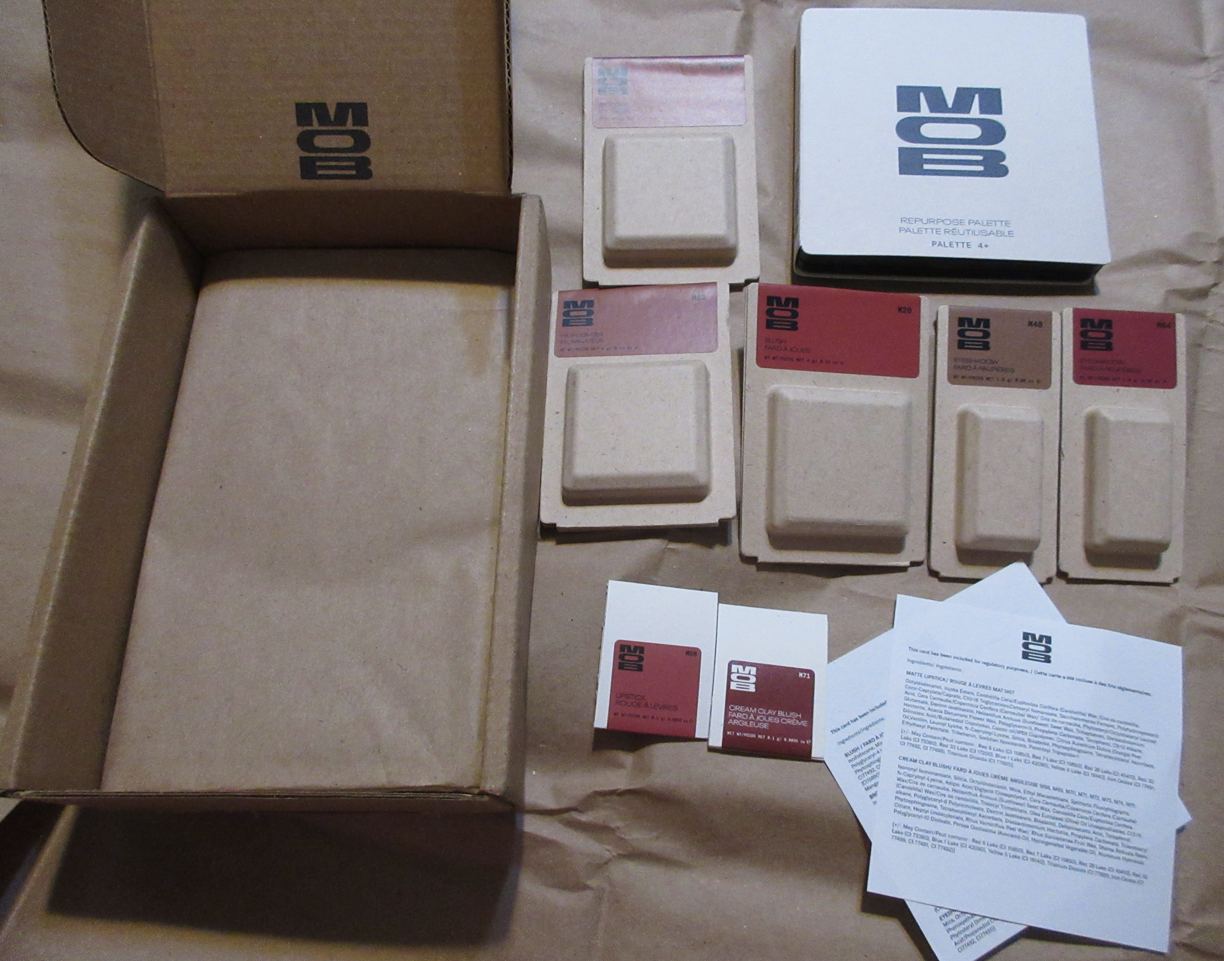
The photo above shows how the items for my custom 4+ palette arrived, including the two samples and two slips of paper with the ingredients listed on them. The box on the left is what they were all shipped in, so there was no wasted space, which is something I really like to see in shipping materials (provided the items are still properly protected to prevent being damaged). The brown paper below all the items was the folded up paper layer in the box. This packaging was delivered by MOB Beauty, but if you order from HSN and Beautylish, the items will come in those retailers’ typical packaging.
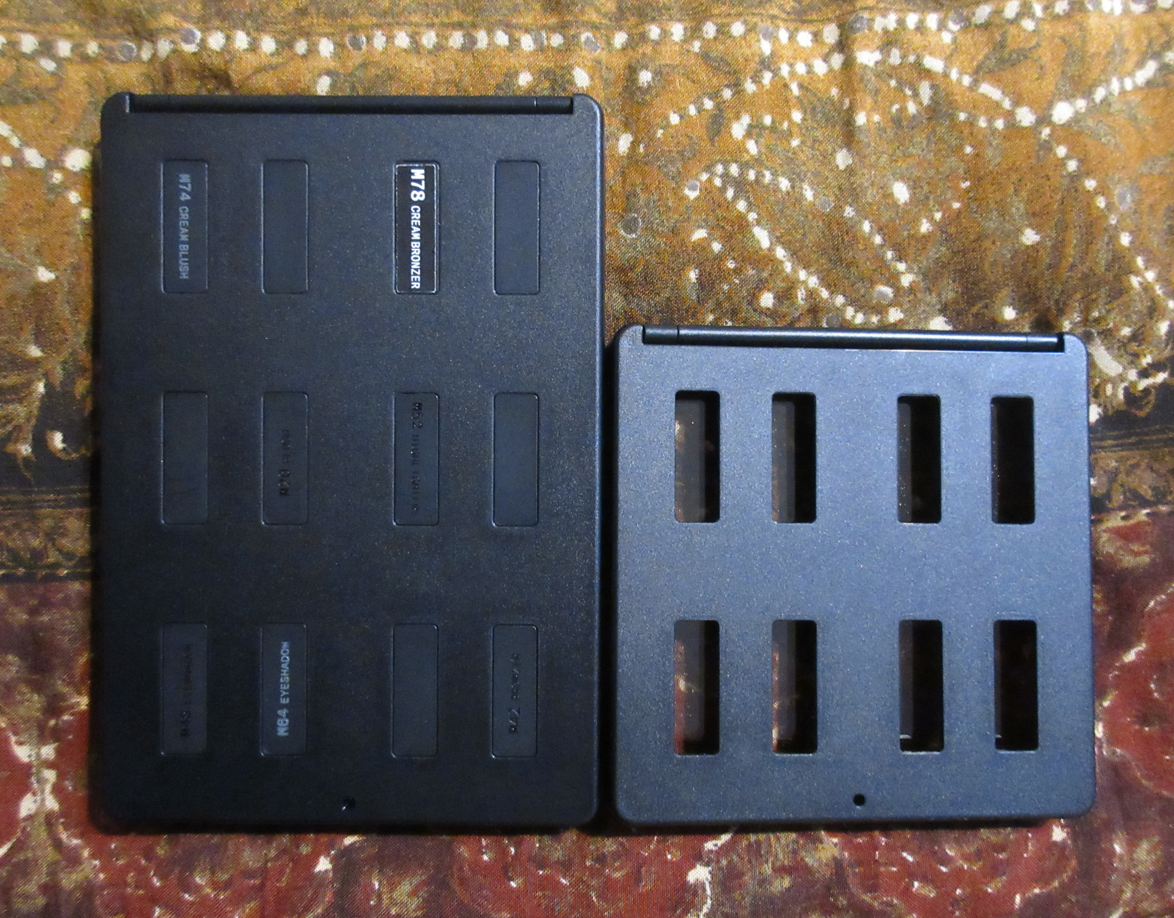
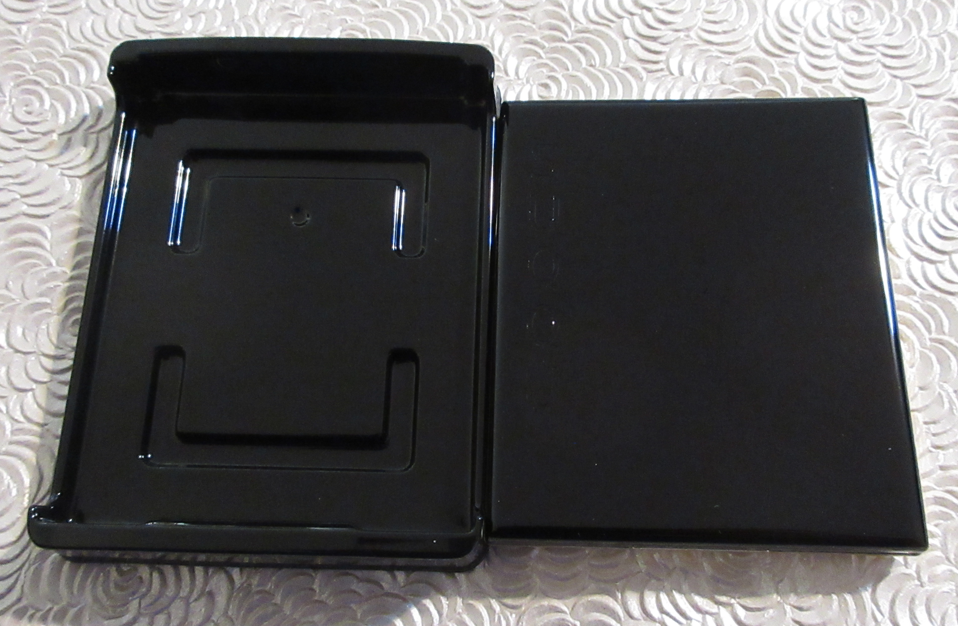
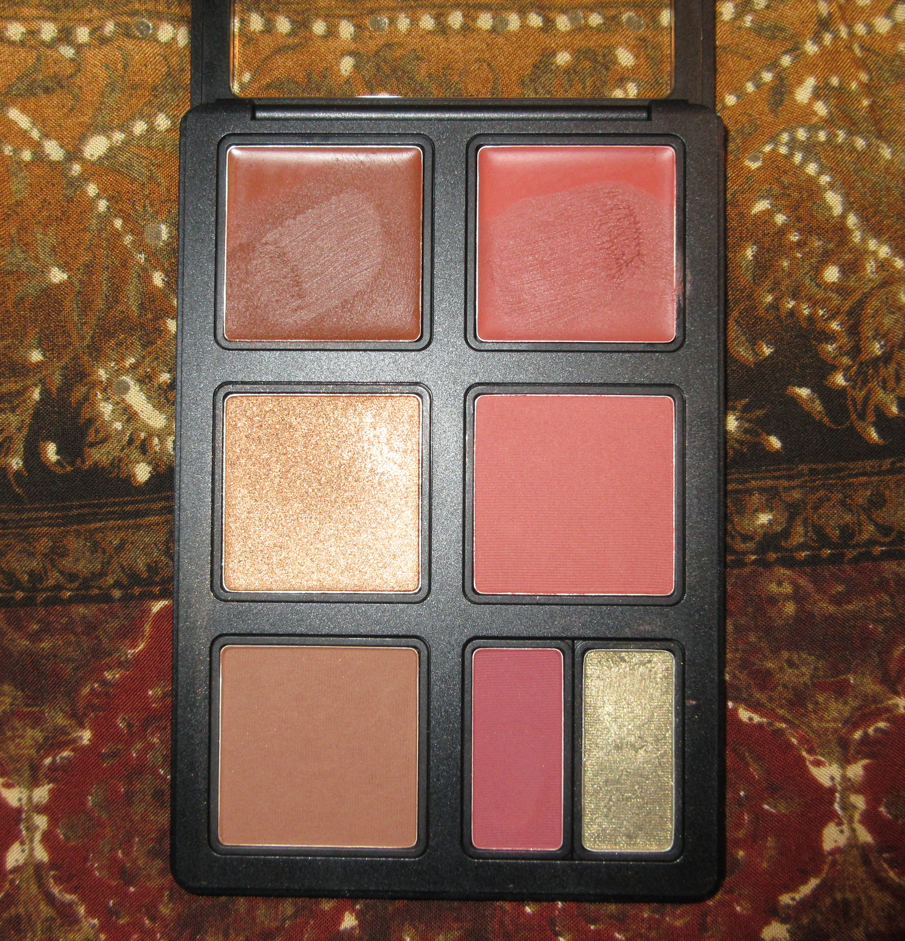
This is what the 6+ pan and 4+ pans look like in the back when filled vs empty. The hole used to pop open the grate to place the pans inside are visible from the back.
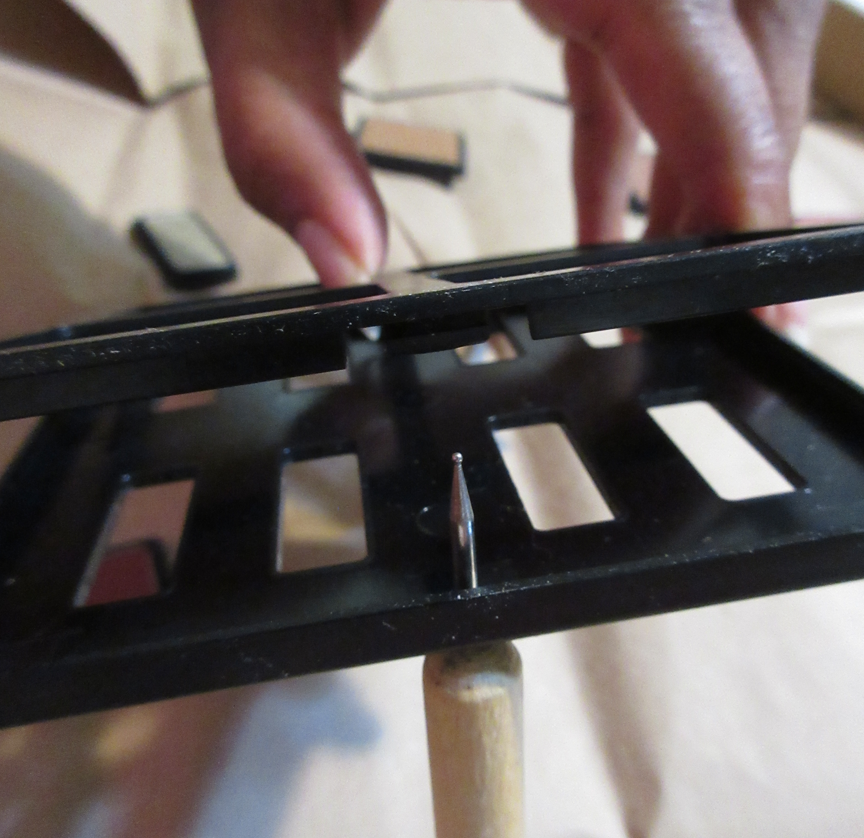
I used one of my clay shaping tools to do the job of opening what I call the sealing/securing lid.
Once the plastic clear lid has been lifted and the hole in the back of the palette has been poked through in order to lift the second lid, the pans can be loaded in by aligning the two protruding rectangles with those empty spaces. They do not snap into place. They have to just be gently laid on top enough to stay put until every pan is on it and that second lid can be placed back on top to secure all the sides. This is the point where at least one snap should occur, so every edge plus the center should be touched and pressed to ensure that everything was locked into place and can only be opened again via the hole in the underside of the palette.
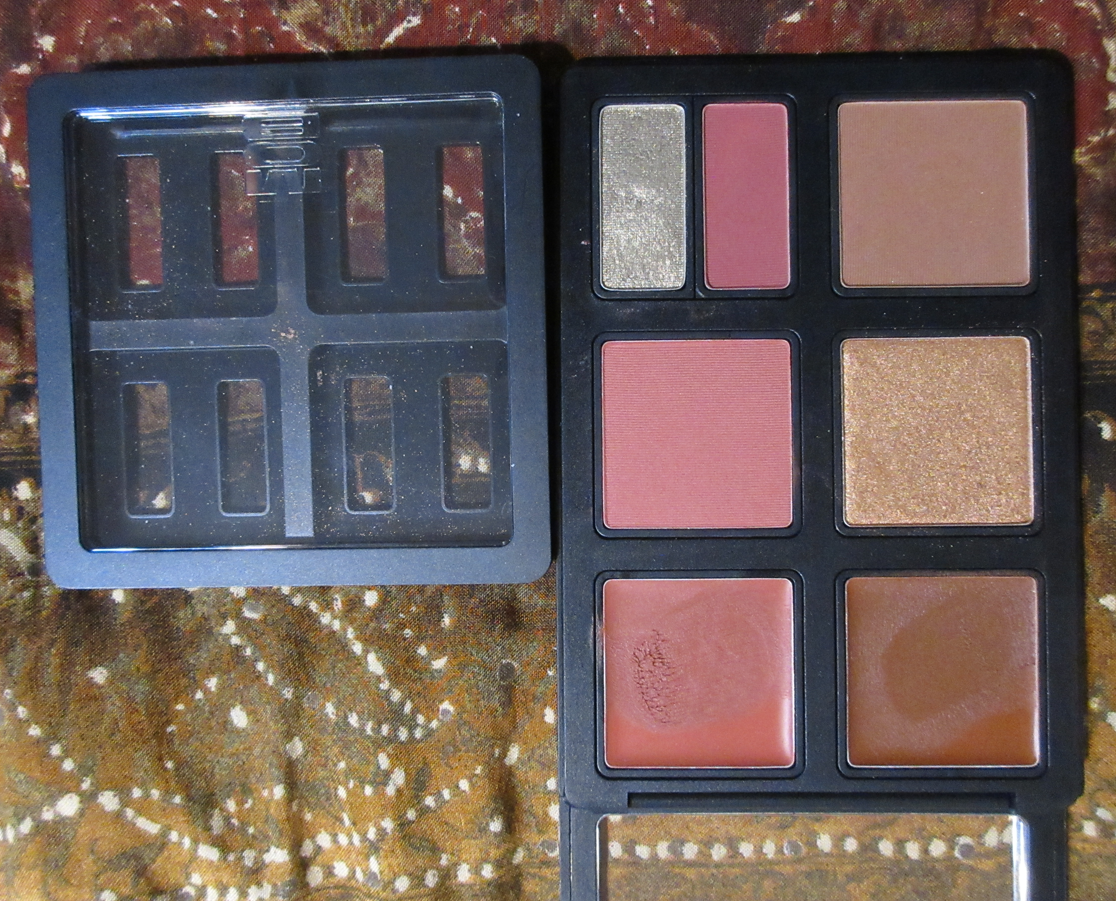
Additional photo of an empty versus filled palette.
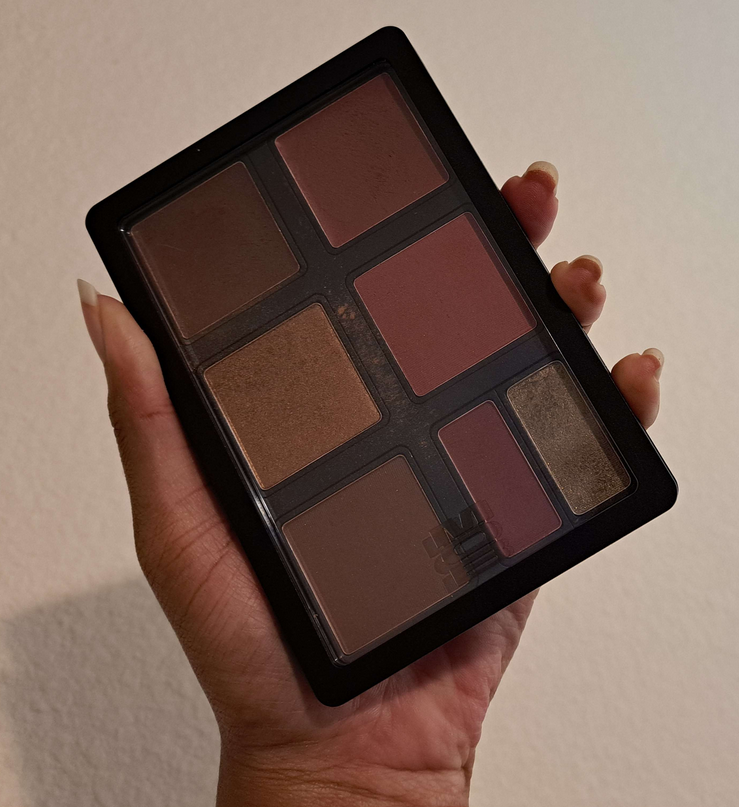
Despite the 6+ pan being longer, I still consider it to be a travel-friendly size from the way it fits in my hand.
Important Tip About Choosing A Shade
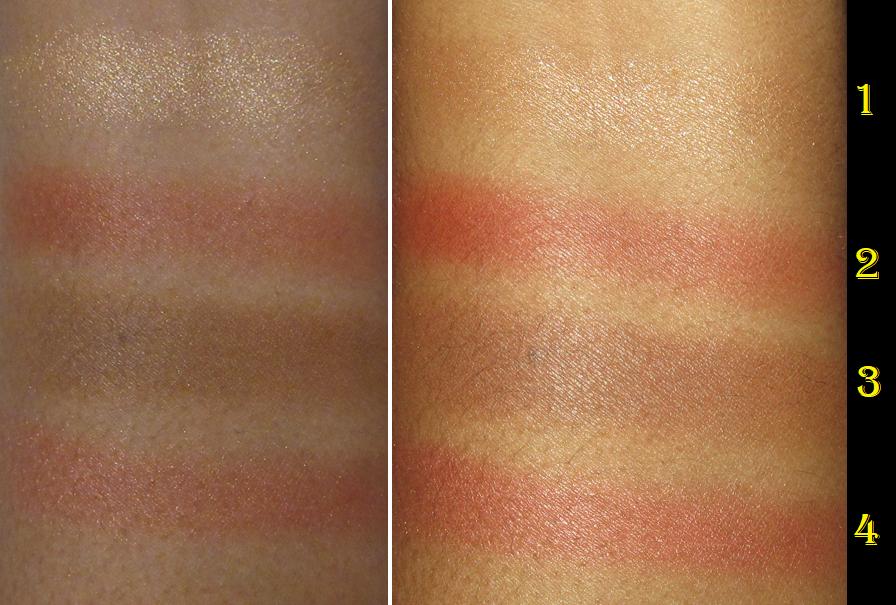
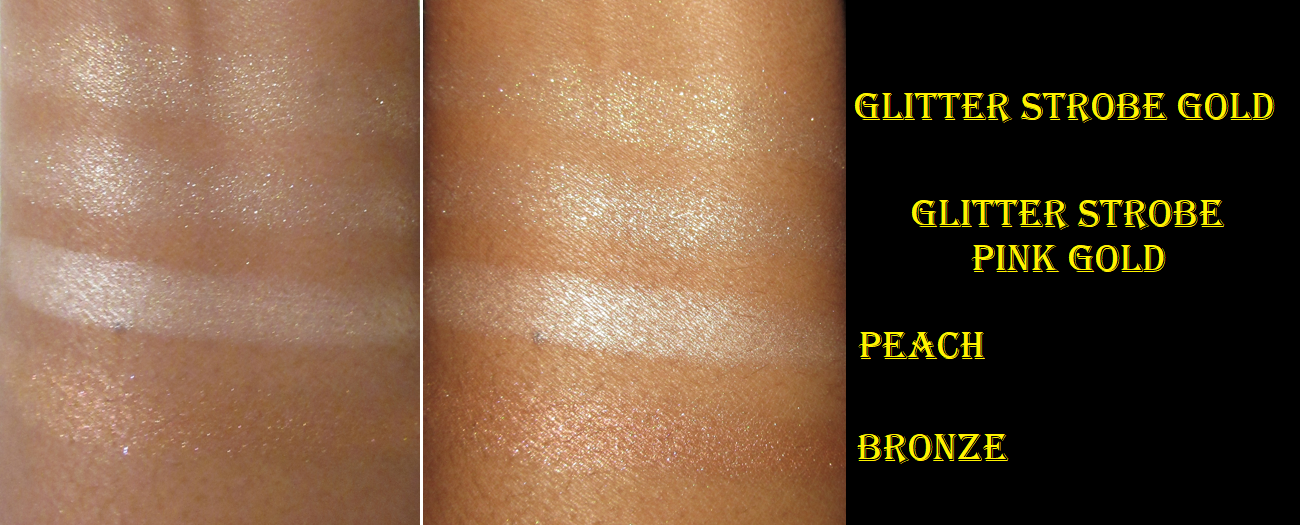
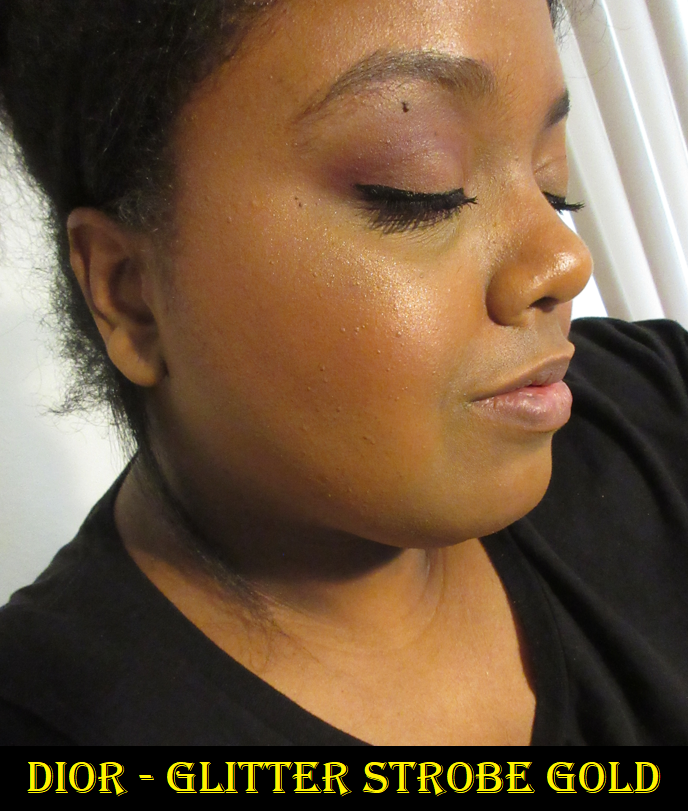
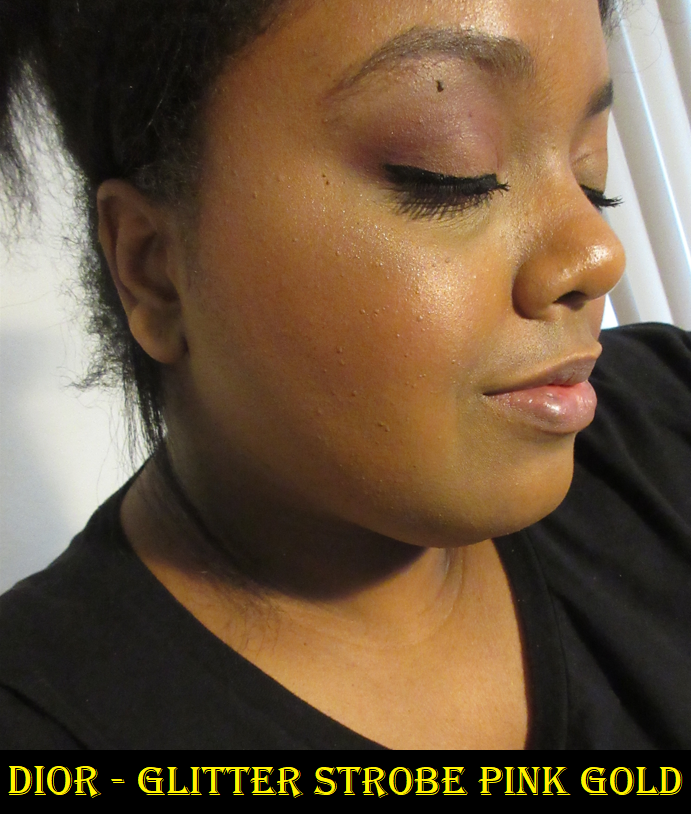
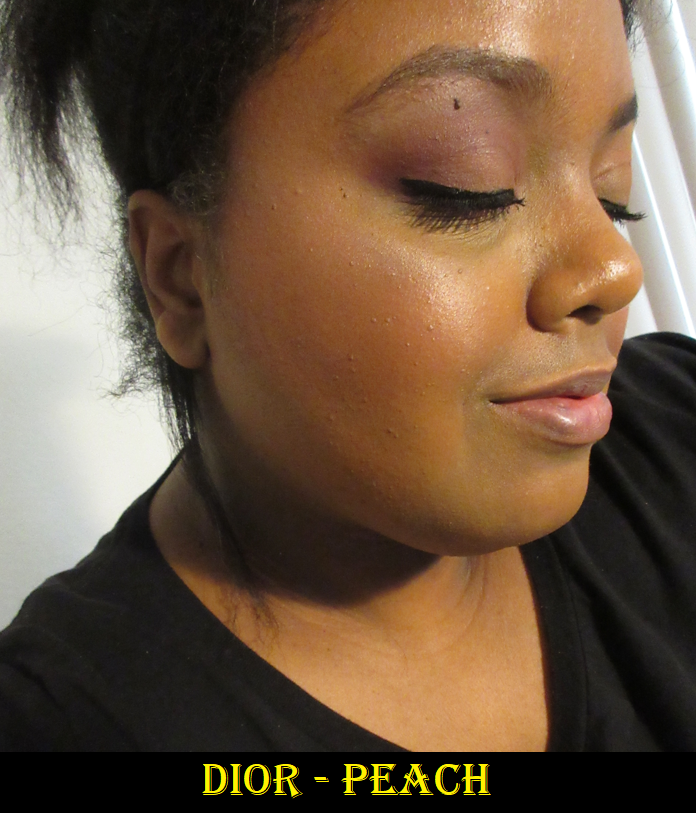
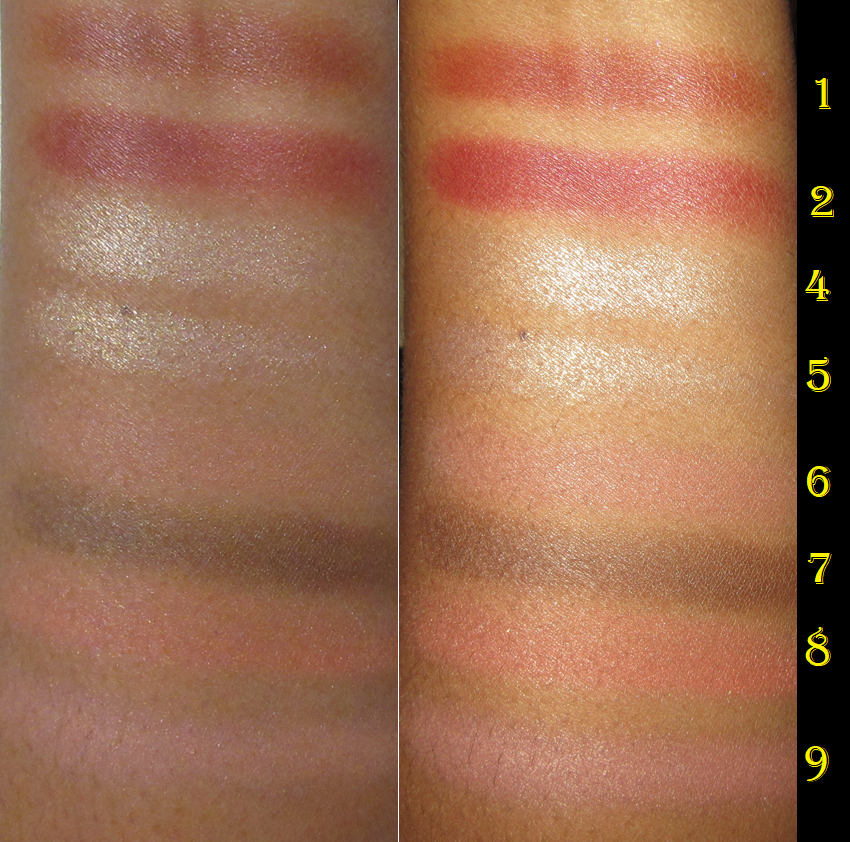
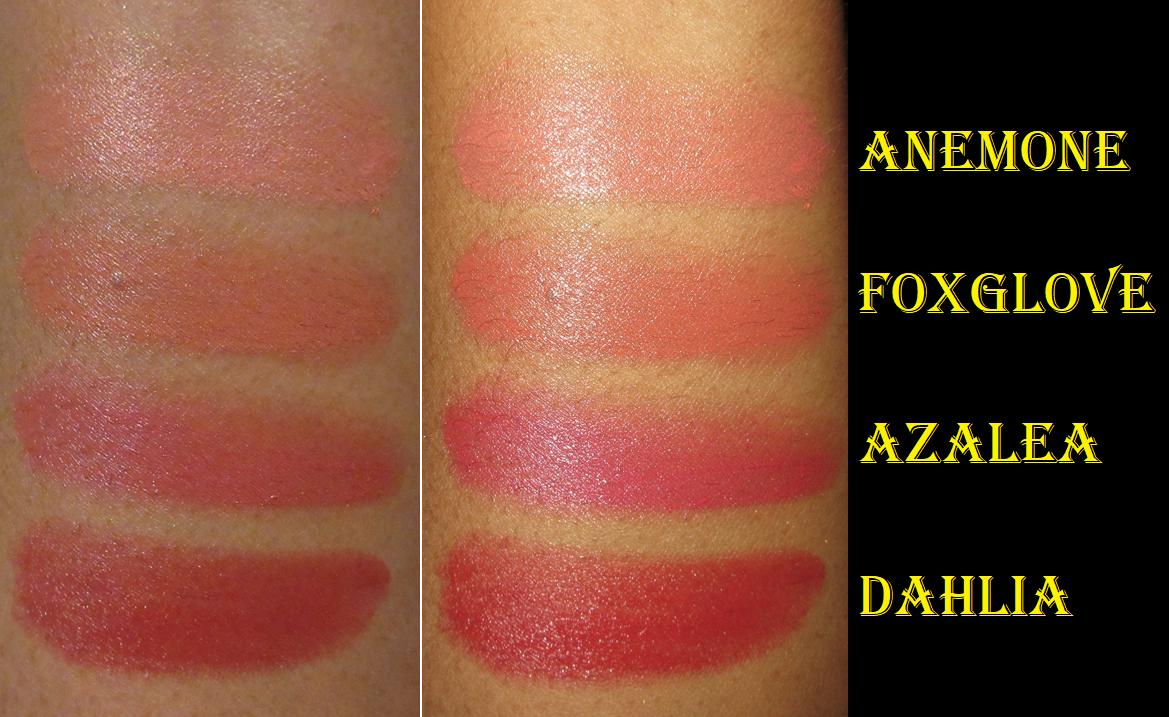
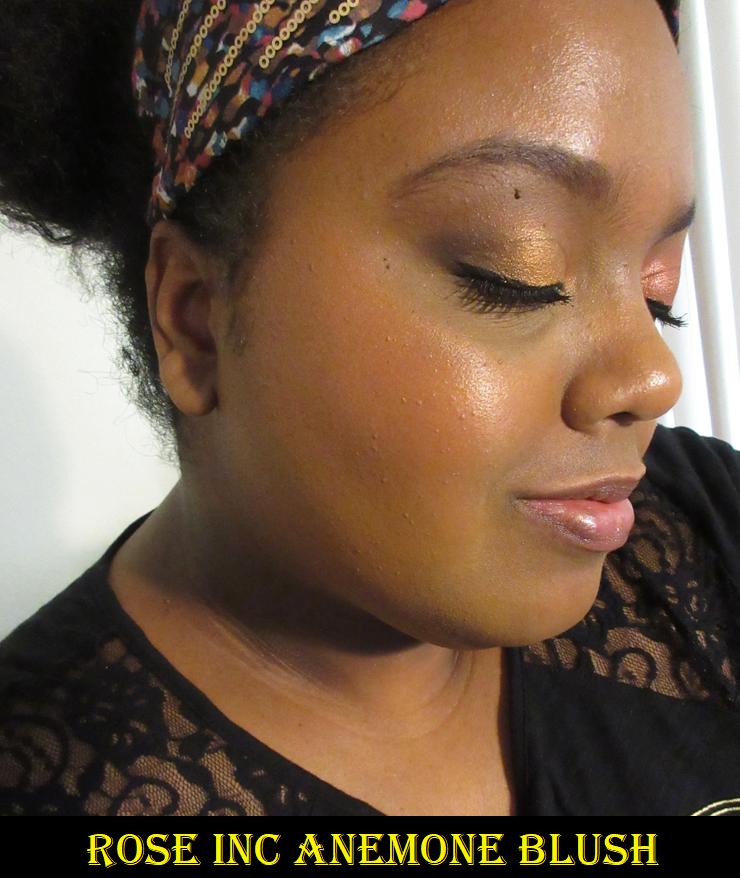
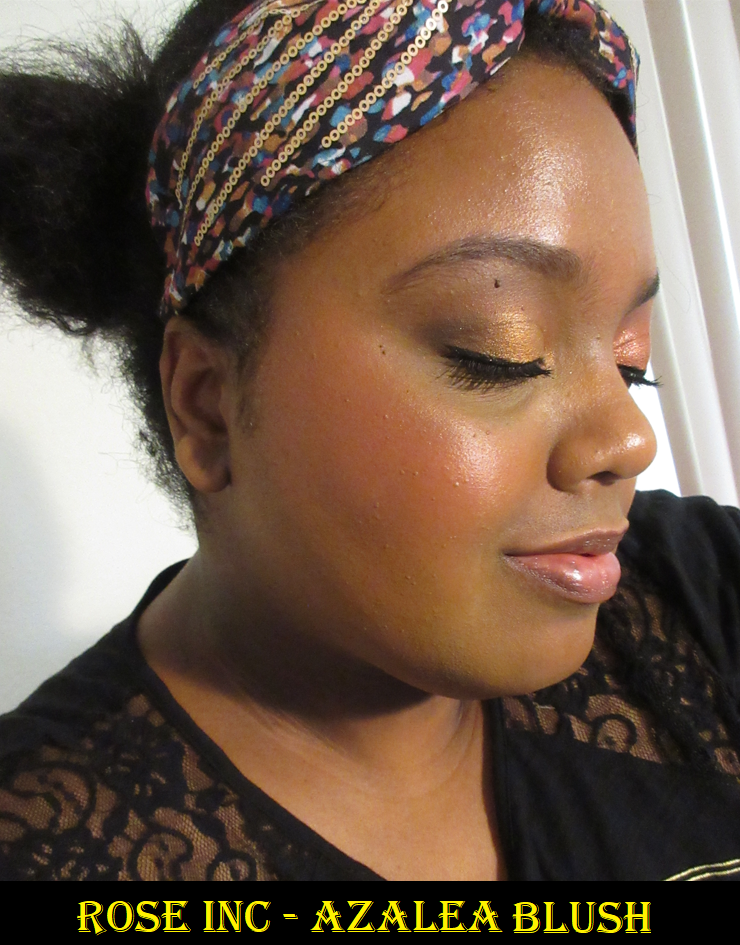
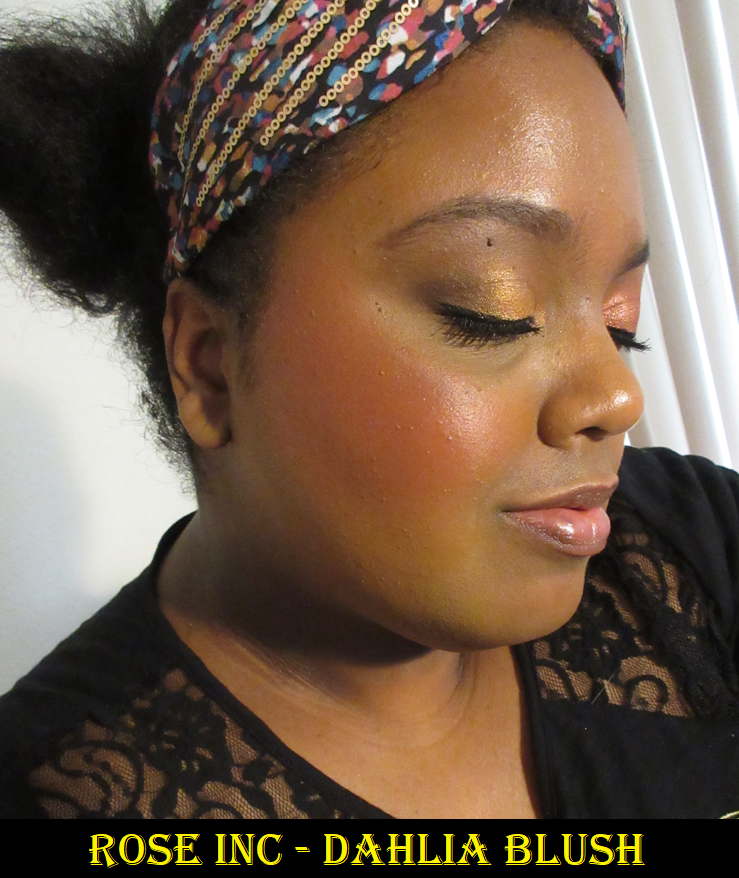
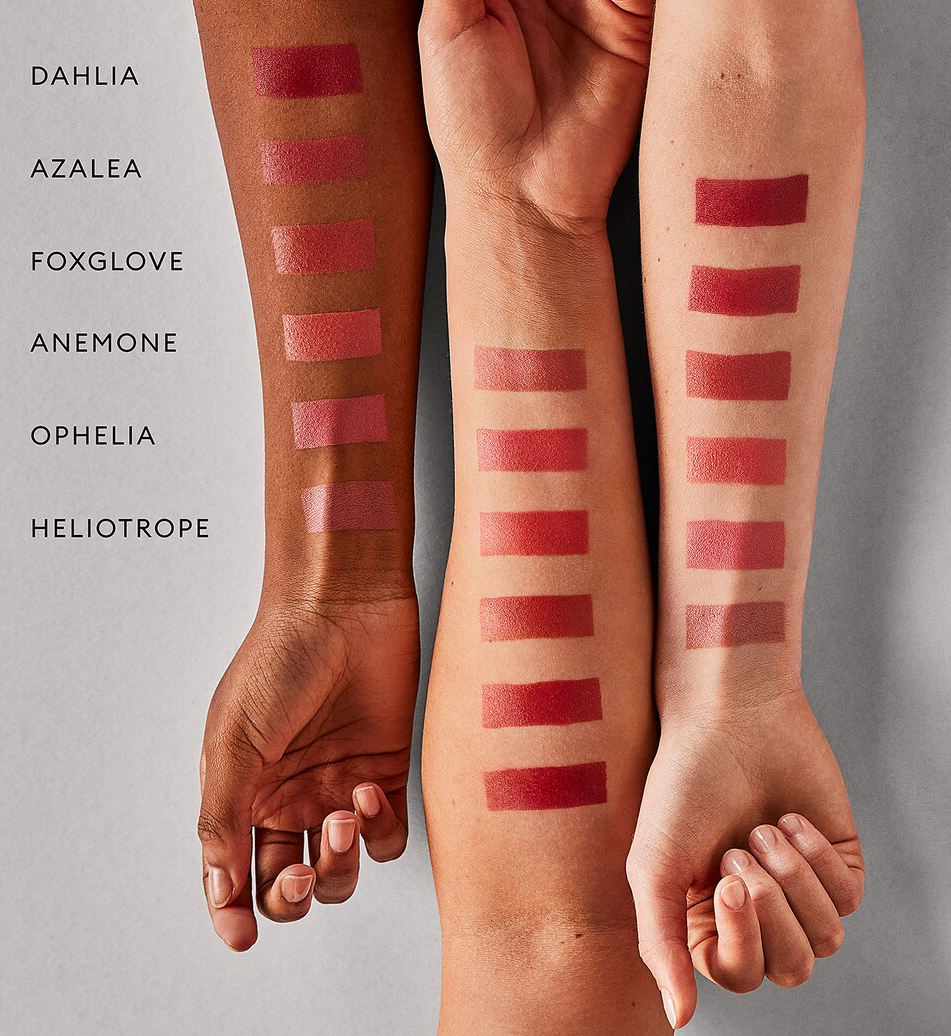
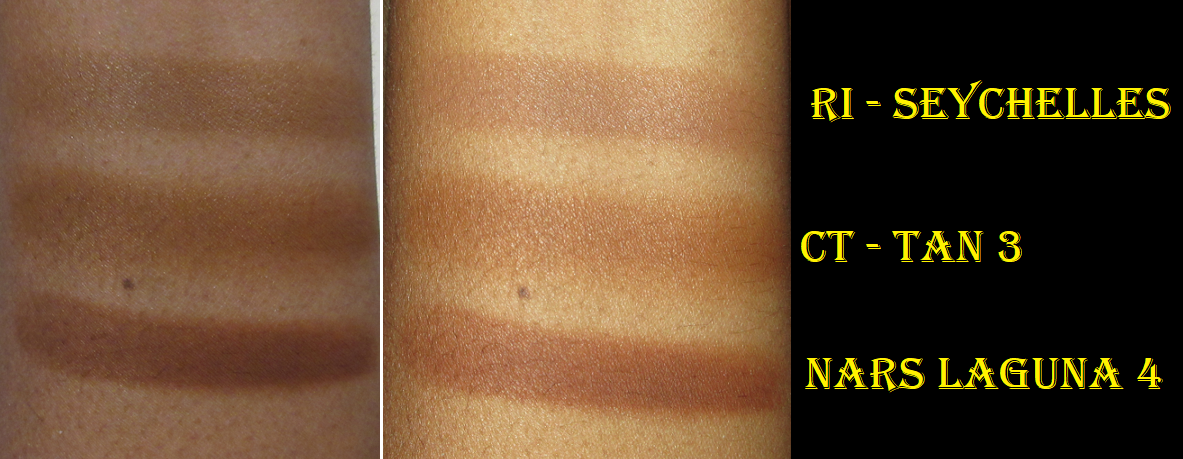
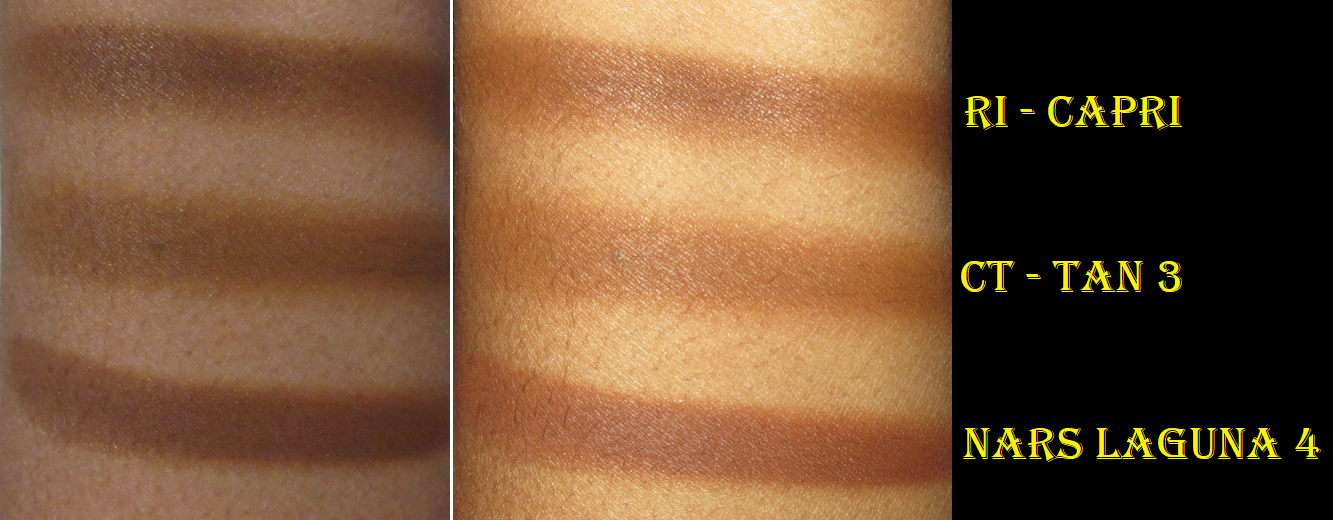
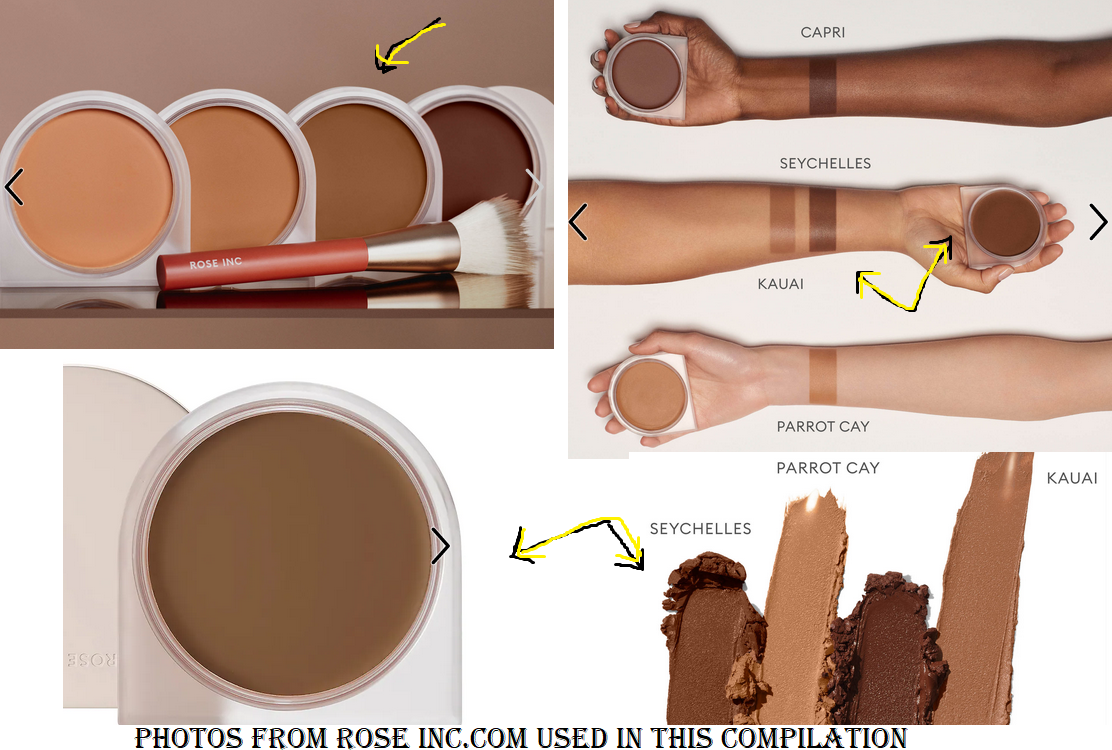
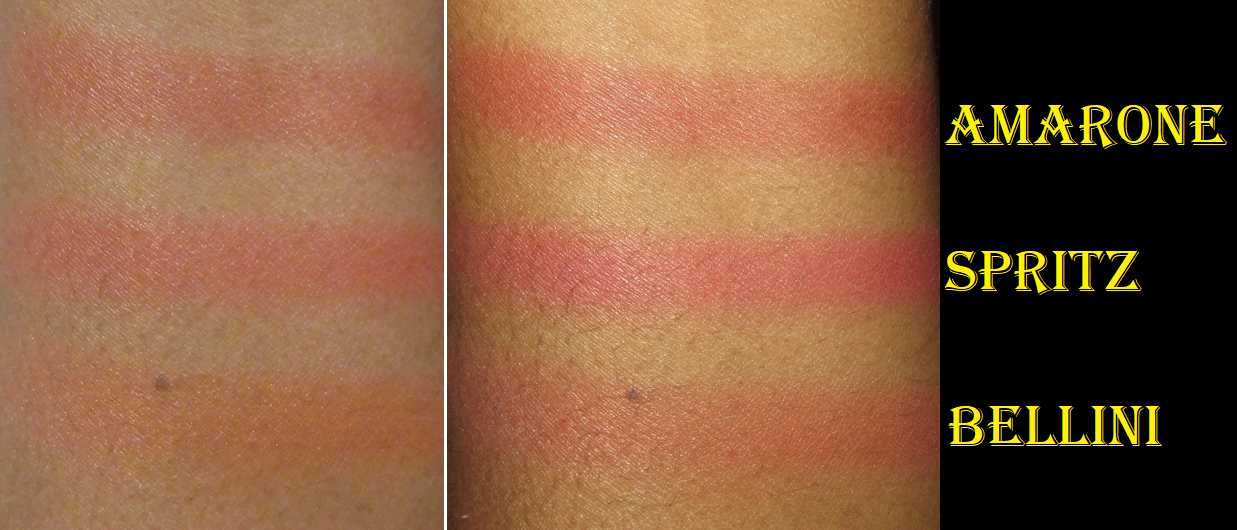
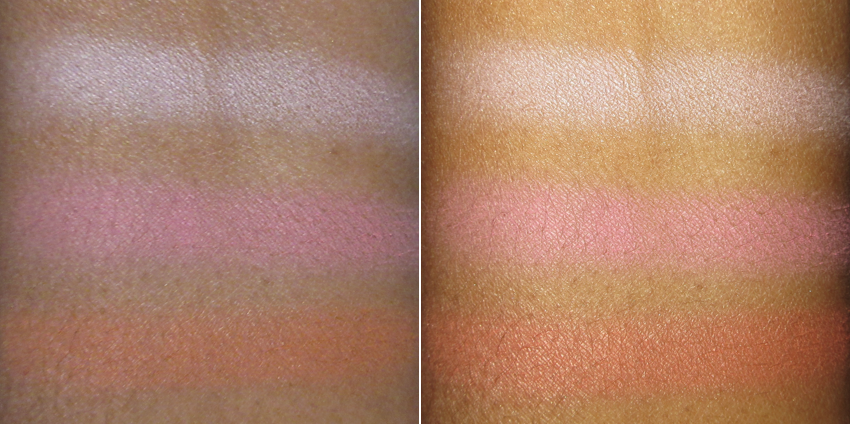
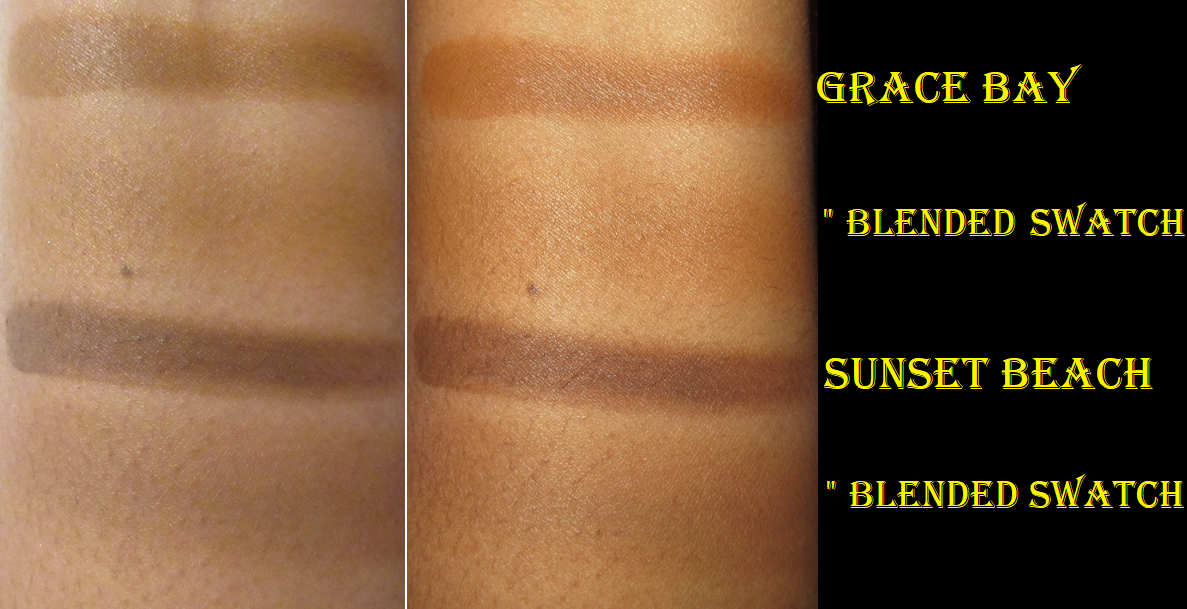
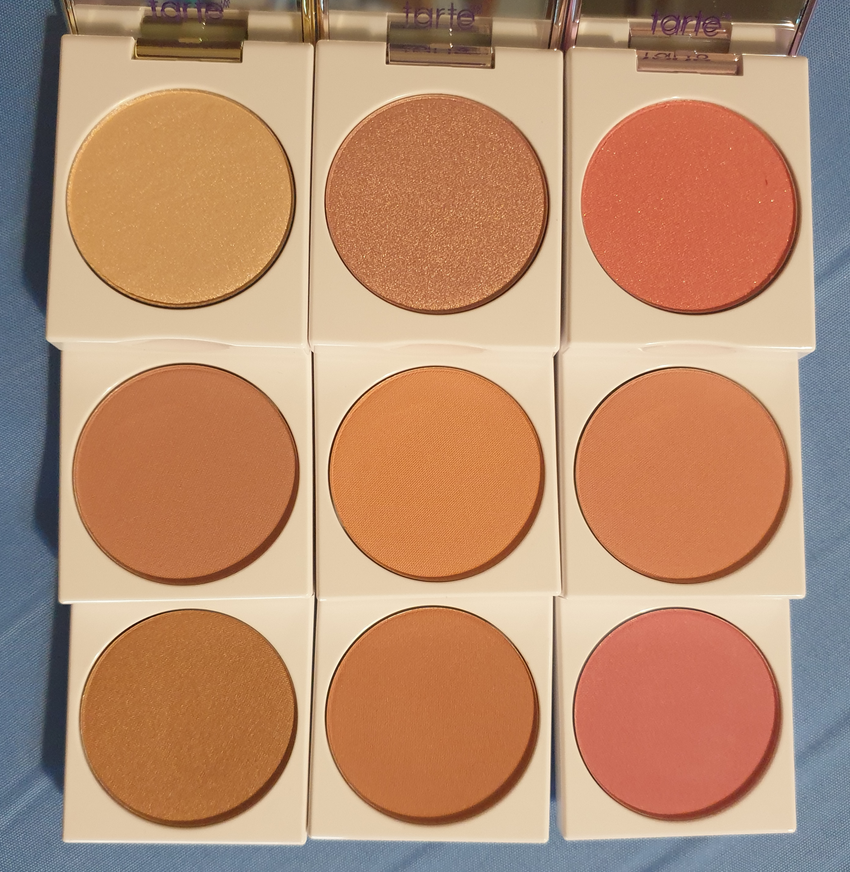
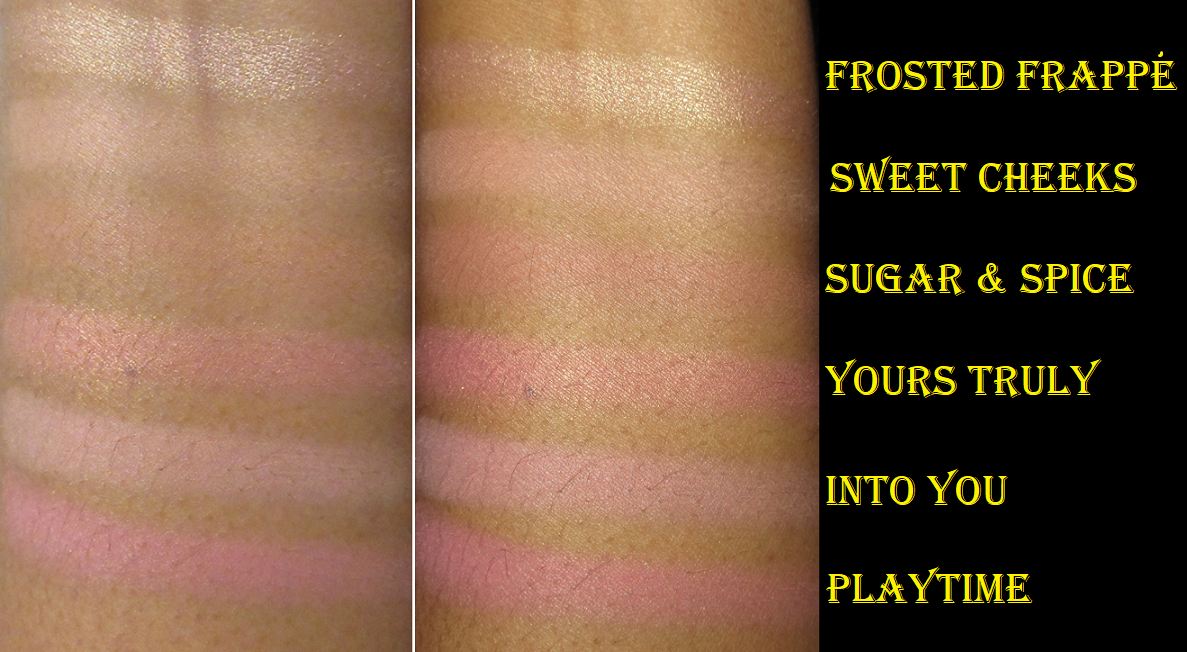
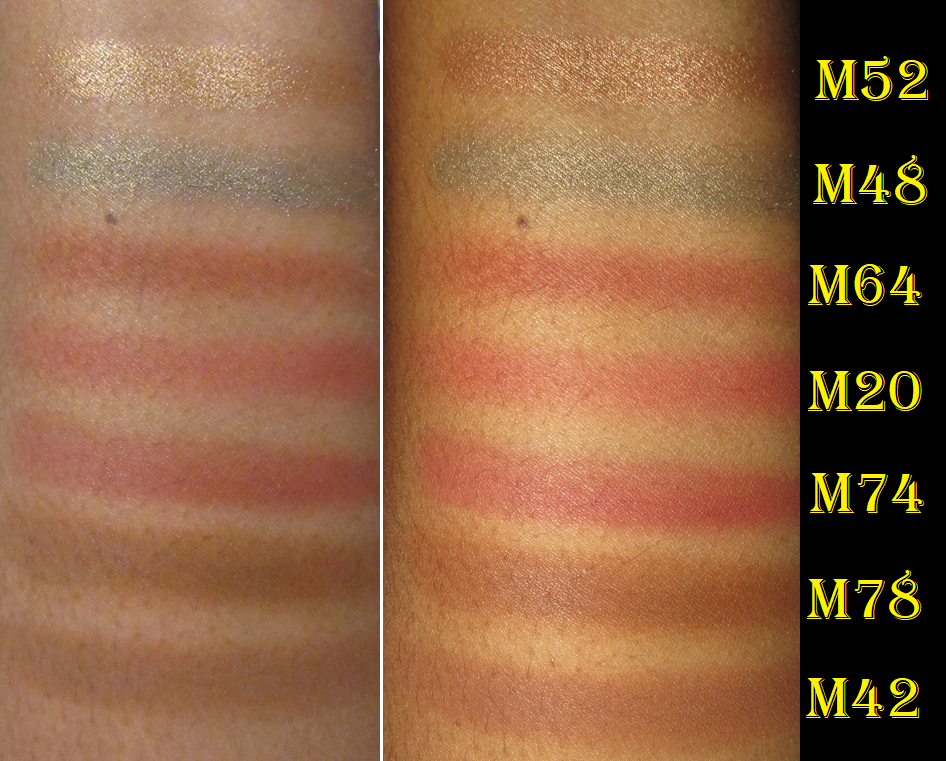
Since the idea is to not be wasteful, choosing the best suiting product based on the brand’s photos is crucial. There is quite the difference in depth between how the color appears in their pans versus those arm swatches, and especially depending on the model bearing the swatches as well. The way these shades ended up looking on my skin was represented the most accurately on the tan (dark-tan) model across all formulas. I wanted to mention this for those who are around my skin tone and may have been wondering whether the model closest to our skin tone does the best job indicating how it will look on us or whether the swatches have been manipulated to look more saturated than they actually are and therefore we should make purchasing decisions based on the first model pictured below. I’m happy to report that MOB Beauty did a great job accurately reflecting the swatches, unlike many other brands that want to pretend their shades look the same even on deep skin and digitally manipulate the photos to prevent showing how ashy they’d be. So, I recommend feeling free to base purchasing decisions based on the swatches of the models closest to your skin tone.
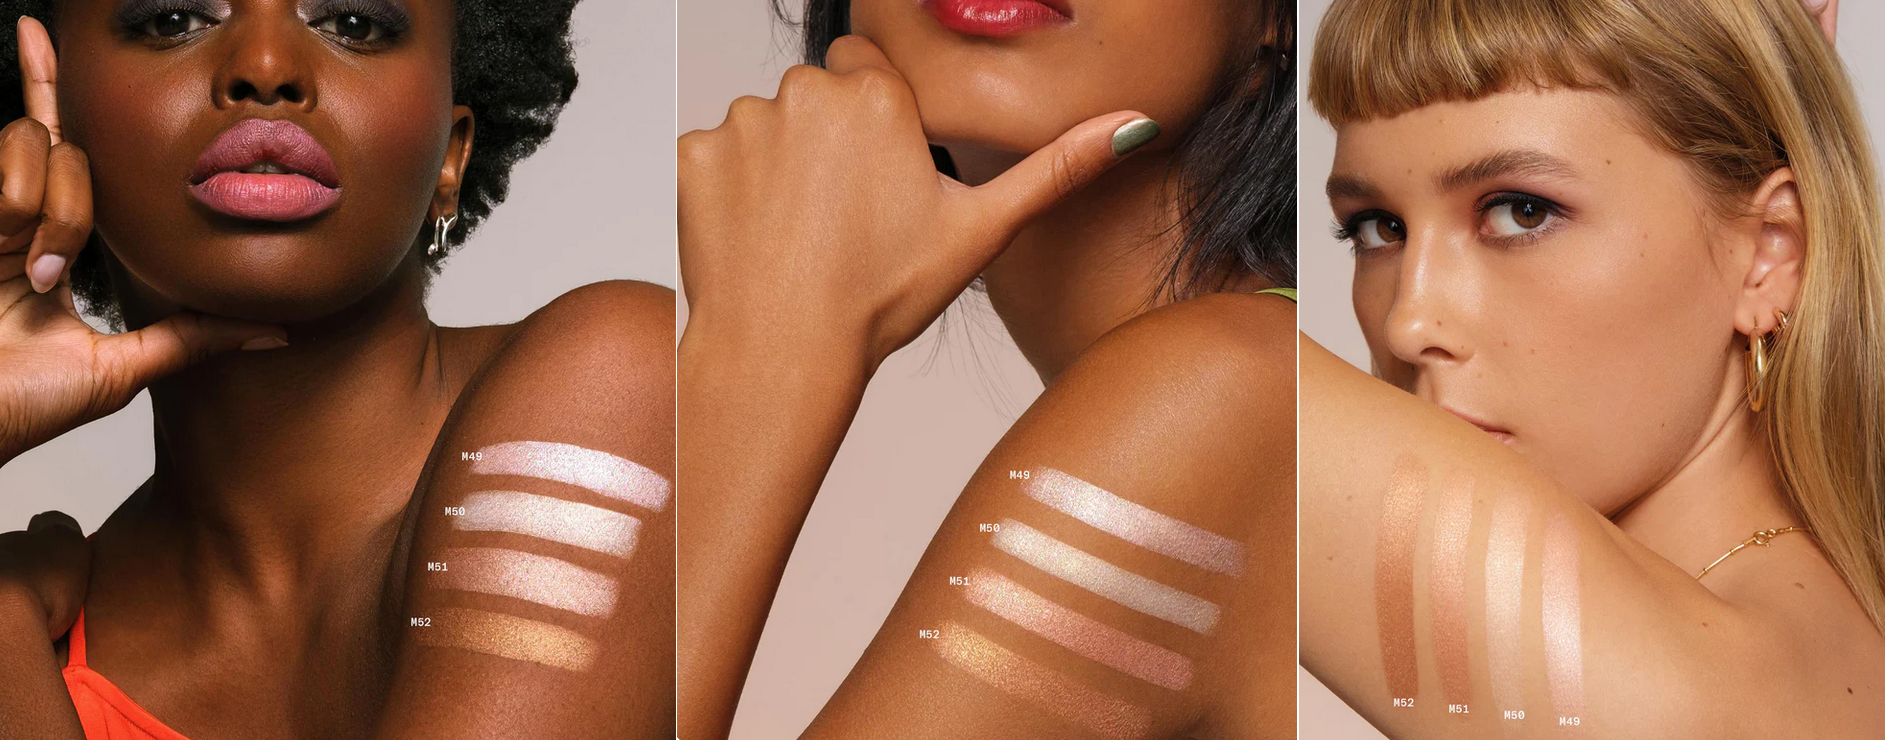
I still found it useful to compare how the swatches looked on the other models in order to figure out what the starting undertones and depths were, and see at which point the shades start to look distinctly different from each other. For example, as seen on the third model, the M49 and M50 highlighters are the same depth and only differentiated by M49 being a pale pink and M50 being a pale gold. So, on tan skin and darker, the different undertones make no difference and those two highlighters will essentially look the same on the face. On the first model, the rose-gold M51 being a couple of shades darker than M49 still looks essentially like the other two highlighters, but on me, if I wanted all different looking highlighters, I would need to choose between M49 and M50 for the first option, then M51, then M52. If I removed the choices that look different in tone, but would look too stark on me, M51 and M52 are realistically my only highlighter options.
I continued this practice for each product. I looked at how they are supposed to look on the third model, where they start to look ashy or at least too similar to each other on the first model, and then narrowed down which of those remaining options looked prettiest on the second model.
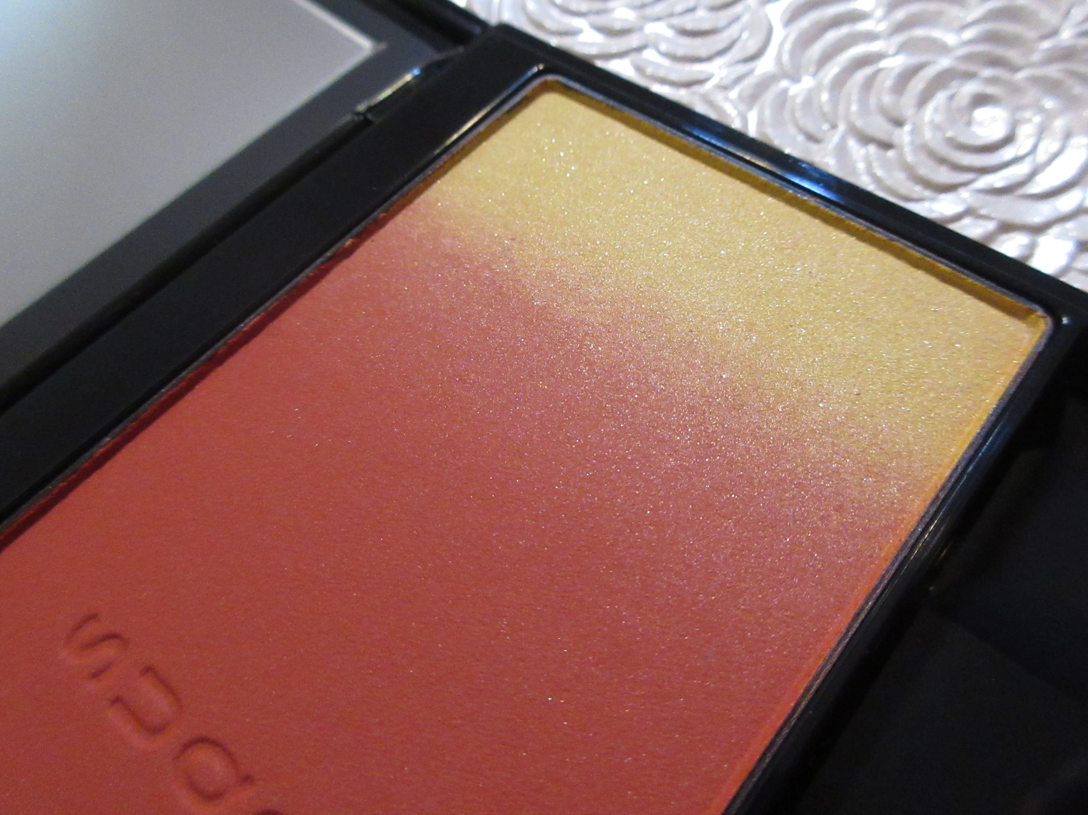
Cream Clay Formula
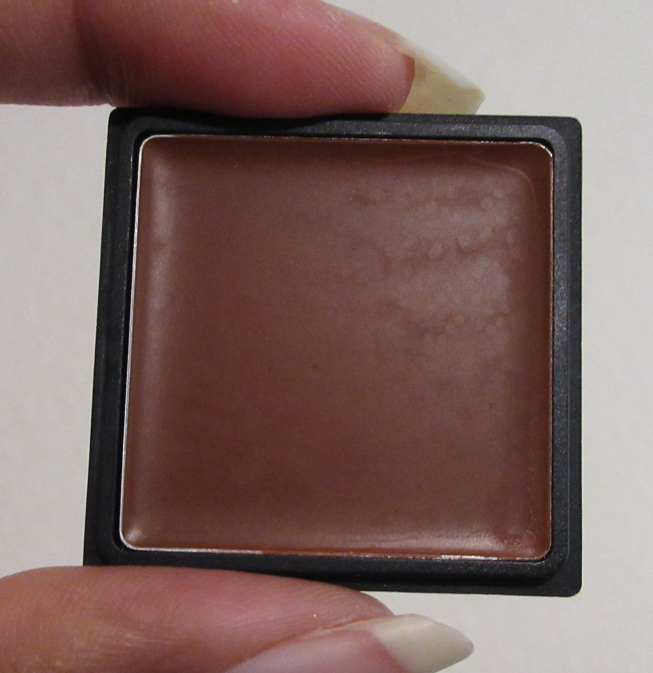
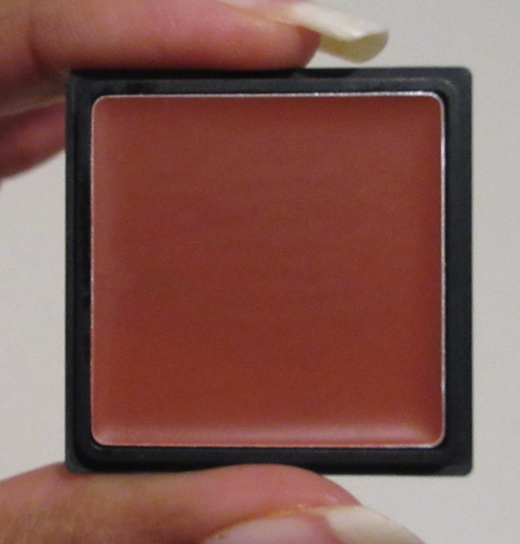
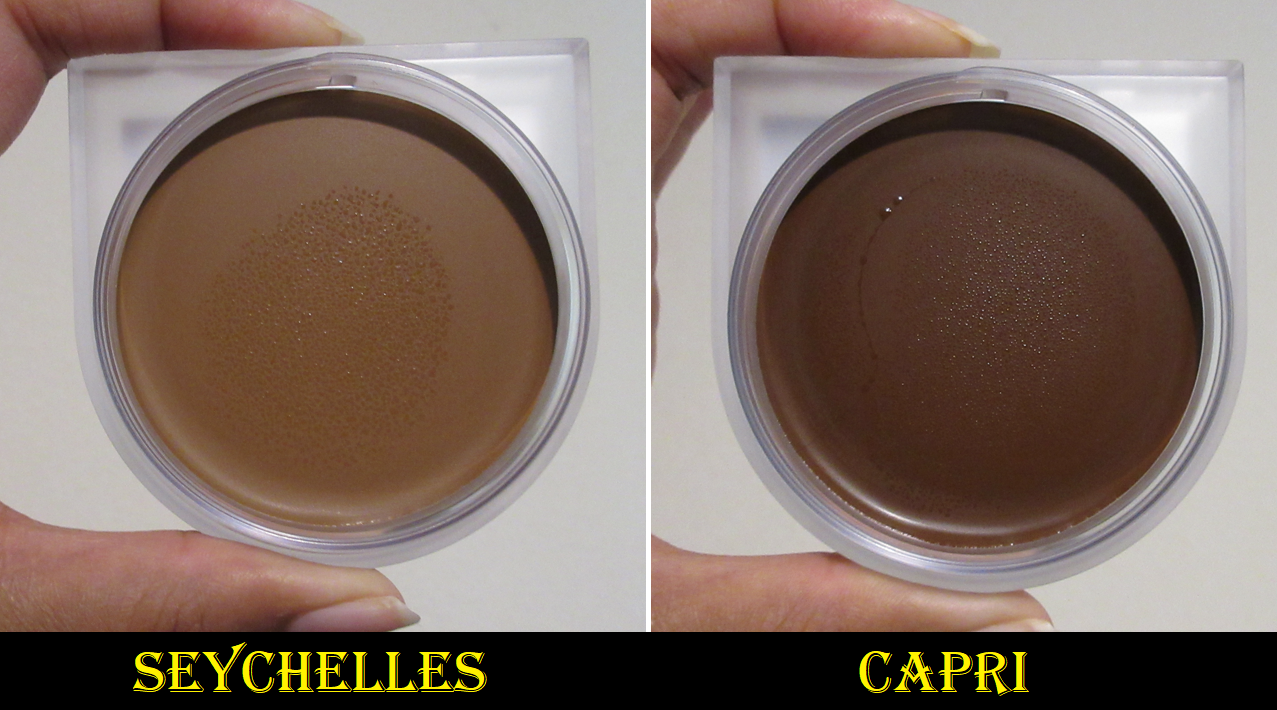
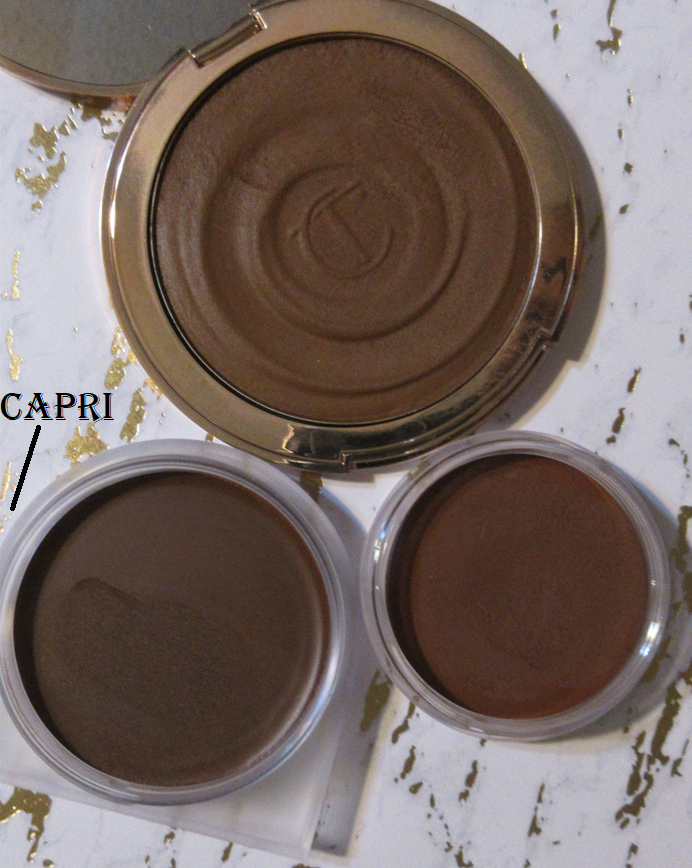
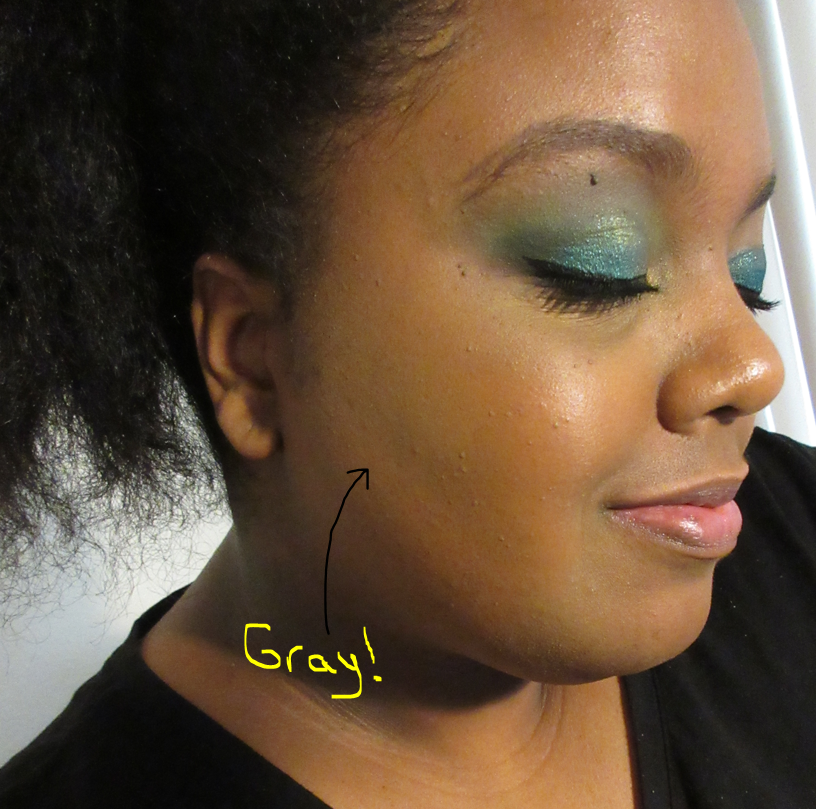
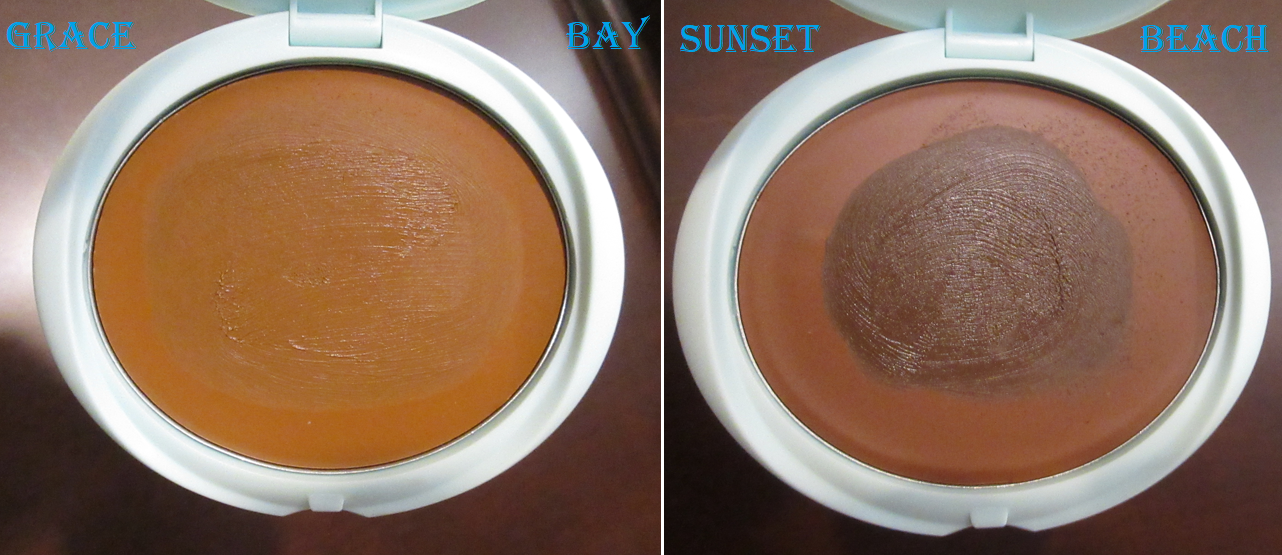
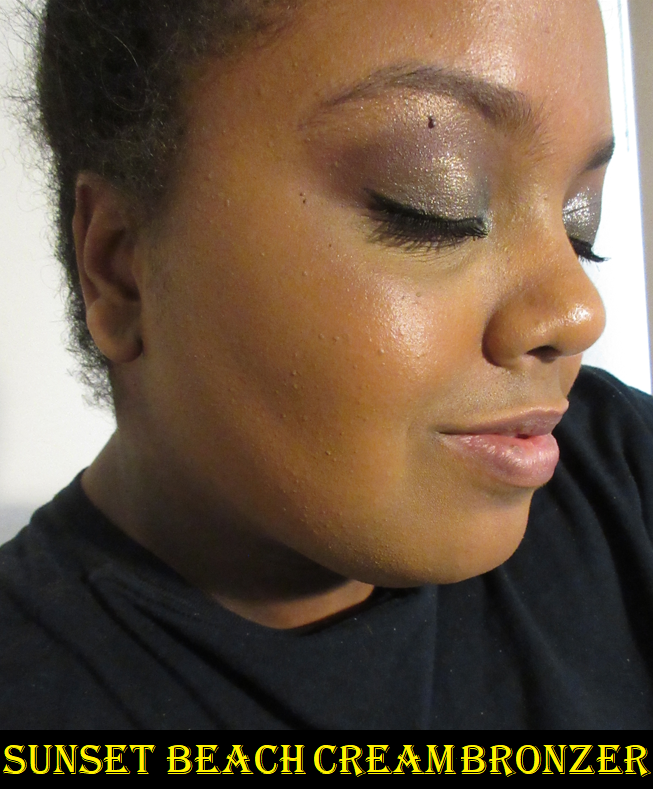
As seen in the photo of the Cream Clay Bronzer in M78 on the left, the creams look as if there are bubbles under the surface, but that top layer is completely smooth. Since this looks like it was poured in while hot and then set, it’s possible those are air bubbles and not an indication of anything weird happening while in transit. Or perhaps they’re just condensation marks from it starting to sweat and melt in those hot delivery trucks, but then it cooled and imprints of the droplets were left on the surface. An example of the sweating is in the mini samples section.
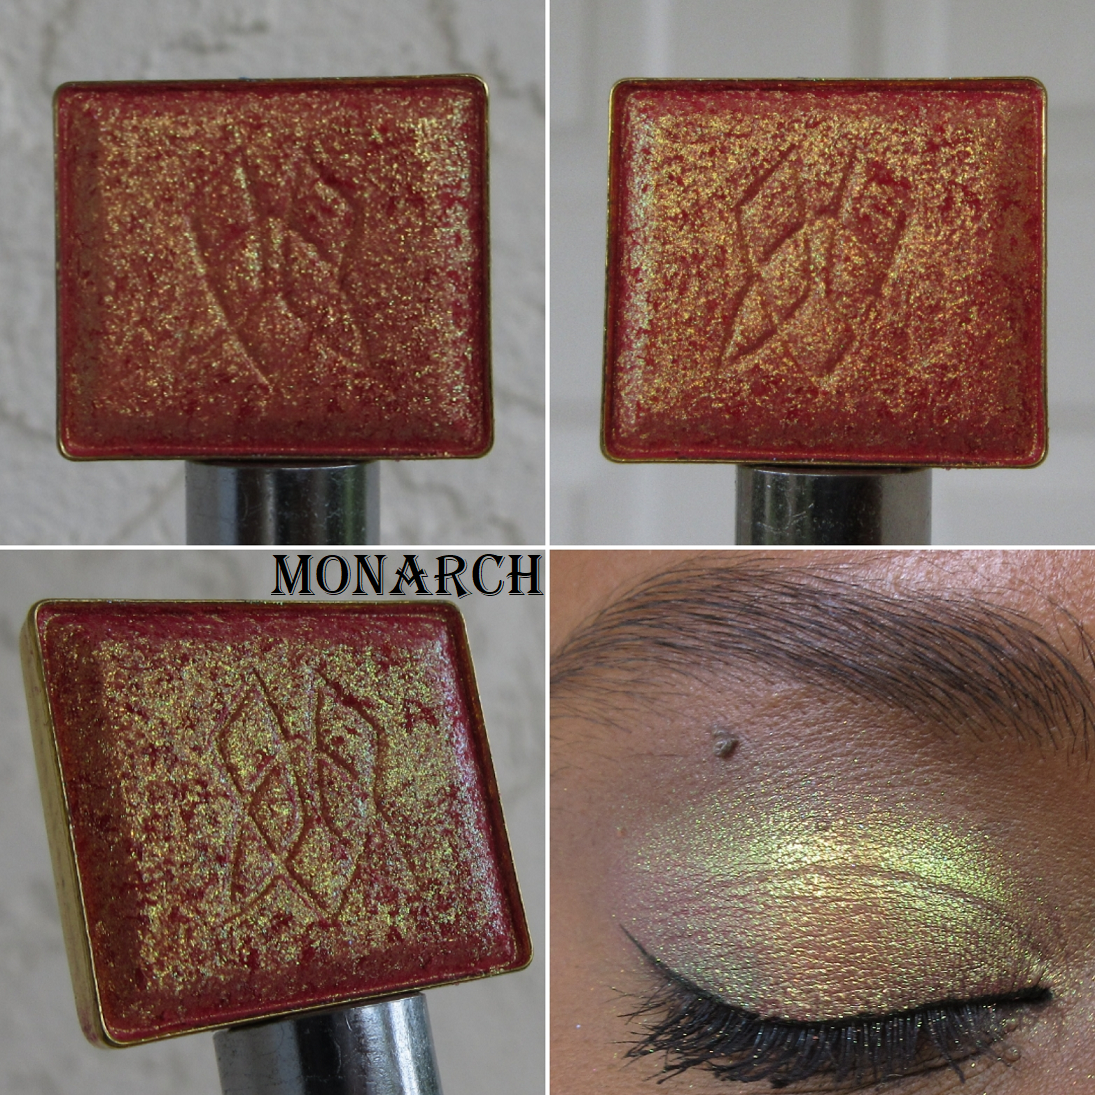
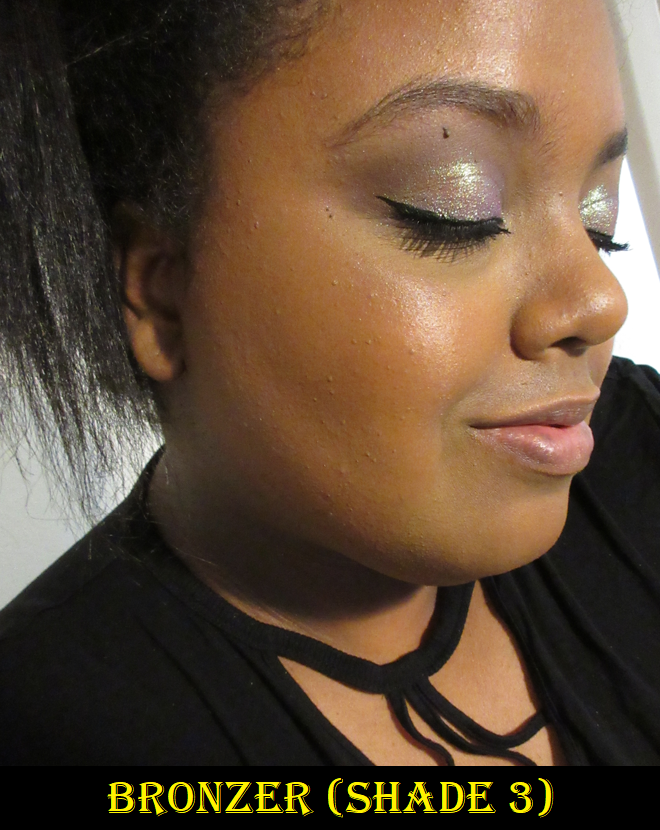
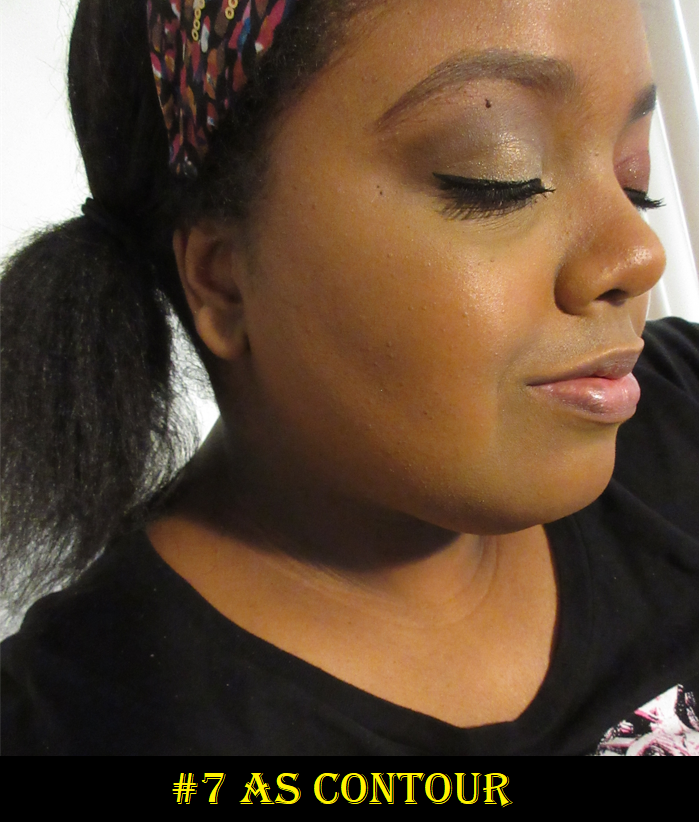
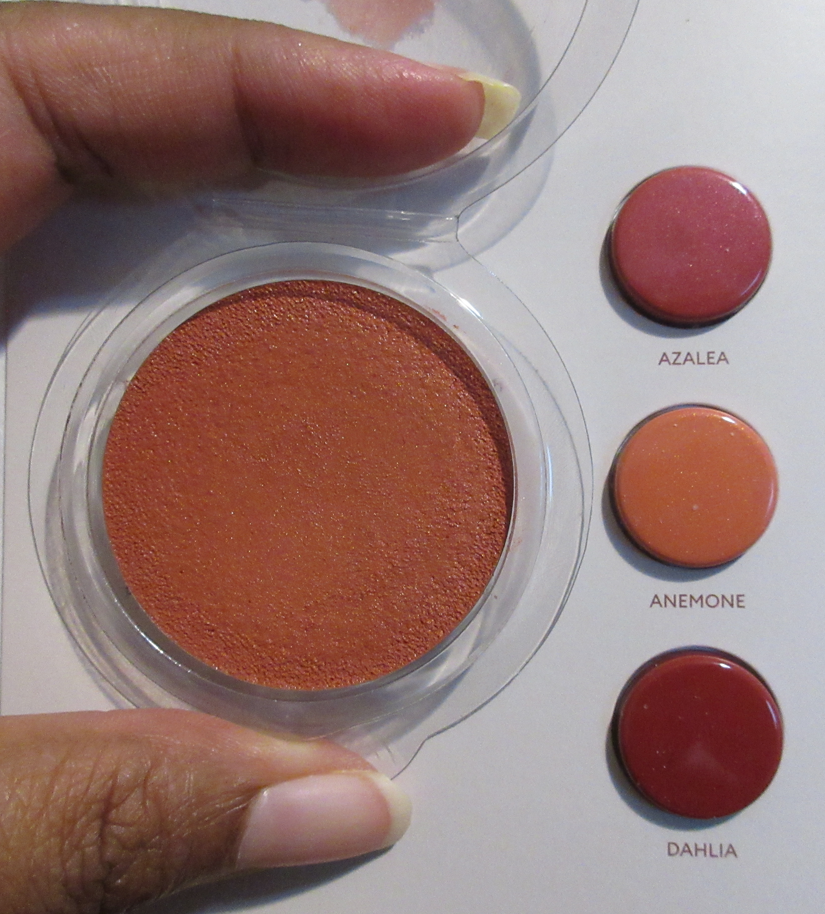
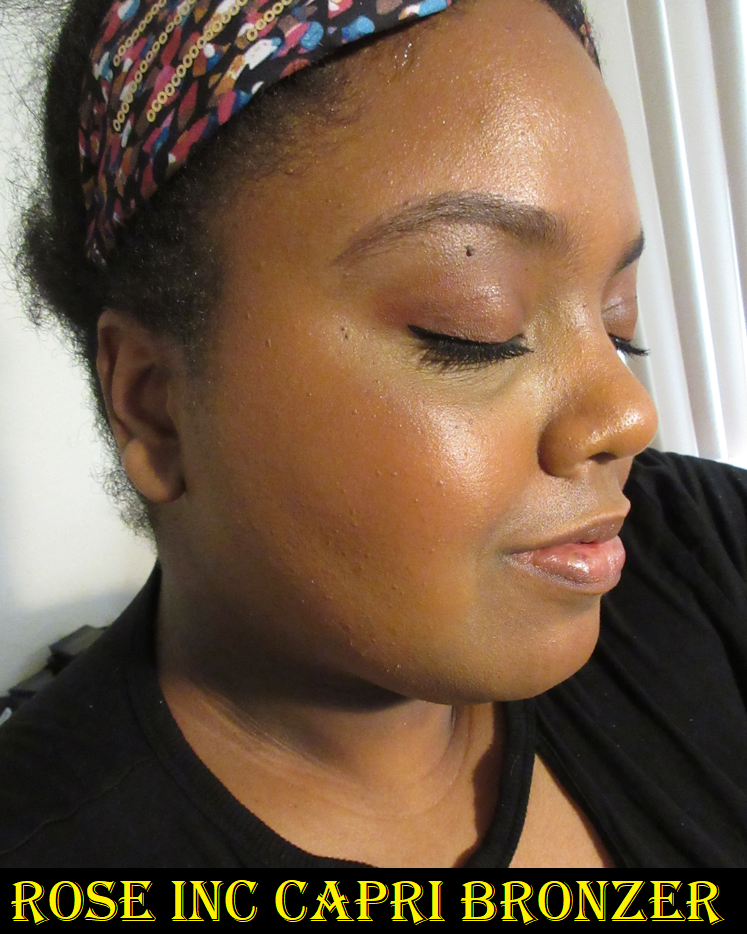
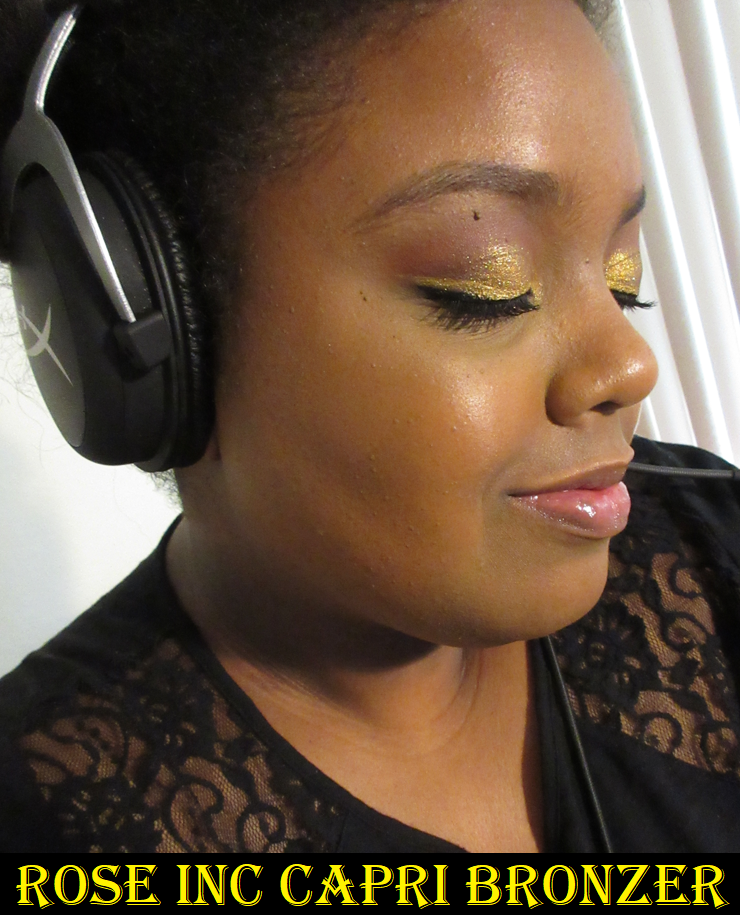
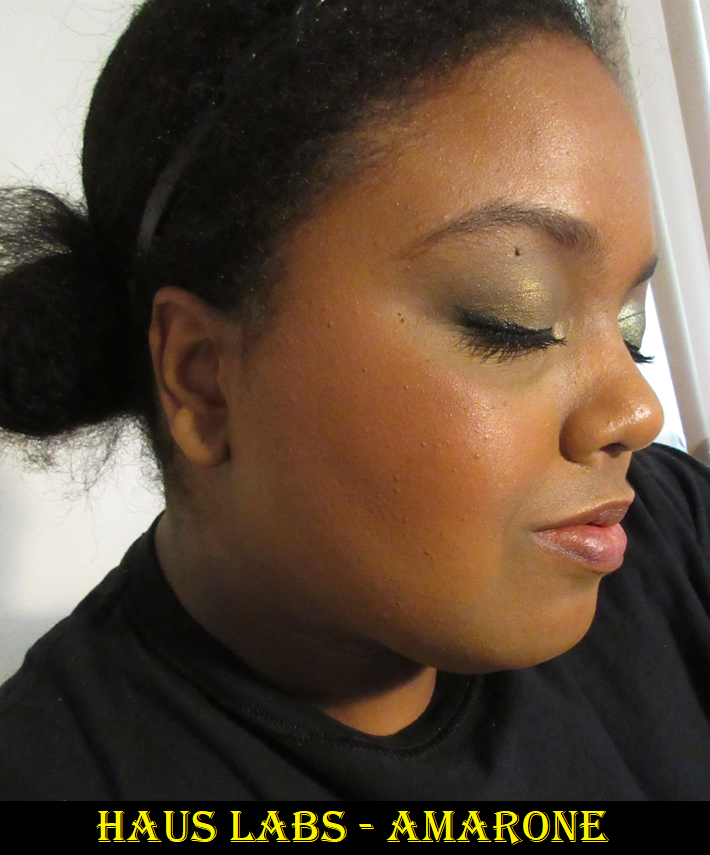
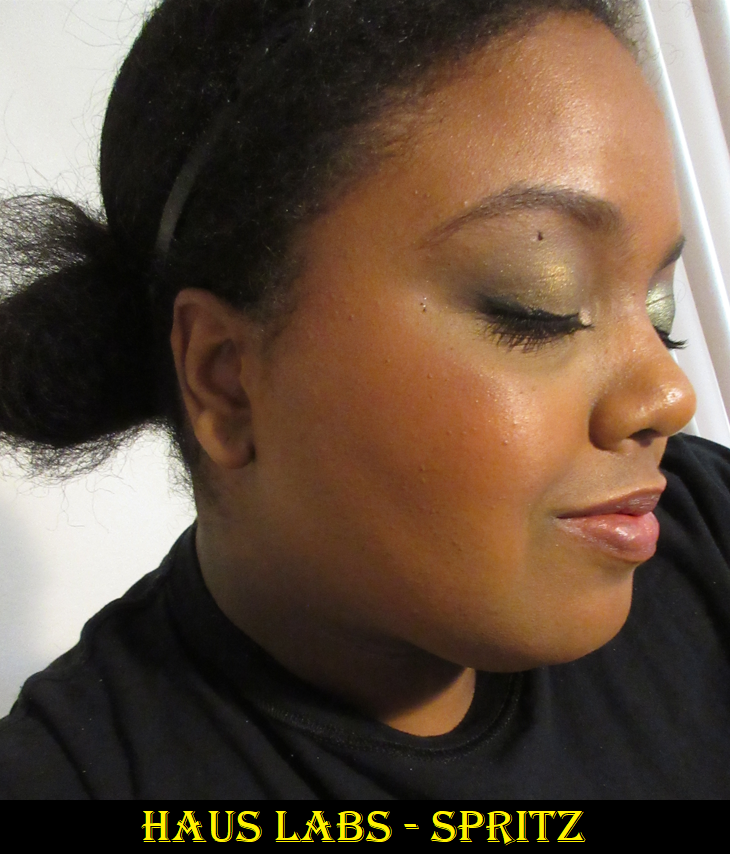
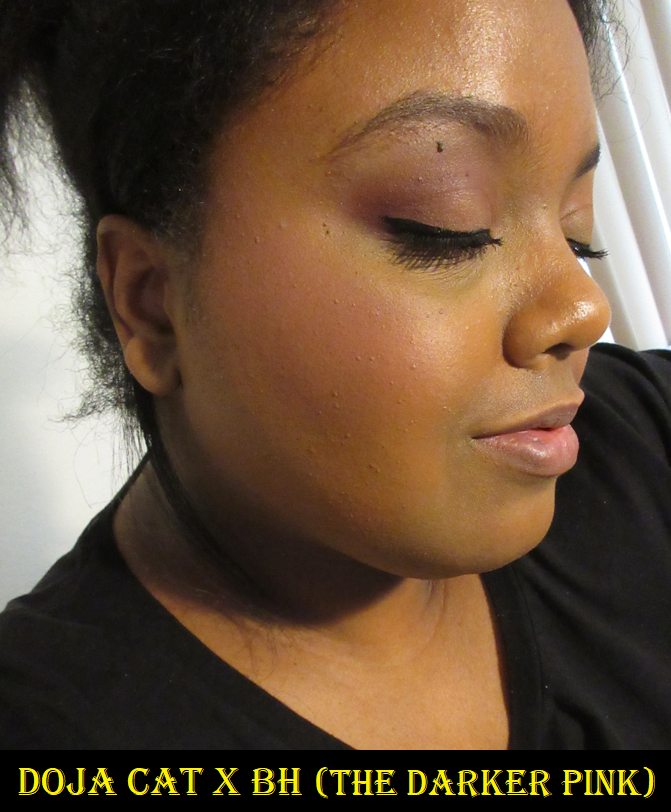
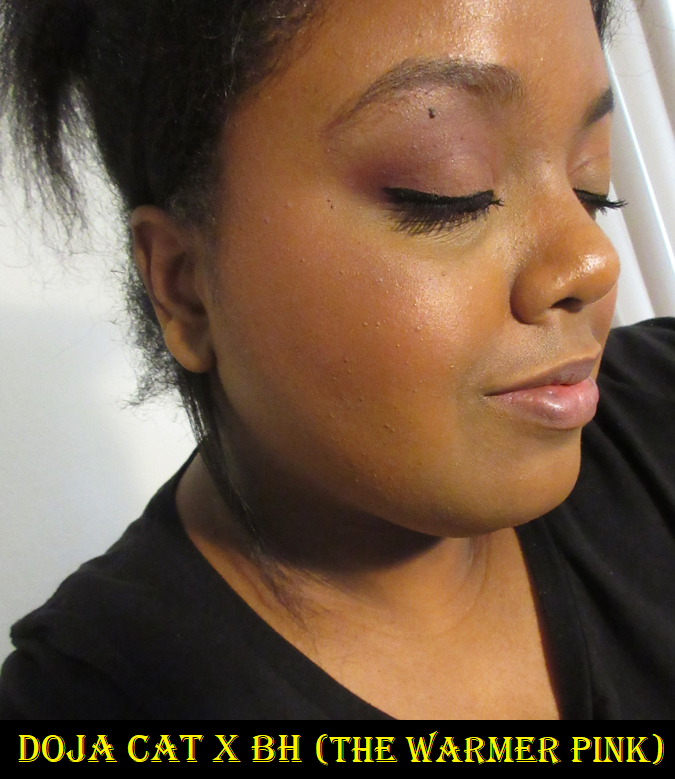
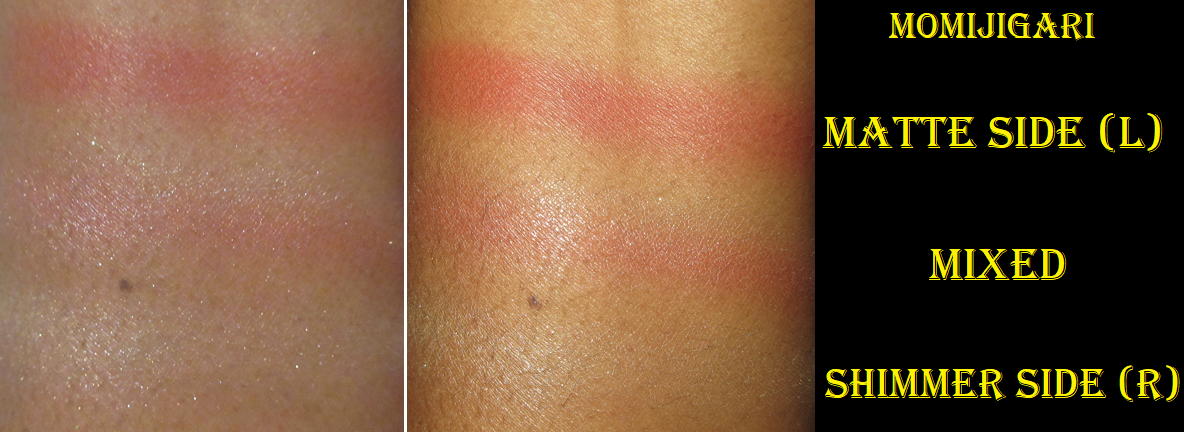
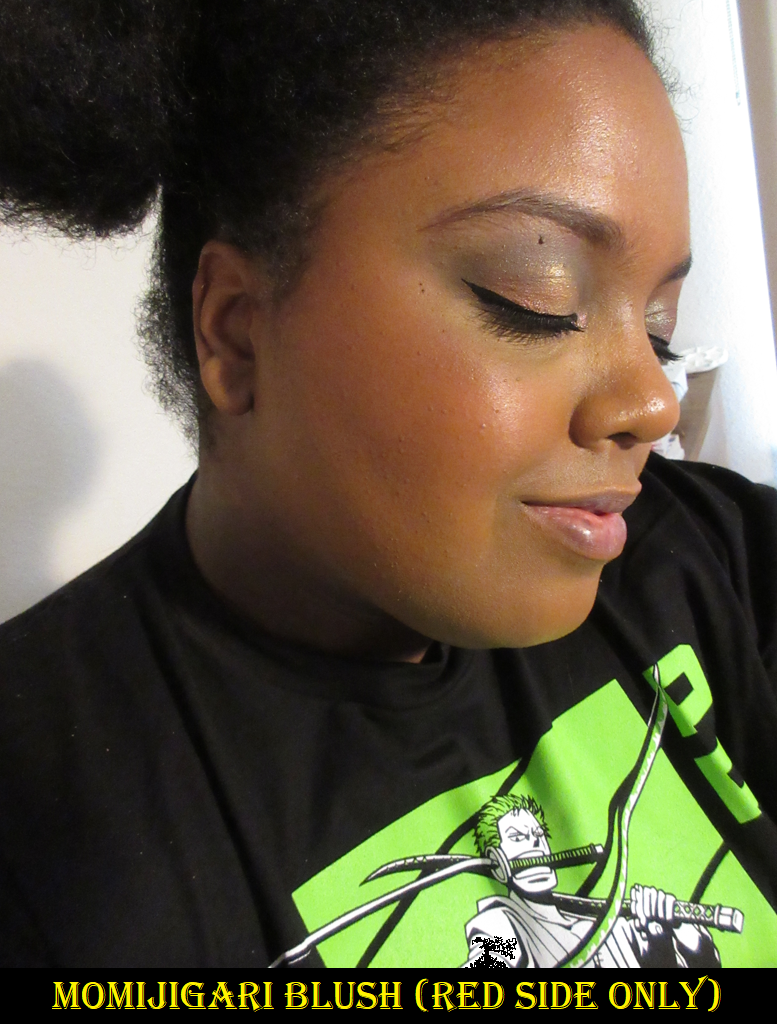
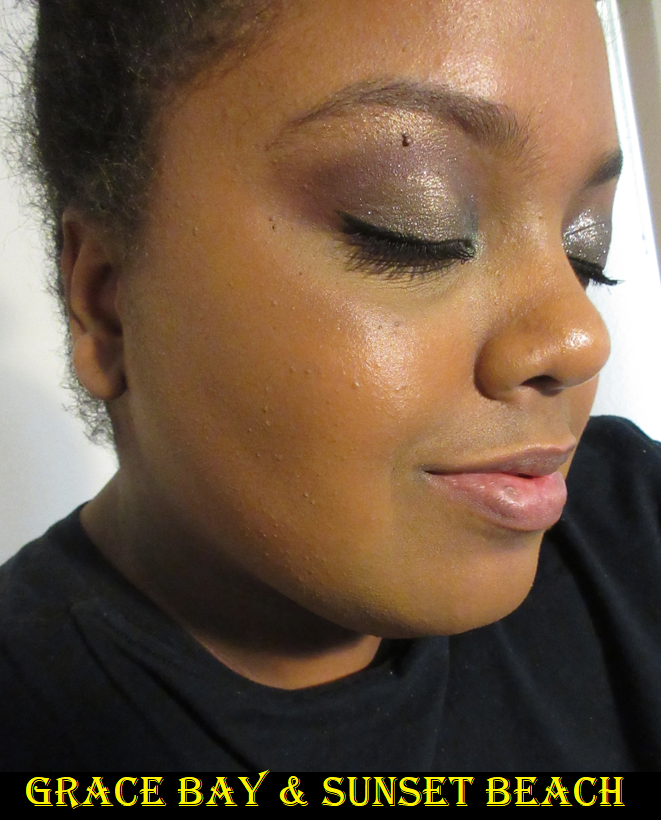
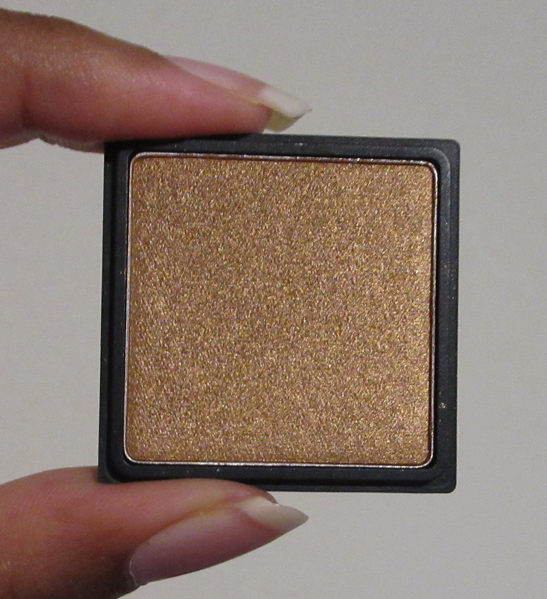
When it came to selecting a bronzer, there were a completely different set of models, none of which were anywhere near as dark as me. However, based on the arm swatch photo, M78 and M79 looked like they would work for me. They are the same depth, so it was just a matter of an undertone difference. M78 was described as a “rose chocolate brown” and looked warm, but leaned closer to neutral than the “espresso brown” shade M79, which looked redder. M78 was certainly the better option because I would not have wanted it any warmer.
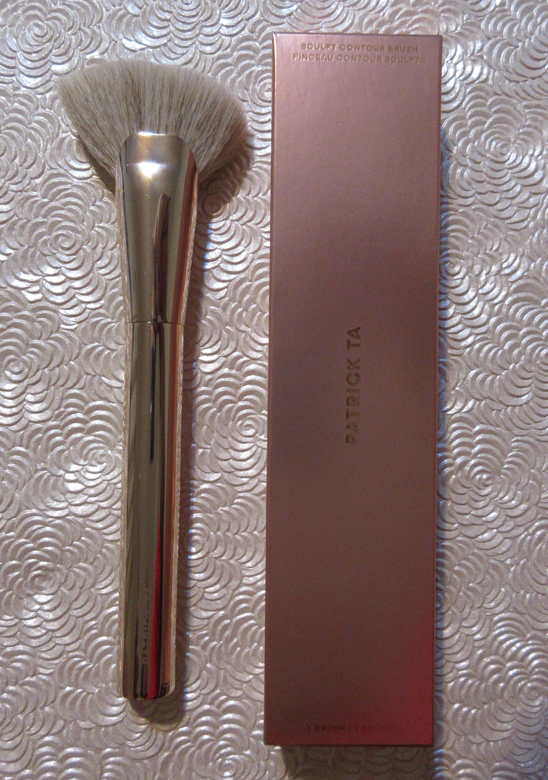
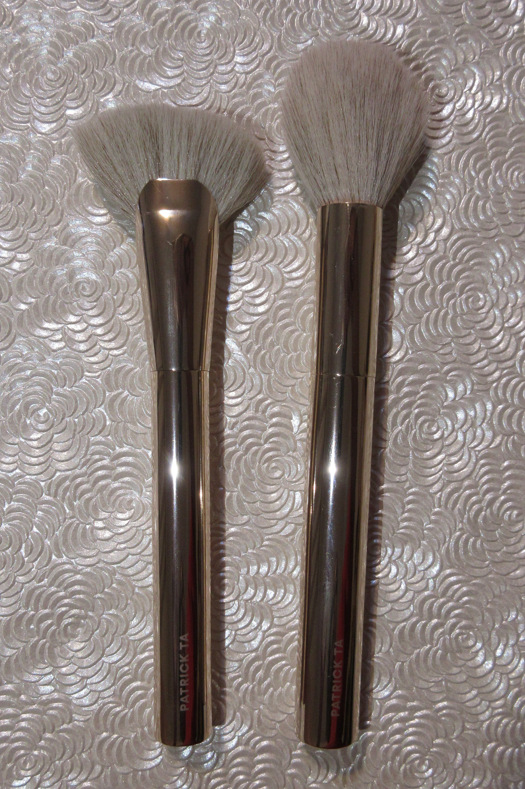
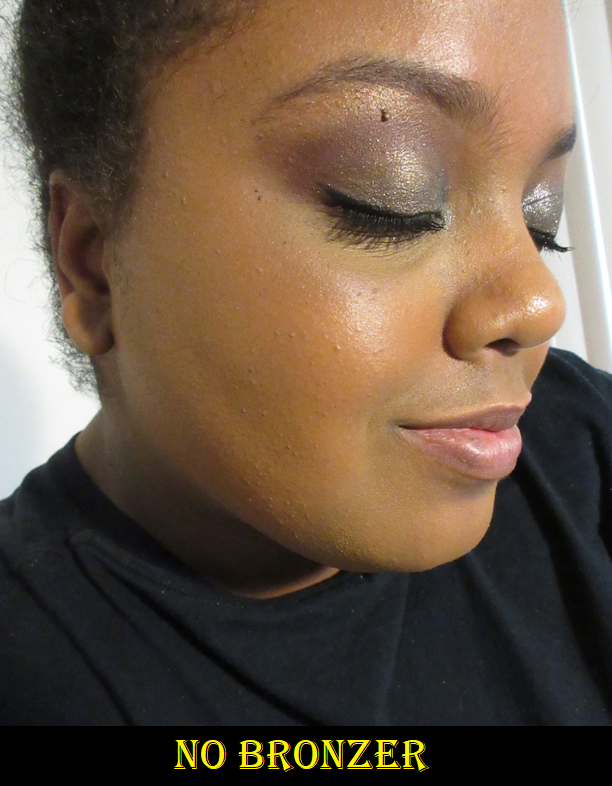
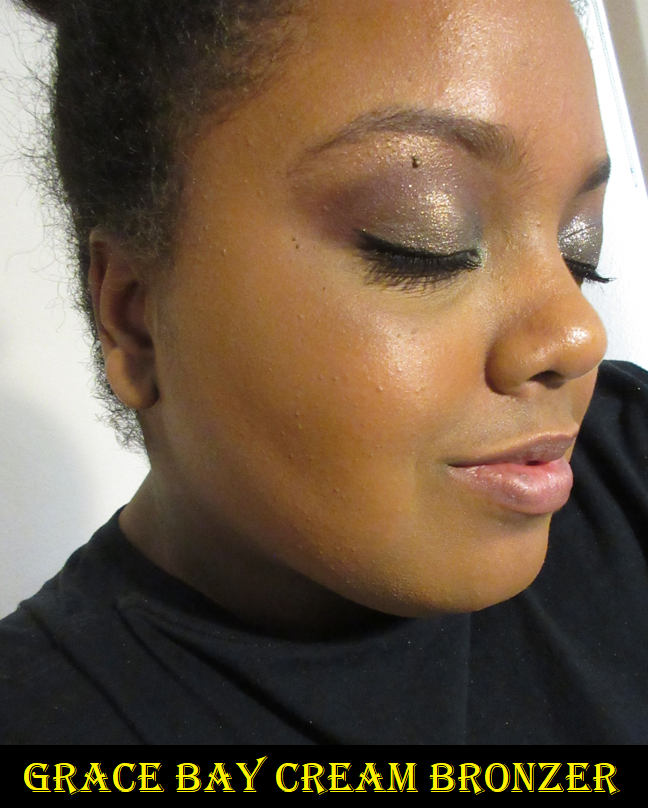
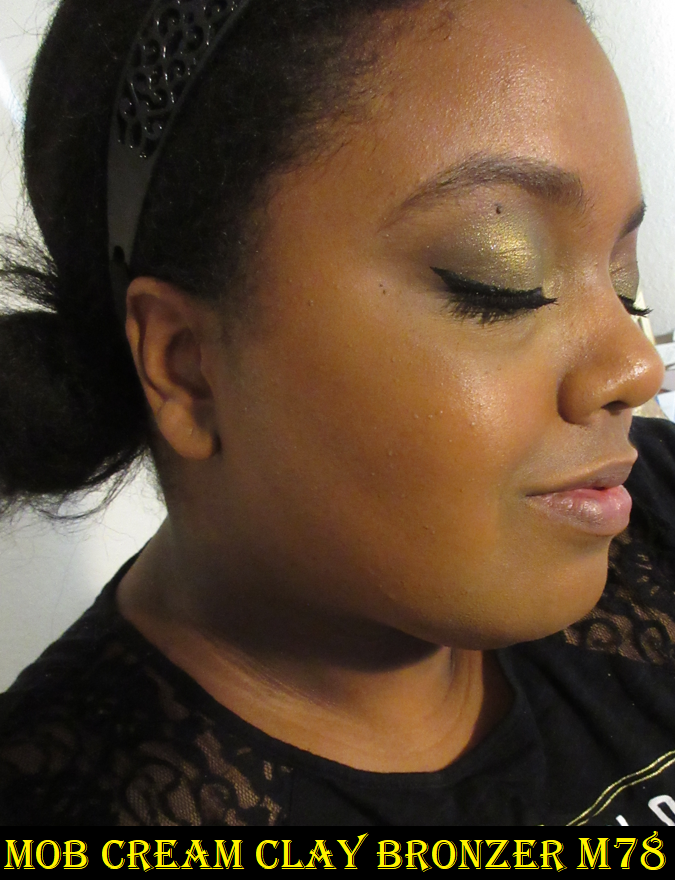
It shows up easily when I apply it to my skin, but it sheers out a fair amount as I blend, so I have to really load on the product to get the impact level that I like. In addition, my dry skin soaks up these cream products. If I try to keep the bronzer looking subtle, it’ll be significantly faded within the hour. So, I have to actually over-apply in order to get it to last on my face. The nice thing is that if I can accept it looking heavy in that first hour, I know it’ll at least look normal the rest of the time after that. It will still fade as the day goes on, but at least the fading is at a slower pace and will still be there at least 8 hours. I have tried so many times to wear this over a very moisturized face and different primers, but it still does this. For that reason, I use this product the most with my Patrick Ta Contour Brush because I can load it on and blend it out quickly. It essentially allows me to use this cream bronzer the way it was intended. My usual Sonia G Mini Base is actually too good with the blending. In the amount of time it takes for me to keep building up layers with that brush, it’s trying to set and then I can run into the issue of it starting to look a little patchy. And when I say “set” I just mean setting into place, as it doesn’t fully dry, but it’s at least not sticky. It just gets a little less easy to budge, but will still have some transfer. Applying powders on top hasn’t been successful in setting my face either, and my powders also make the bronzer and blush more subtle in the process. Sometimes I use the cream and powder bronzers together, but then I feel like that’s adding an extra step I wouldn’t have to do with the other products in my collection.
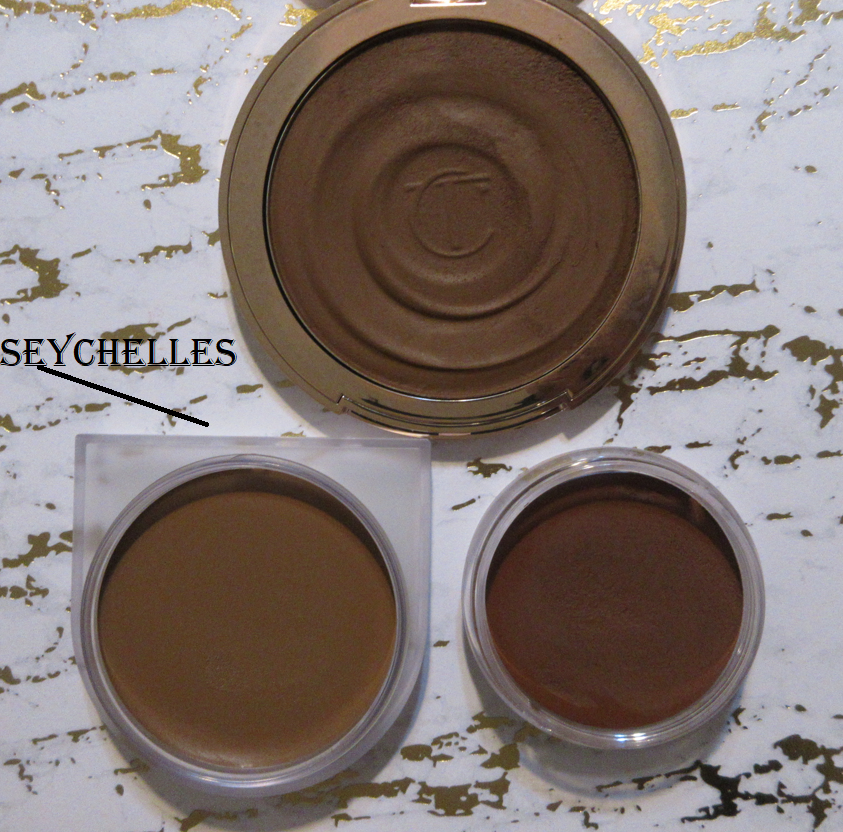
I like the tone of the cream bronzer and the ease of use with the right brush, but if I put the complication with my skin type aside, one of the things I find lacking is that the cream bronzer ends up looking matte even without being set with anything. I personally would prefer that if I’m bothering to use a cream product, I want it to look a little dewy or have a sheen. The glow of the product in the photo is literally a combination of my sweat and my semi-dewy foundation. For these reasons, my feeling about this product is that it’s just okay. The positives and negatives cancel each other out. I don’t feel any excitement when I use this, like I do with plenty of other cream bronzers I own. Also, this formula is the type that forms a little bit of a stiff layer on top between uses, which is why I mentioned it’s imperative to keep it away from air exposure as much as possible. It doesn’t cause me any problems using the product, but it makes the experience using it slightly less enjoyable. That top layer issue at least isn’t as thick as the Danessa Myricks Power Bronzer that I love can get though, so I give the formula some credit for that. Overall, this tends to happen with vegan formulas where the ingredients are what the company says are better, but something gets sacrificed, and for me it’s the experience when using it. It doesn’t have any wow factor for being extra creamy, leaving a beautiful finish on the skin, etc. I’m at least glad that the performance is solid. I think that’s what MOB Beauty was hoping to achieve the most, but there aren’t bells and whistles to go with that in my opinion.
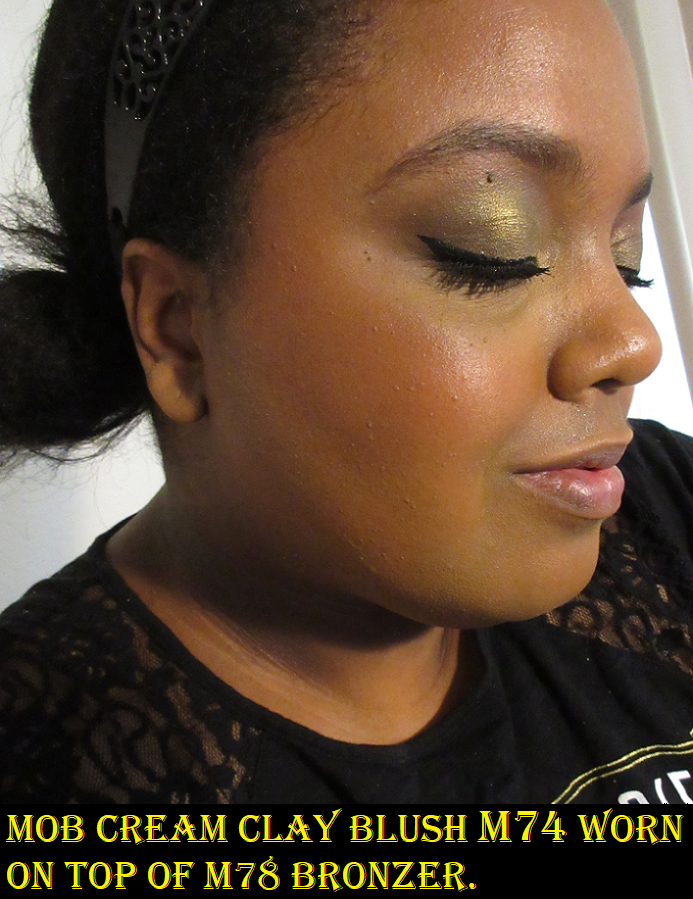
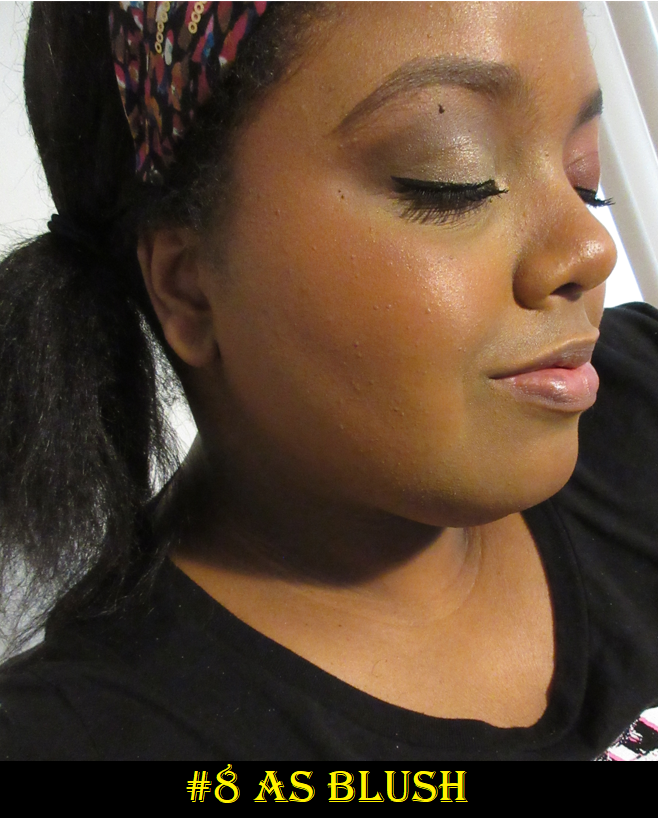
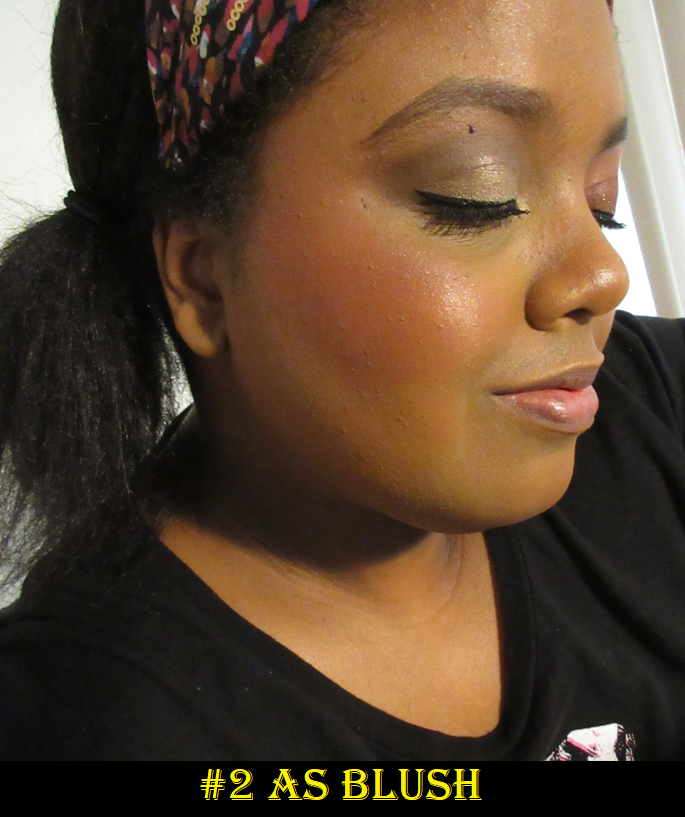
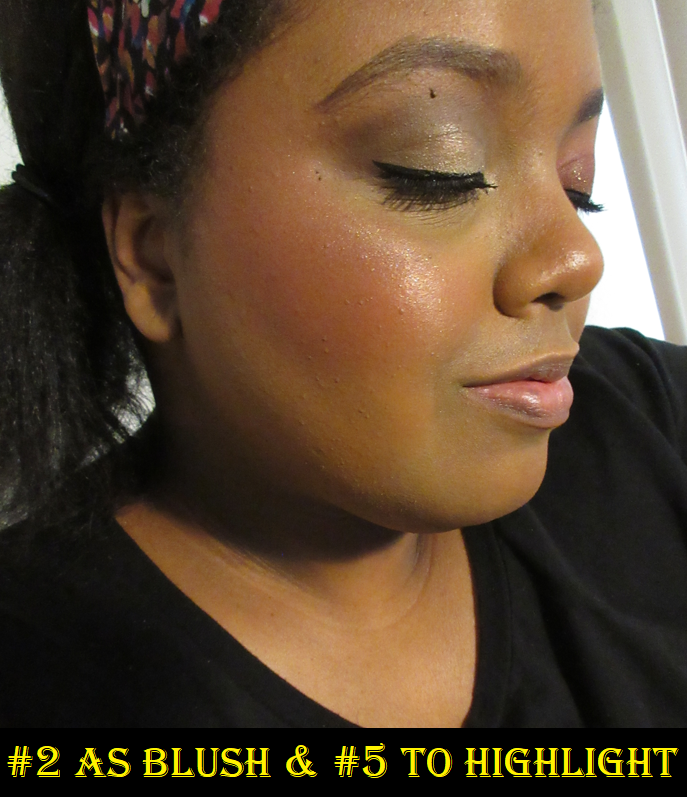
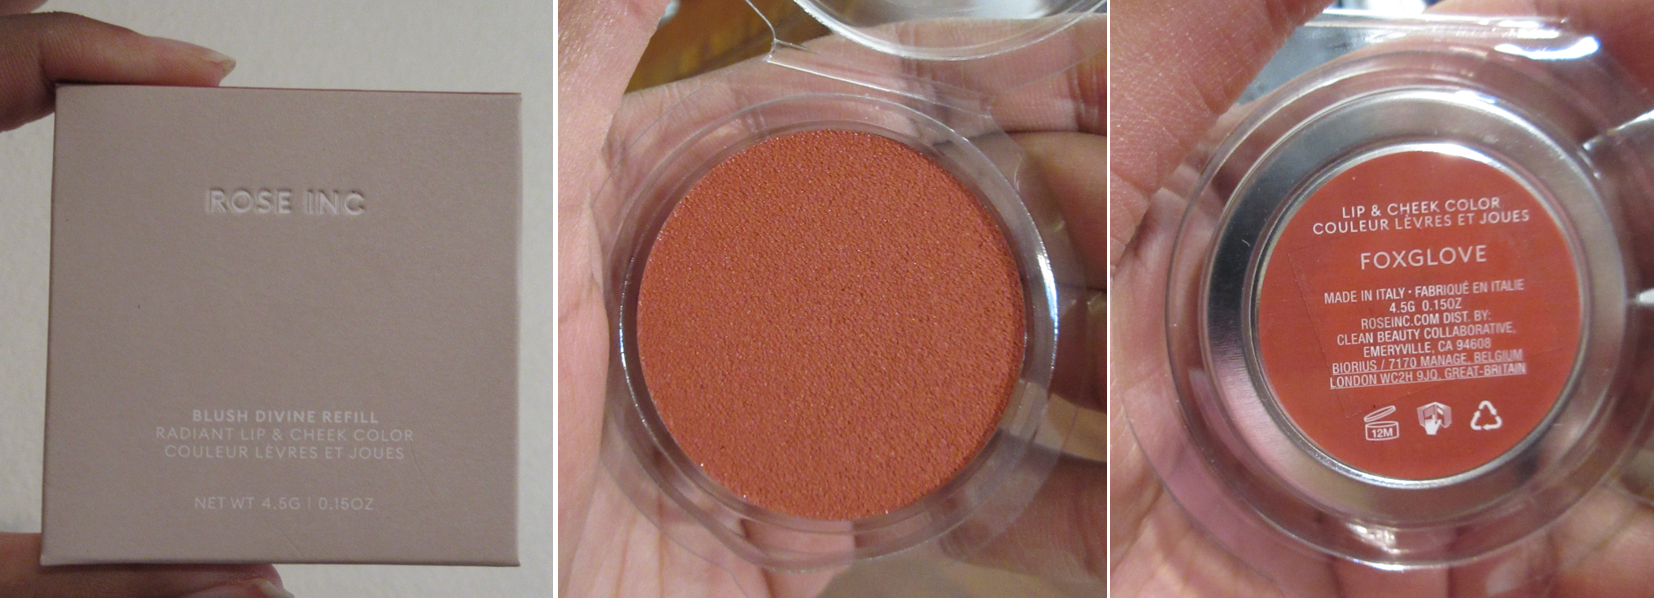
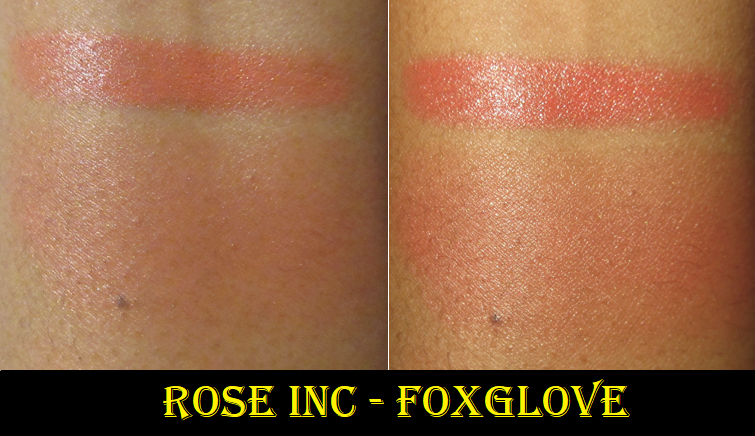
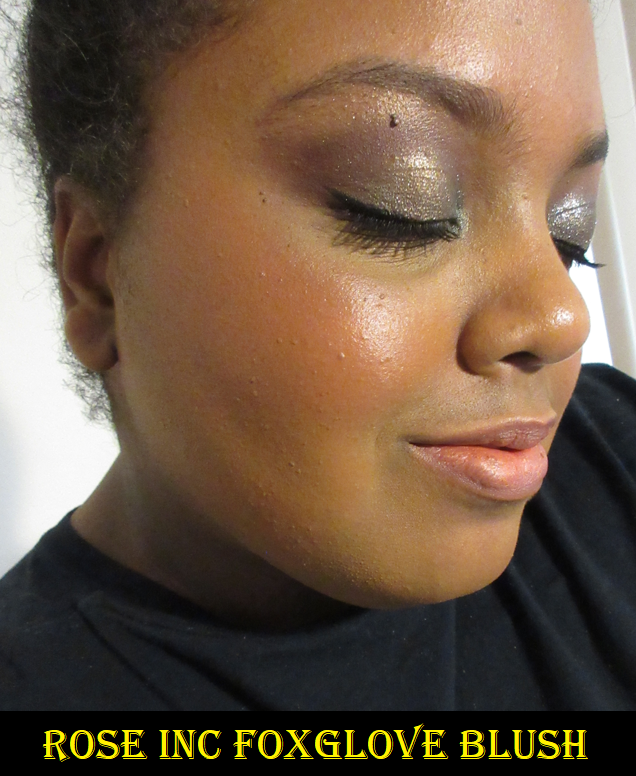
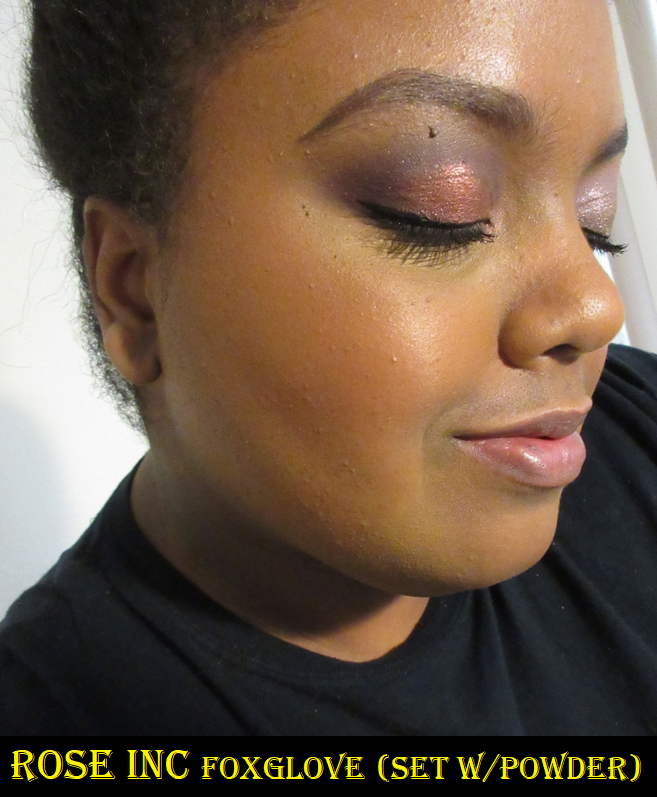
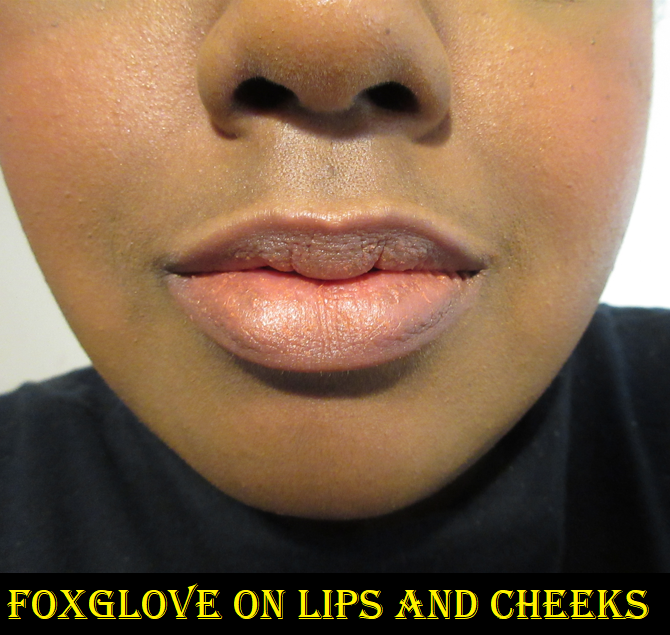
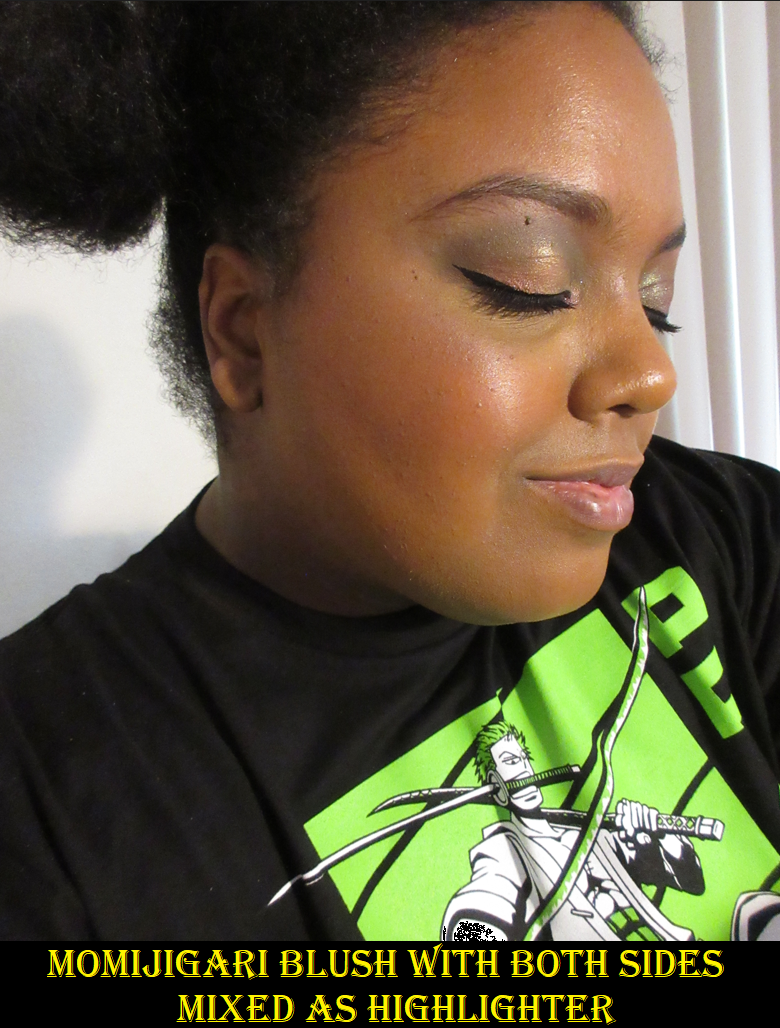
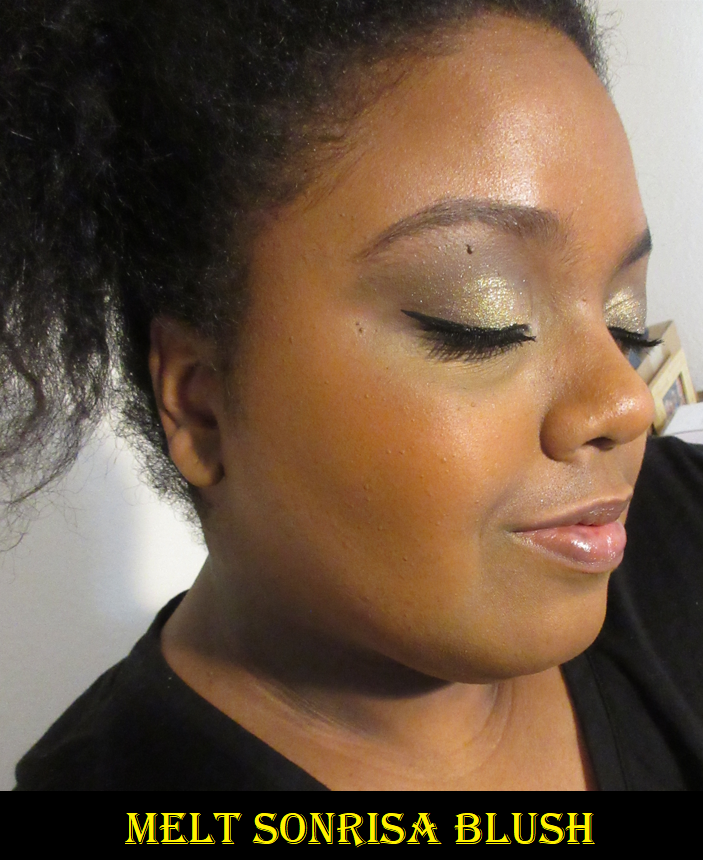
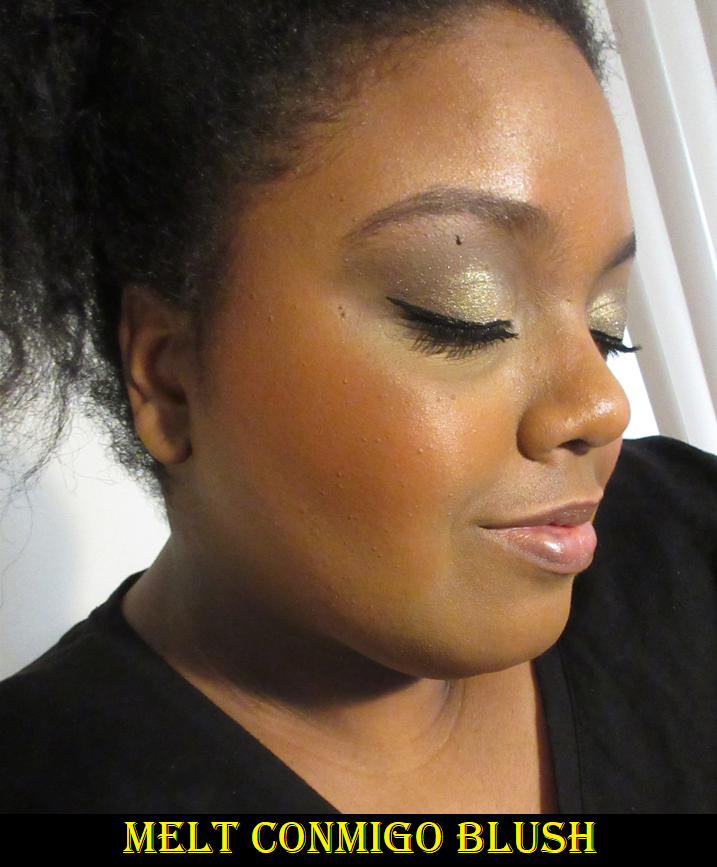
The Cream Clay Blush in M74 looks, feels, and performs the same as the bronzer. They both have a decent amount of pigment and blend easily, but I also need to over-apply this product to keep it lasting on my face at least 8 hours. I also find myself having to touch up the bronzer again after I apply the blush on top. I like that it blends in so seamlessly with the bronzer, but it’s almost too much. Perhaps if I picked a more vibrant and less natural-looking shade, the blush wouldn’t look like an extension of the bronzer. I still think it’s pretty, but I do enjoy pairing it with other blushes right on the apples of my cheeks to add a lighter and brighter pop. This means that my favorite way to use it involves me adding another step. It’s nice to know that it plays well with the cream and liquid formulas from other brands though.
Just like with the cream bronzer, I could apply MOB’s powder equivalents on top so that it helps with the longevity issue. However, that would also be adding an extra step and since doing that takes away the tiny bit of dewiness the cream blushes have over the cream bronzer, it would make the point of wearing the cream at all pretty pointless. I may as well just stick to using the powders, right?
Powder Formula
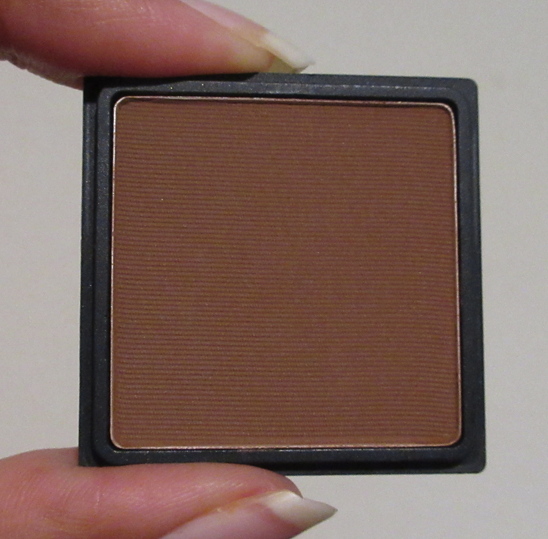
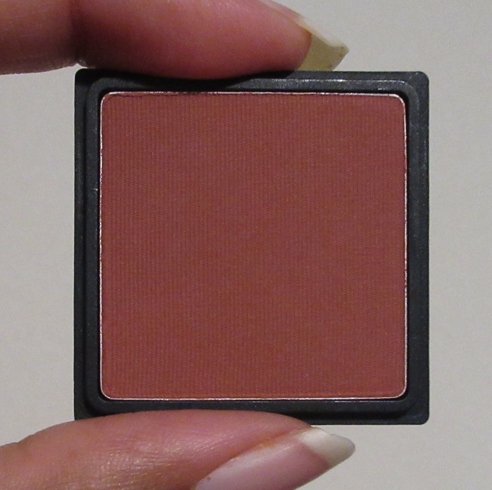
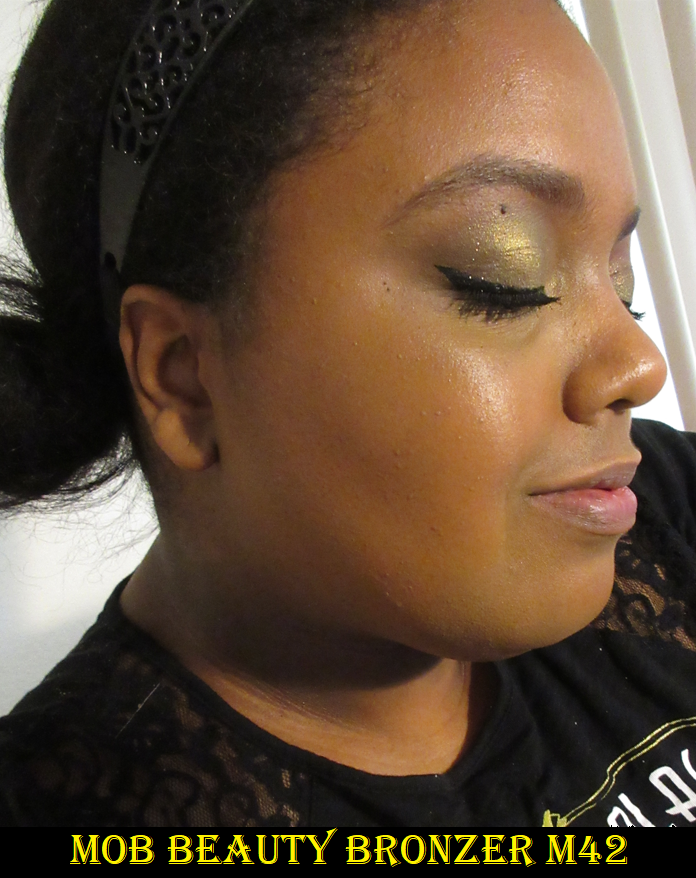
Just like the cream bronzer M78, this powder version in shade M42 is described as a rose brown. However, M42 is the only one that I can actually tell has a rosy undertone on the skin.
The powder feels somewhat soft to the touch, but it’s not as smooth or silky feeling as say the Charlotte Tilbury Airbrush Matte Bronzer, Mented Cosmetics Bronzer, or even the newest one from Jaclyn Cosmetics. Again, I’m guessing it’s because of the consequence of not being able to use certain ingredients for clean, vegan, and sustainability reasons. The “Show Full List” option on their website’s list of exclusions reveals how extensive it gets. It still performs well enough. It’s a buildable formula but it only takes a small amount to finish my face the way I like. M42 is lighter than the cream bronzer (both are the third to last shade in their respective formulas), yet it looks even darker than M78 when built up.
When it comes to blending, I don’t have any issues unless my skin is dewy from wearing some of my favorite foundations, sweating, etc. In that situation, where I would normally apply and blend via using long sweeping motions back and forth, instead it sticks where I put it and ends up with tiny patches that are lighter than the rest because more of the powder stuck to other spots. I’ve had products with the sticking issue before, and this one isn’t as bad with it as others. Trying to blend it out fixes it enough to be passable, but not looking airbrushed and not good enough for me to feel comfortable leaving it as is. One remedy is to use a brush that deposits an even amount to the area at the same time, like the Patrick Ta Contour Brush, before blending it out. The other is to switch up my technique and apply in a circular buffing style while moving across the area I want to bronze. This one tends to be less precise, but the blush will cover it anyway. The third trick I can use is to do a second light layer of bronzer to cover the patches and then use a finishing powder to soften up the look.
This last one is my preferred method because my finishing powders with a blurring effect really elevate the look overall and add that sheen I prefer anyway. Considering how often I wear my dewy foundations, I end up needing to use at least one of these ways the majority of the time. Because that adds to the extra time I need to spend on it, I like using the powder even less than the cream despite knowing how to get it to look pretty every time. I admit that it’s a minor inconvenience, but with the amount of makeup I own, minor inconveniences are enough to get me to not use some products, and then it ends up being a wasted purchase in more ways than one.
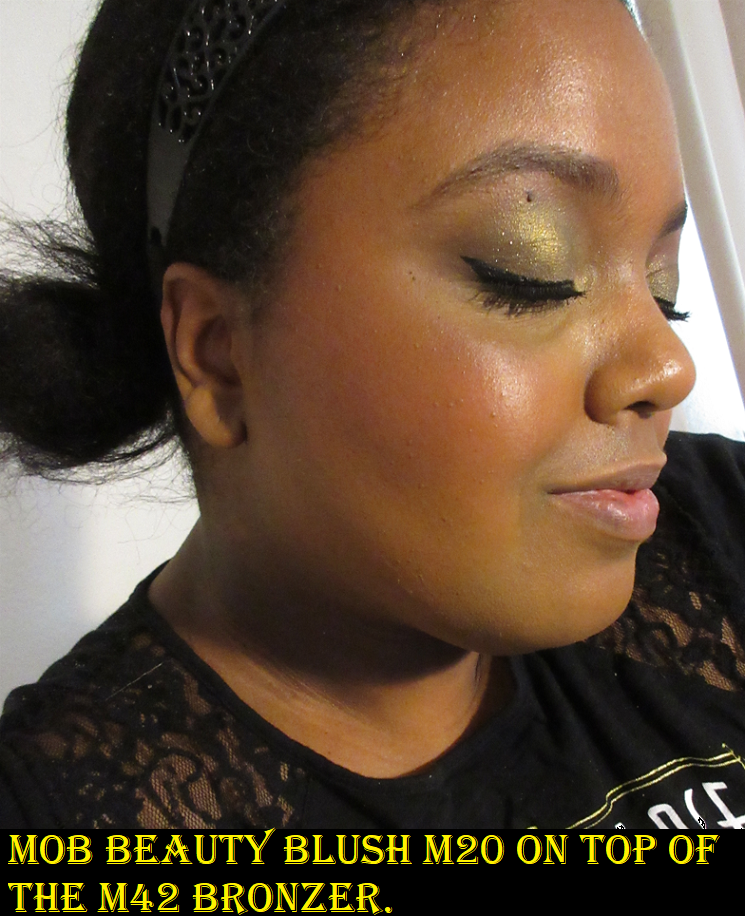
I get a nice amount of pigment from this M20 blush, but it’s a thin formula and prone to a patchy look on dewy skin just like the bronzer. This is especially noticeable if I’m wearing a low coverage foundation where my skin peeks through the blush and it looks a bit odd seeing such a strong color, yet is see-through like a blush tint. So, I end up using the same techniques to combat it, just like the bronzer. However, because part of the bronzer gets into the blush zone, I feel that I have a quicker time making the blush look blended again, which makes it less inconvenient and therefore I’m still likely to reach for the powder blush if the palette is already out and open.
Also, no matter what the situation, I have no longevity issues with the powder bronzer and blush. They stay put all day. The powder blush does fade a little over time, but not enough to be considered abnormal.
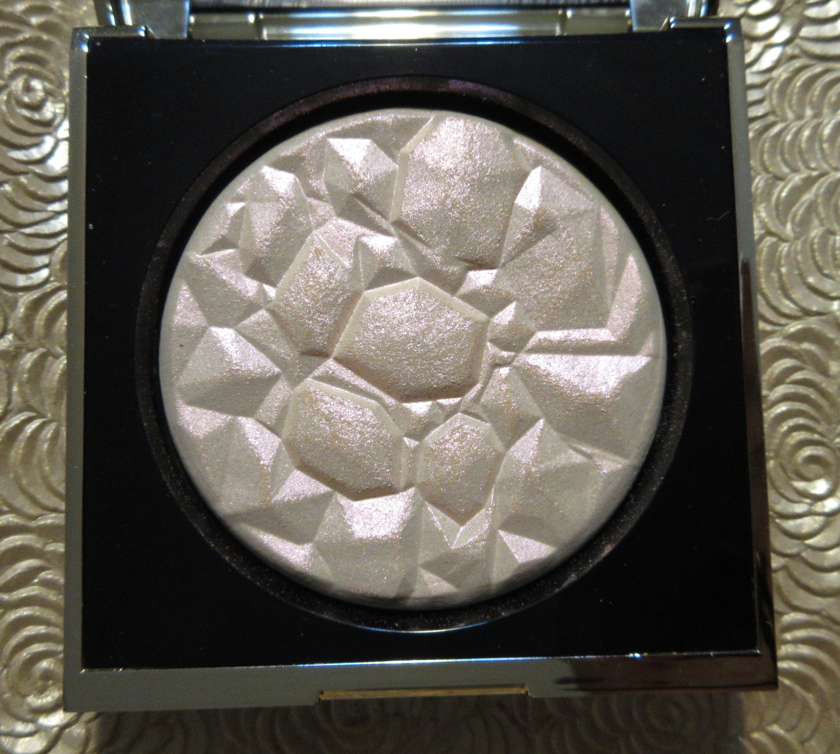
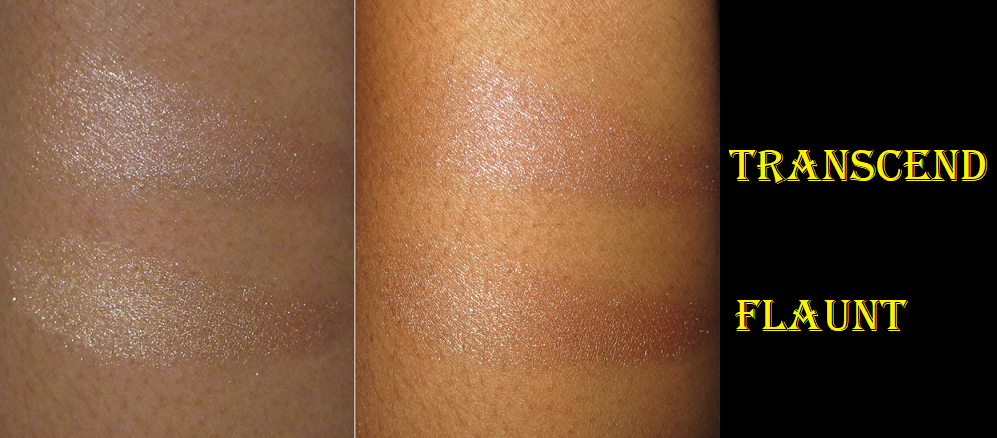
Highlighter
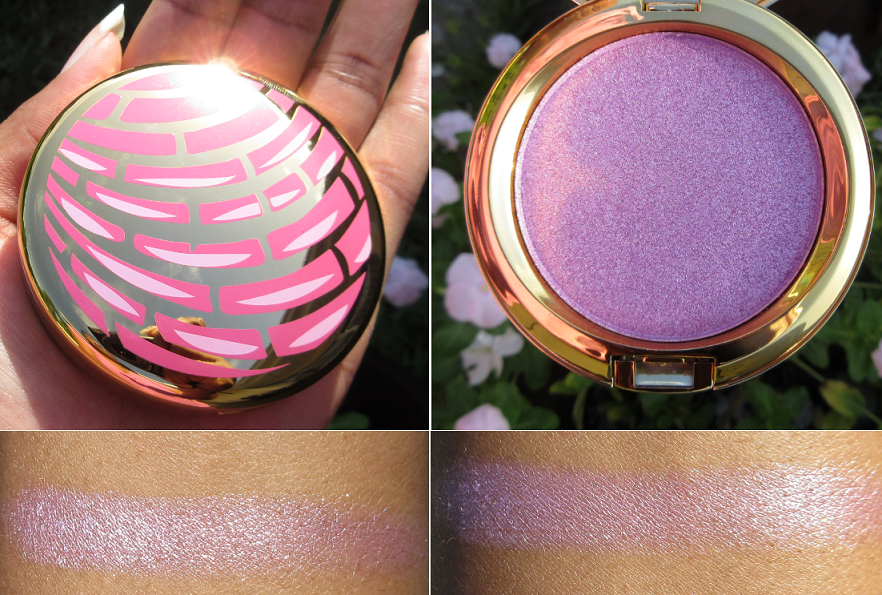
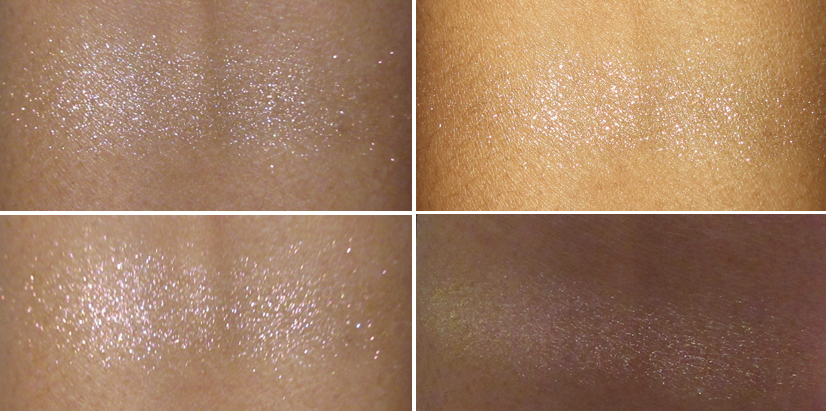
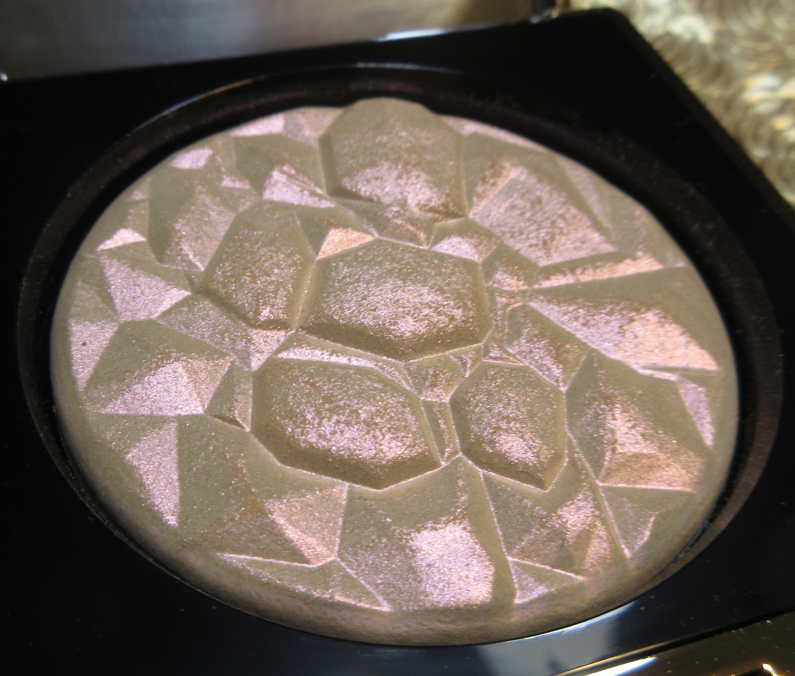
I purchased the powder Highlighter in M52 because the third darkest option has a pink undertone, which I don’t usually like on myself, and everything else would look ashy on me. If I use a light hand, this one matches well enough, but if I’m too heavy handed, it’s obvious that it’s a little dark for me. The shimmer flecks are not, but the overall base color is a little deep on me for a product that is intended to highlight the face.
As has been the case with the powder blush and bronzer, this product sticks, but even more intensely on my face if I wear dewy products in the areas that I highlight. That’s handy for helping it look like it’s one with my skin, but then it’s hard to blend, even with my best brushes. The upside to it sticking is that it lasts on my face all day.
Of all the powder products from MOB I’ve tried, the highlighter is the messiest with the most kickup. The times when my face is actually dry, and therefore the highlighter remains dry, is when I have longevity issues where parts are suddenly missing as the day goes on.
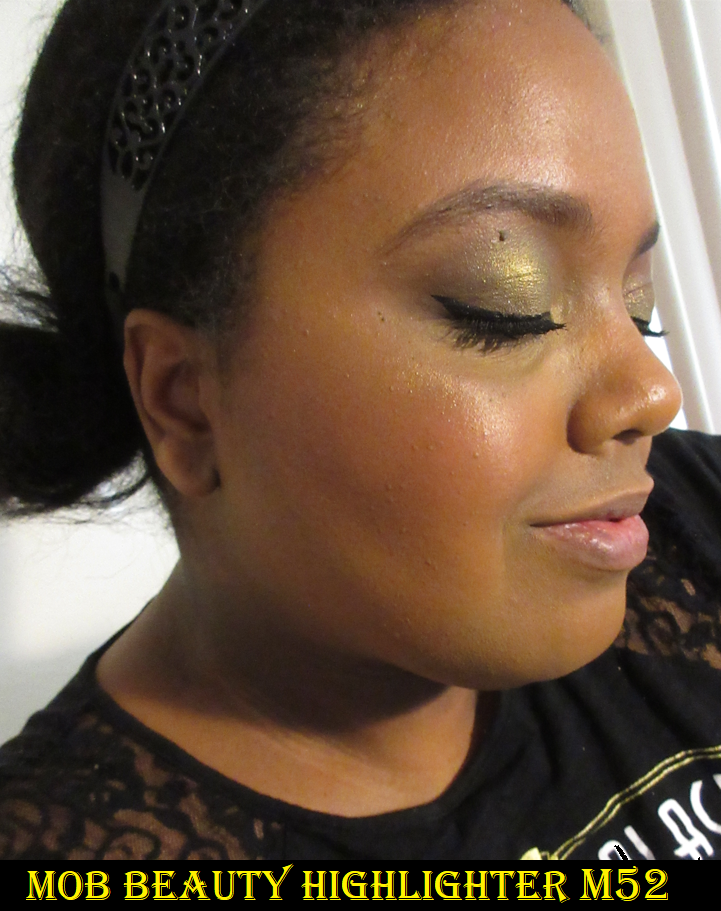
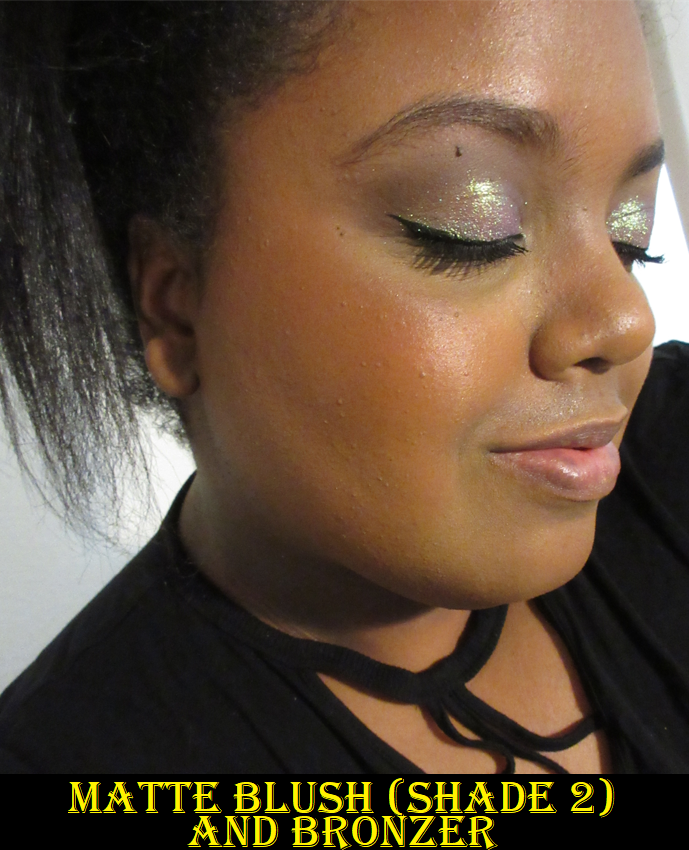
I think I would have liked this highlighter more if I had one that was the same color as M52, but slightly lighter. As it stands, it’s okay. Because I only have two eyeshadows, I sometimes use the powder bronzer as an additional brown shade and this highlighter as an additional shimmer.
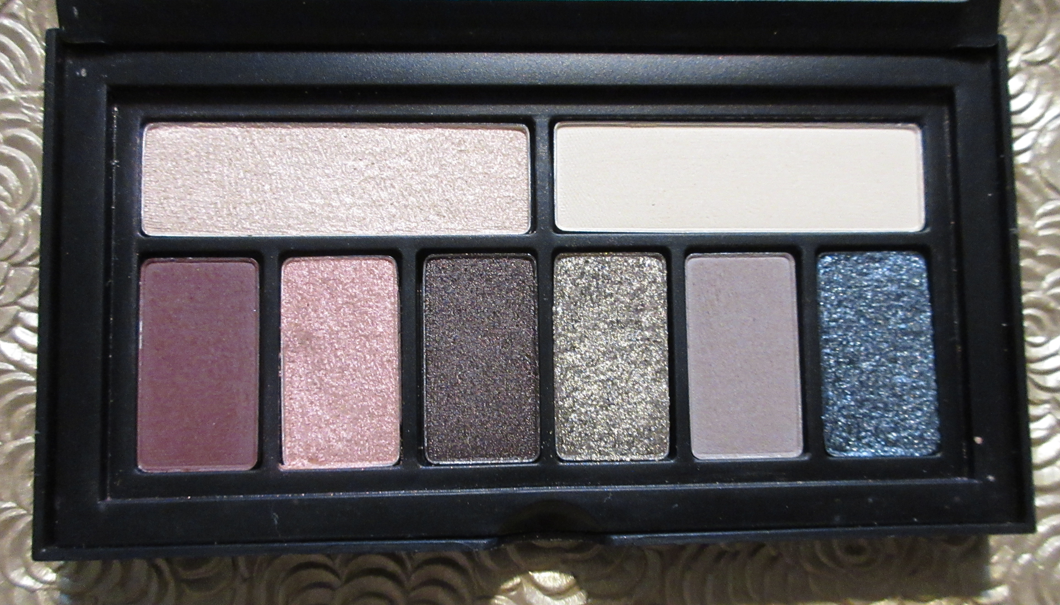
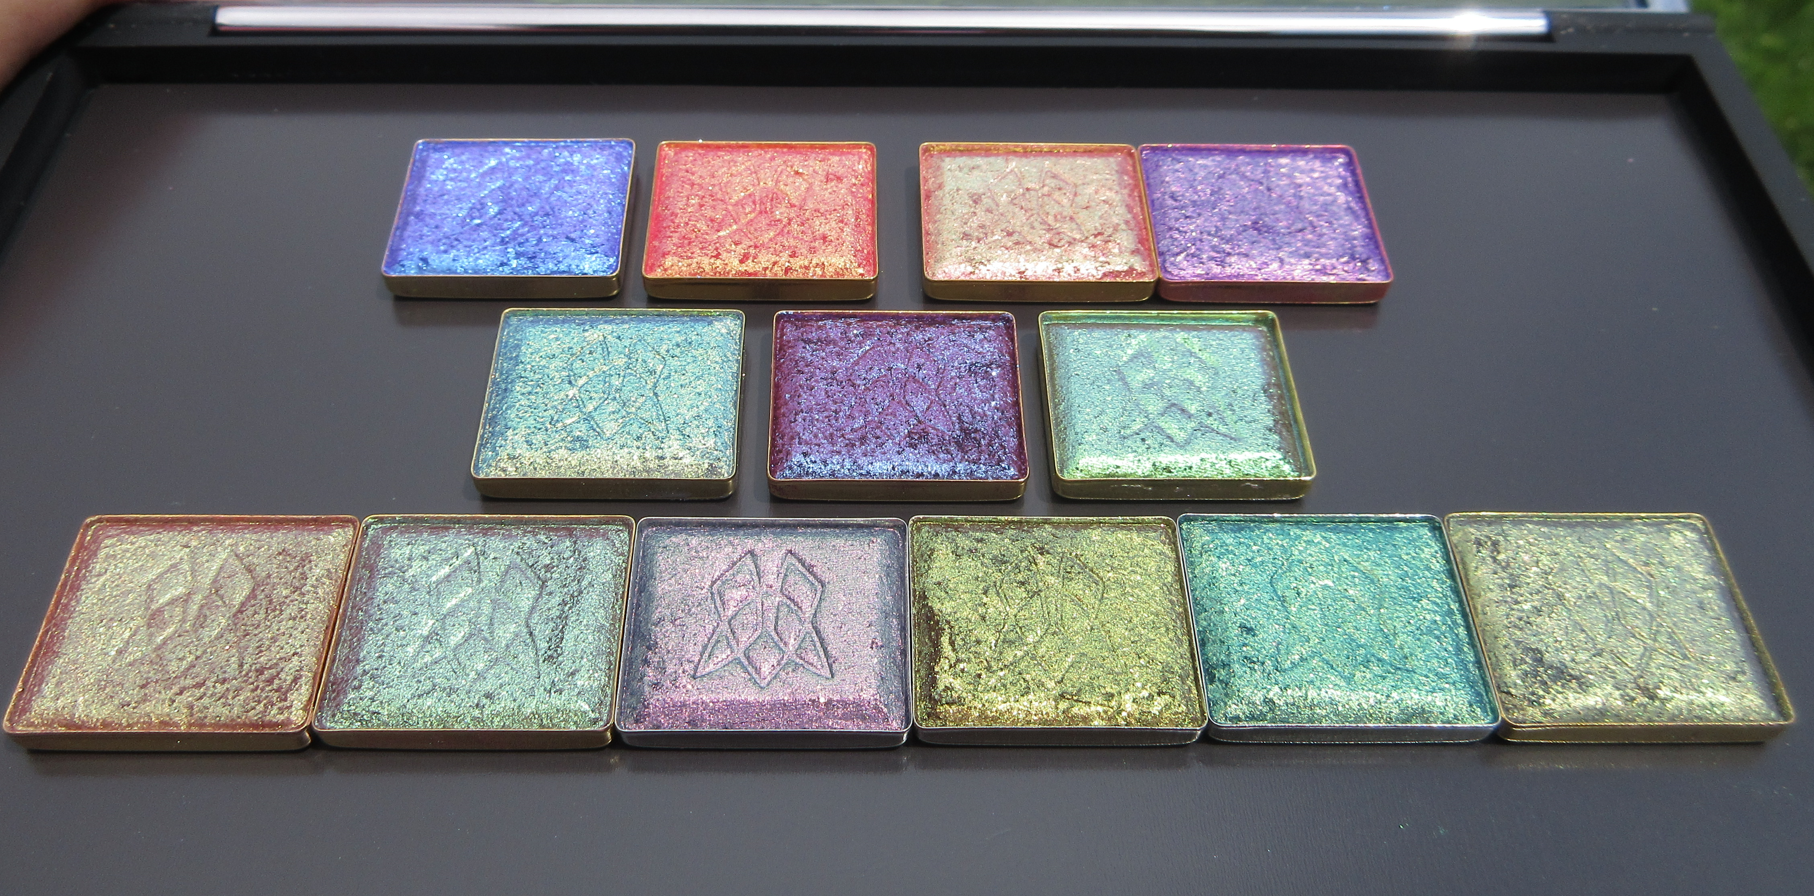
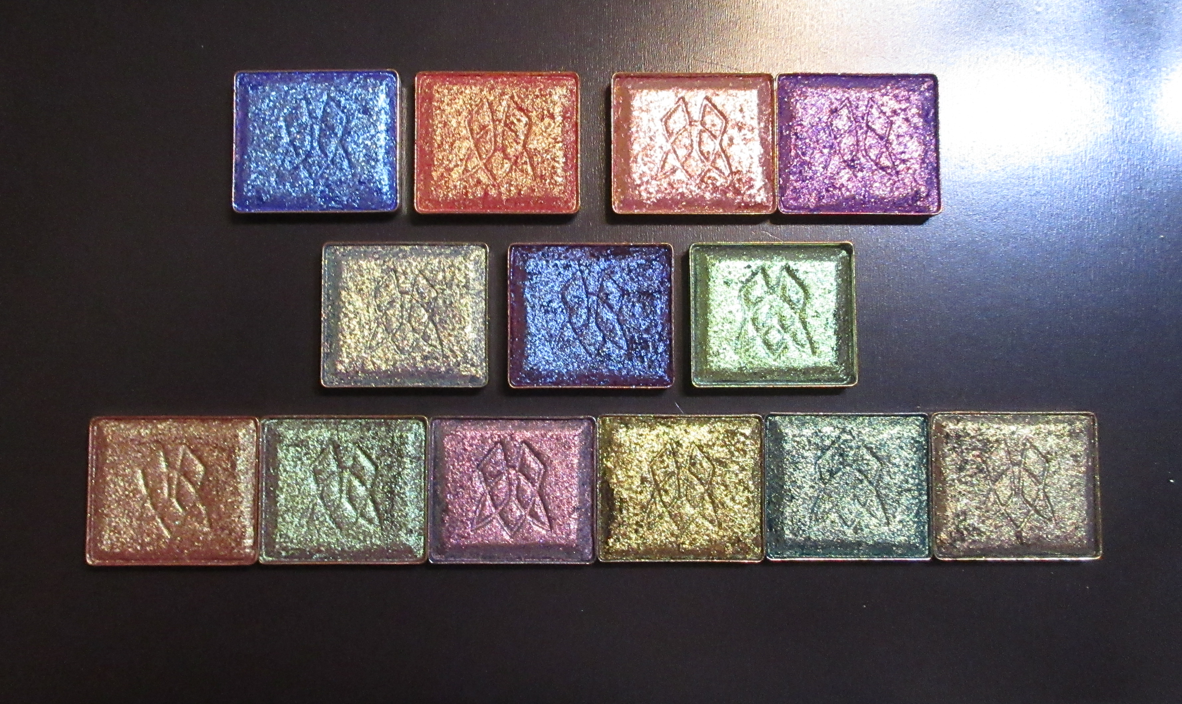
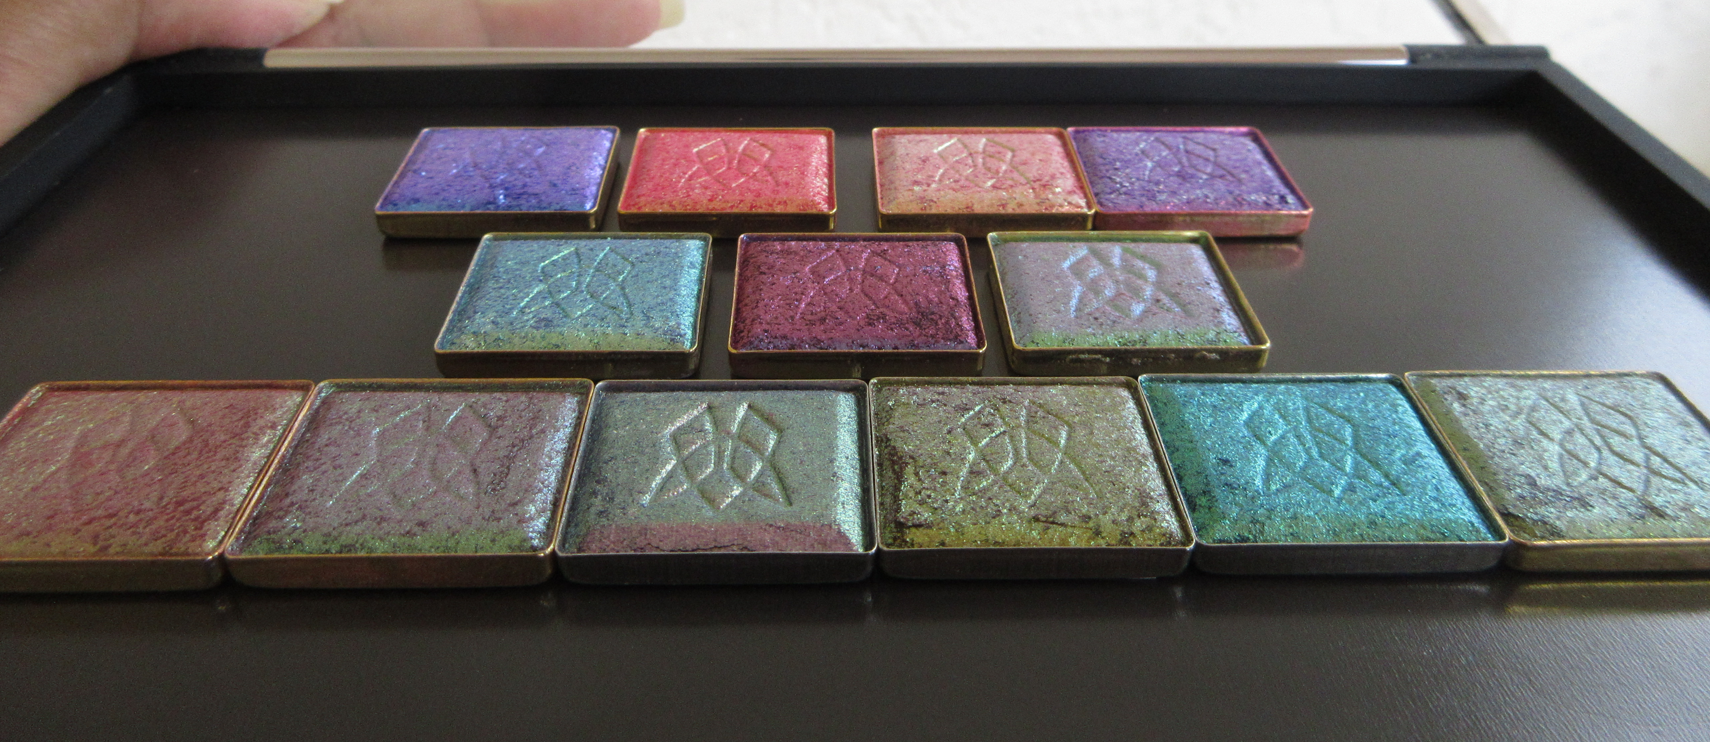
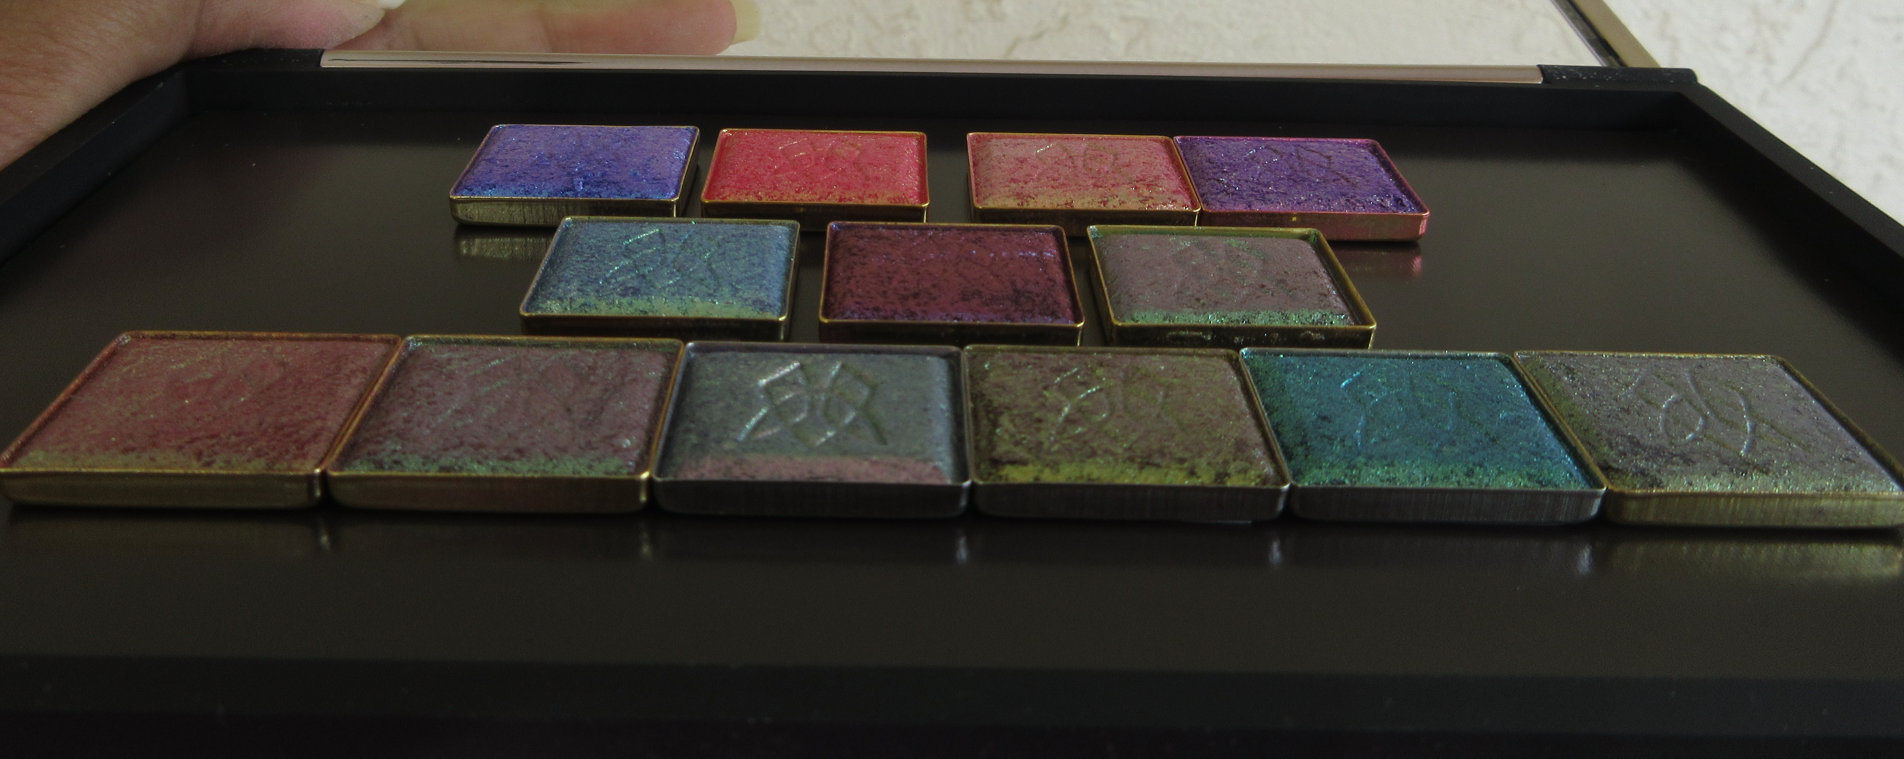
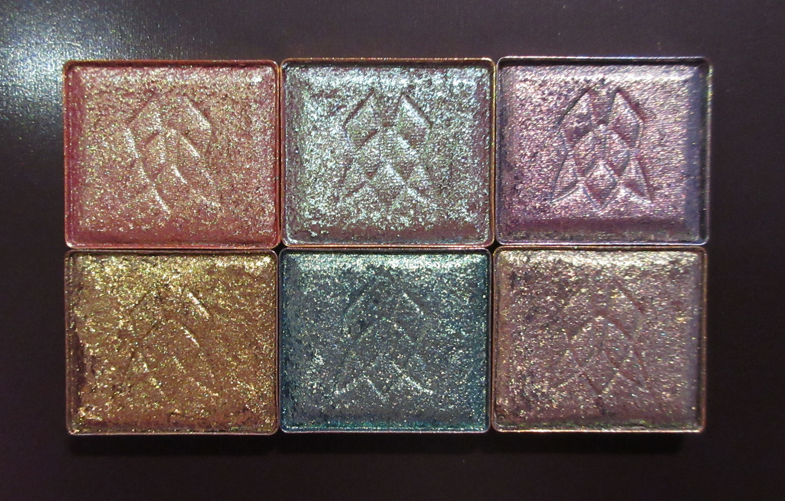
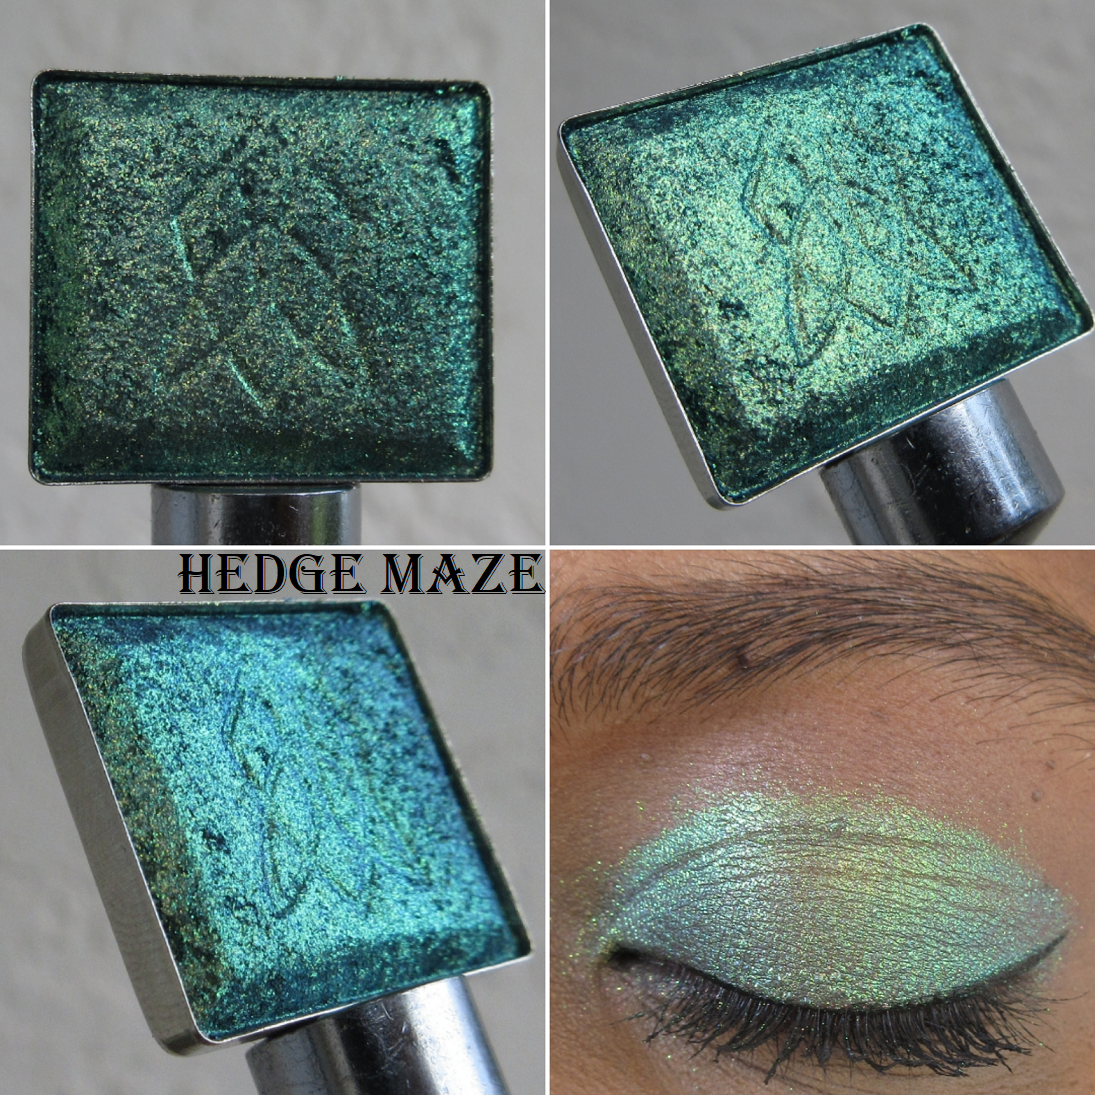
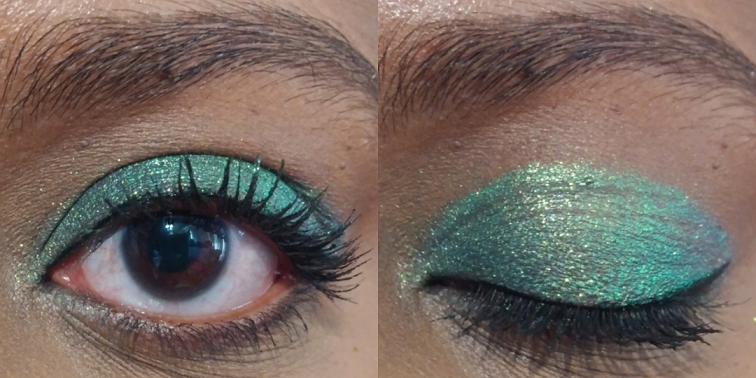
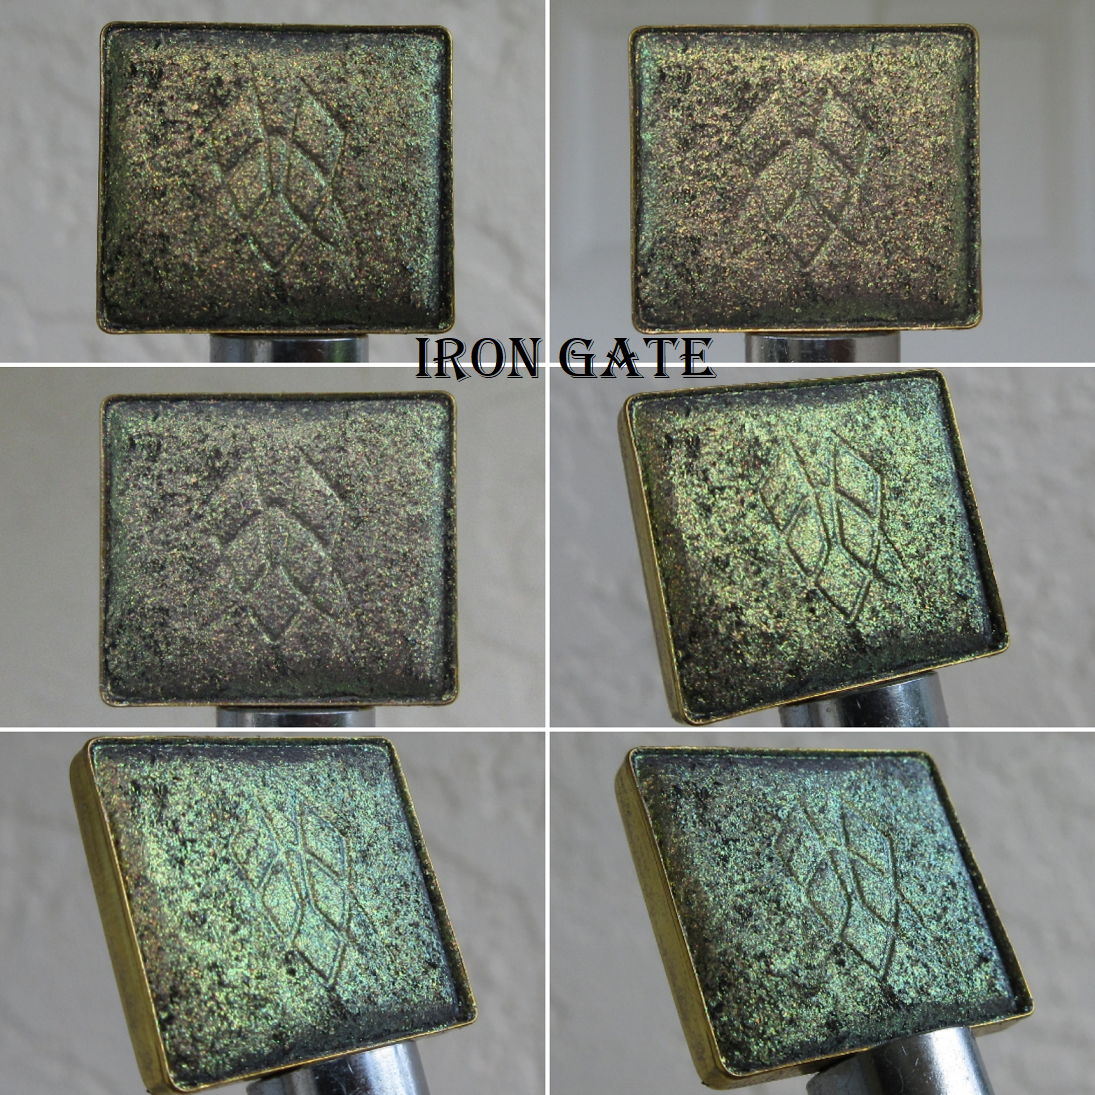
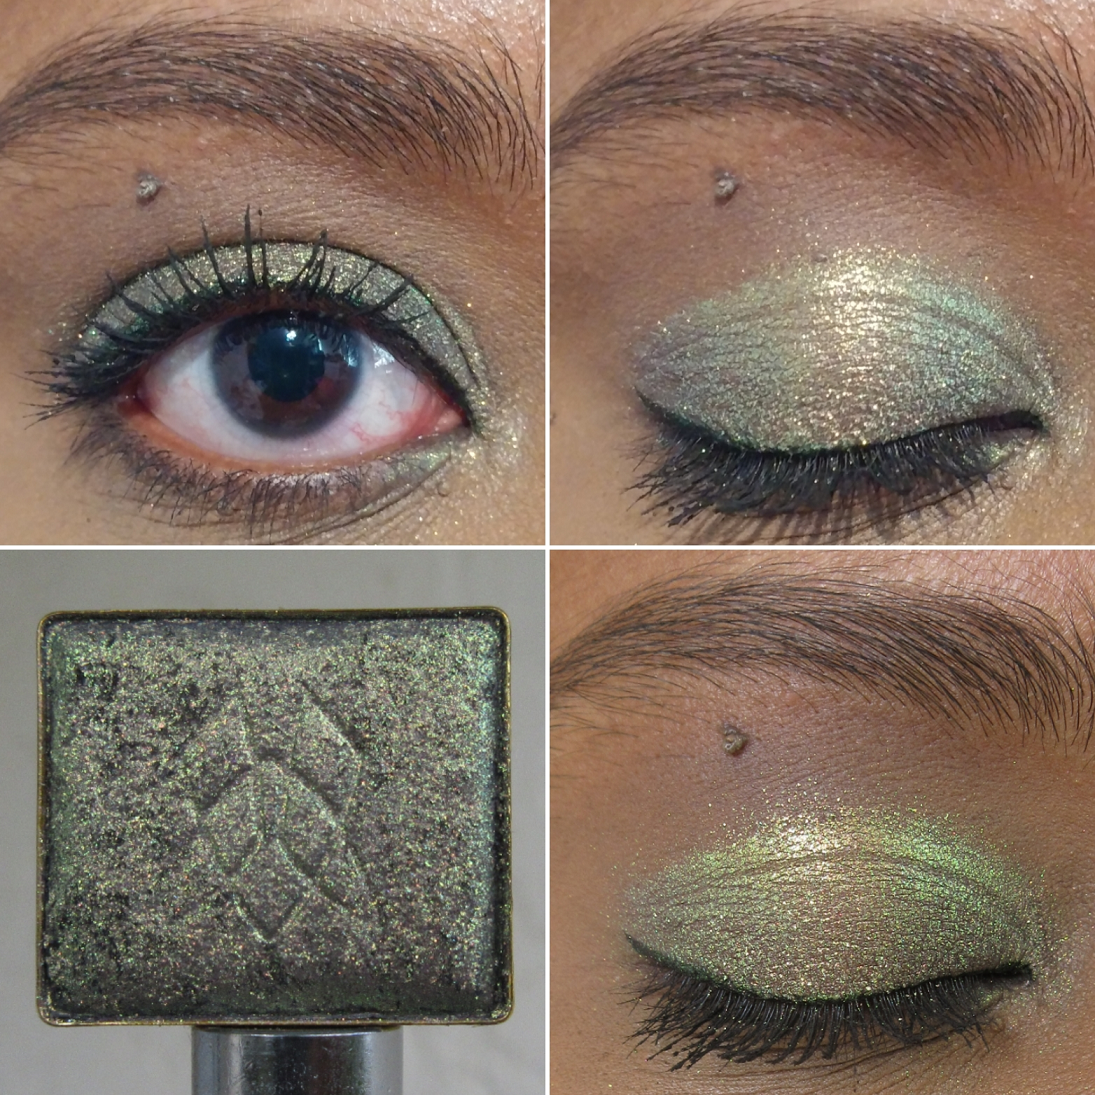
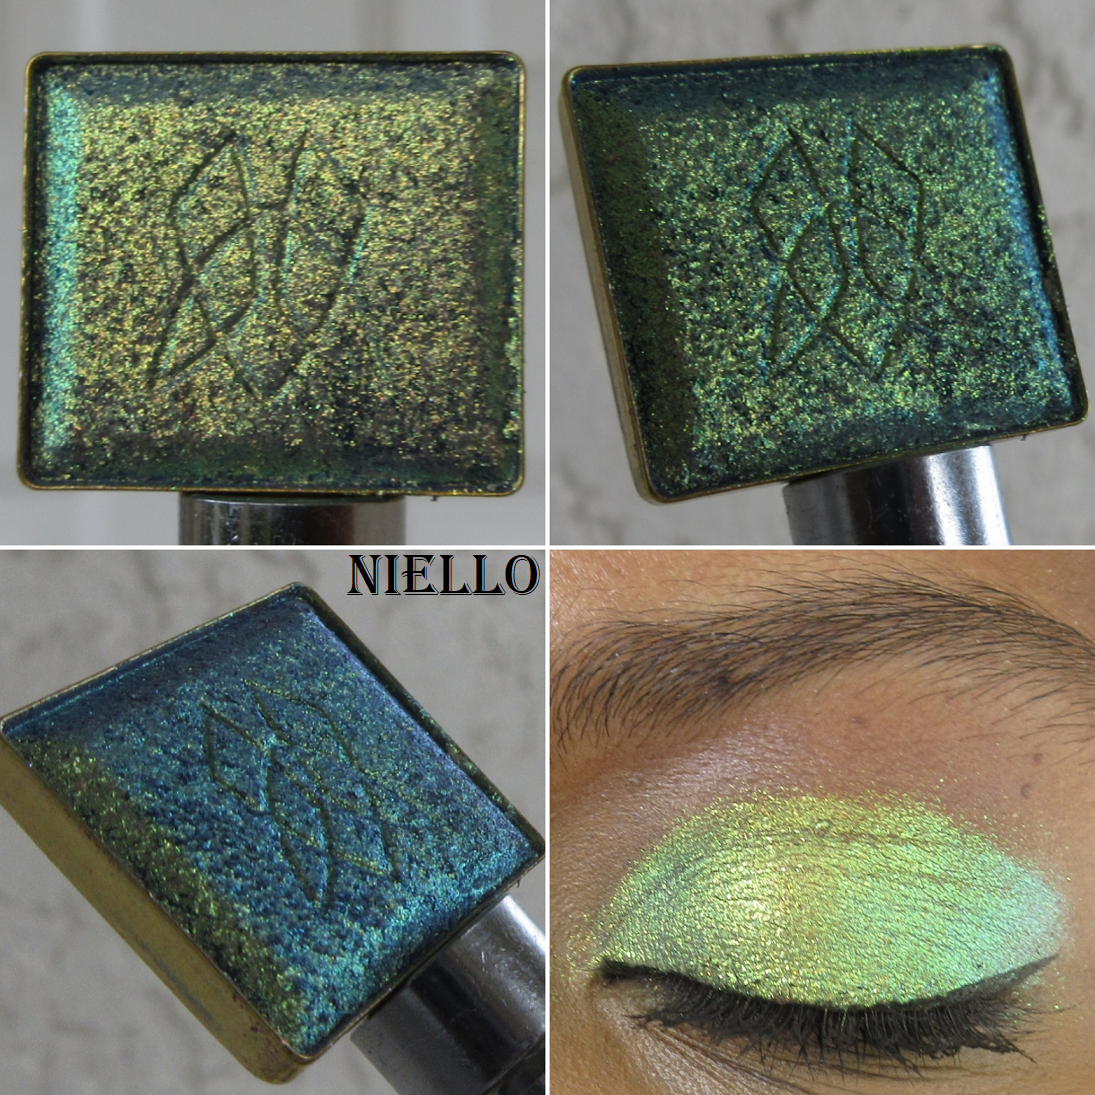
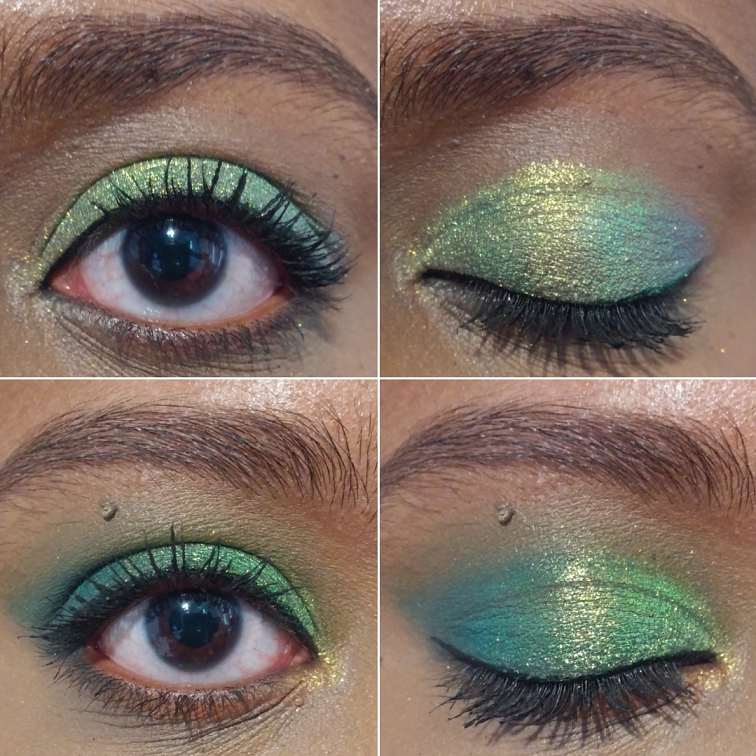
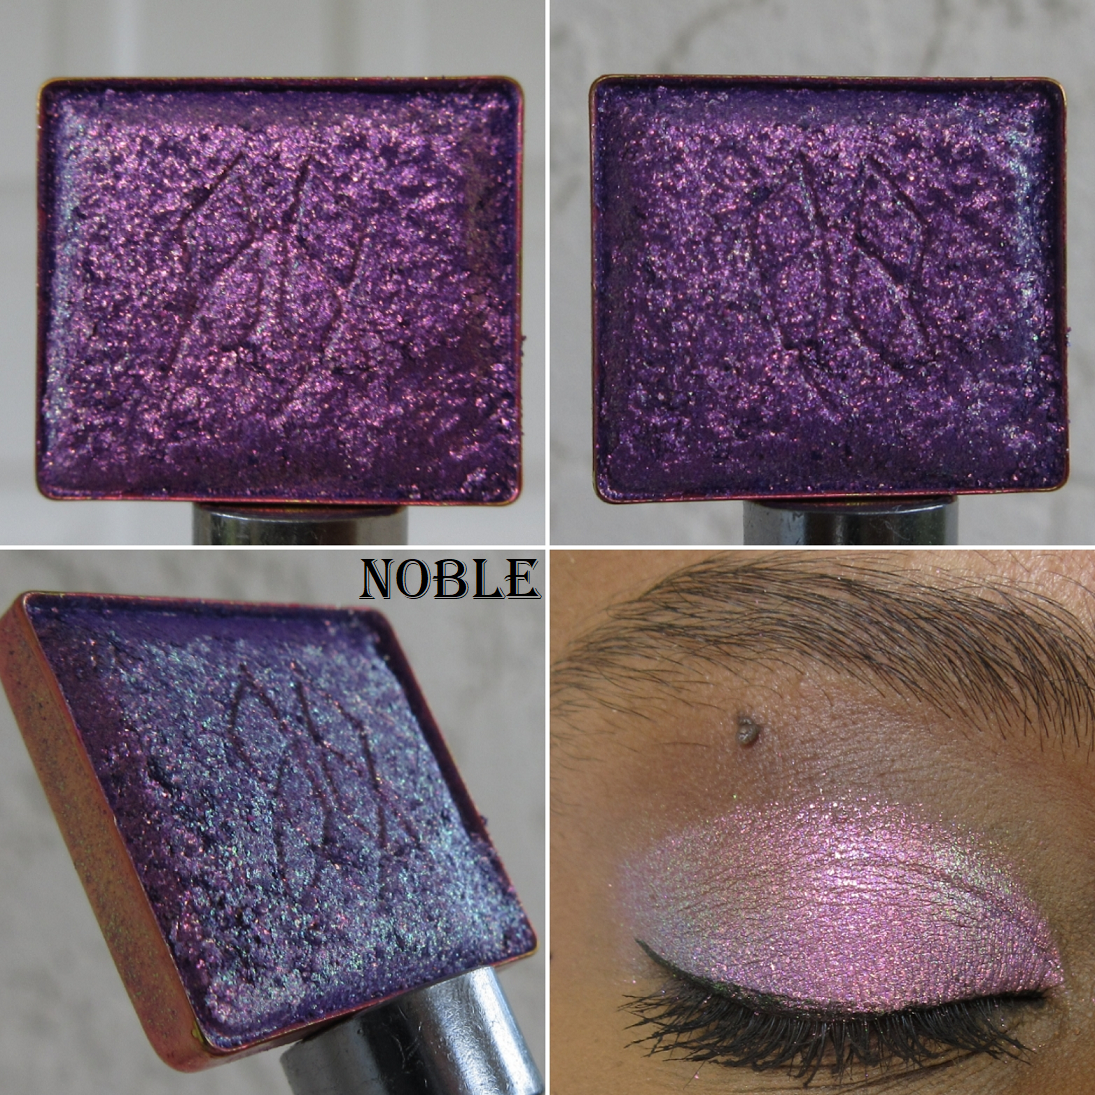
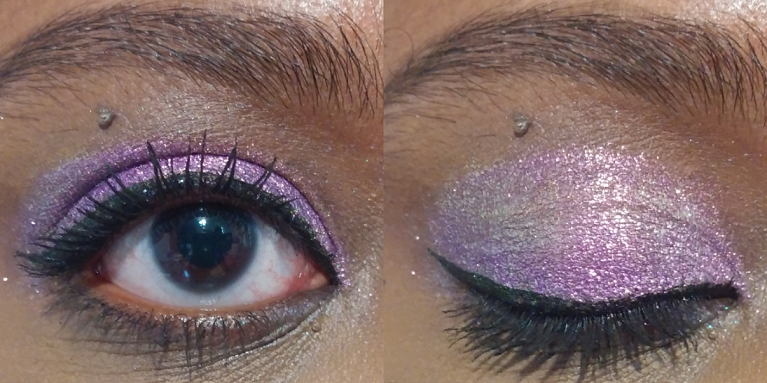
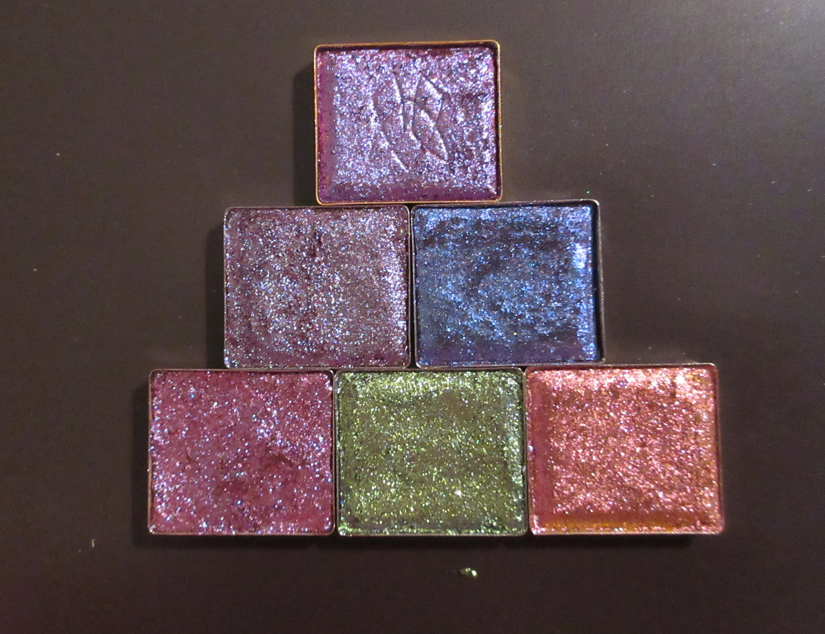
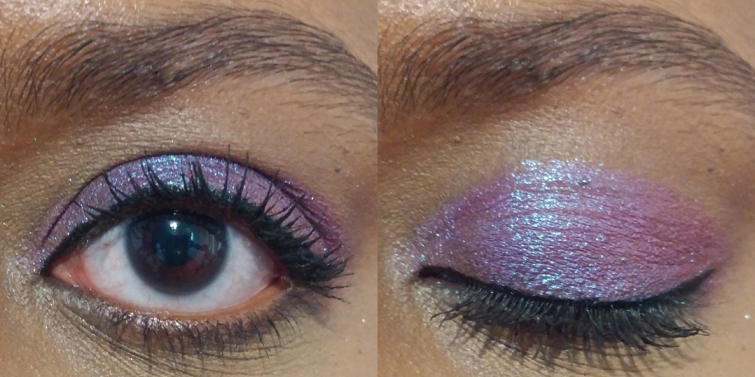
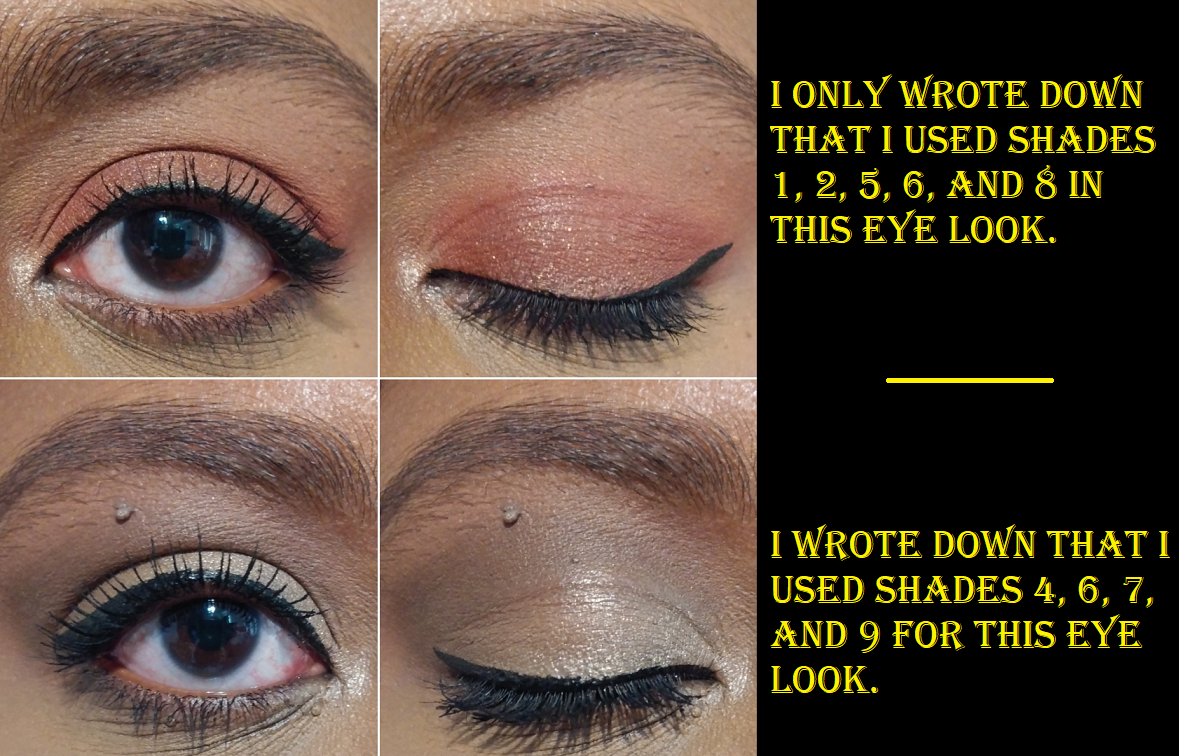
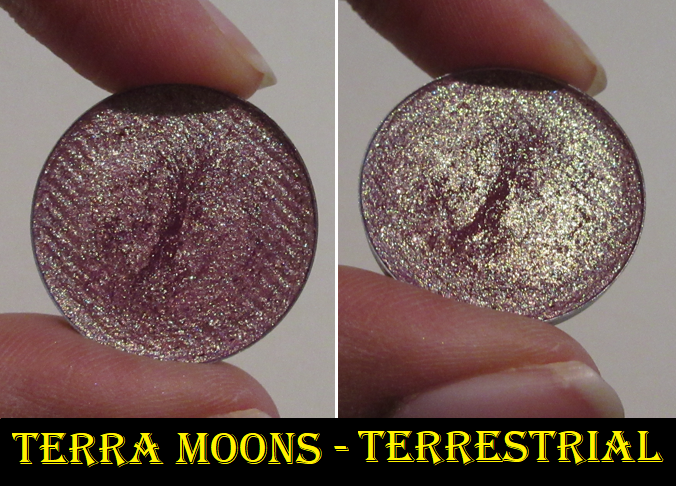
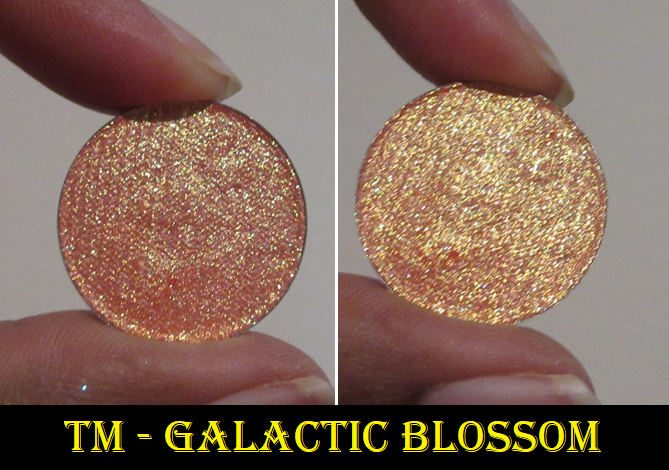
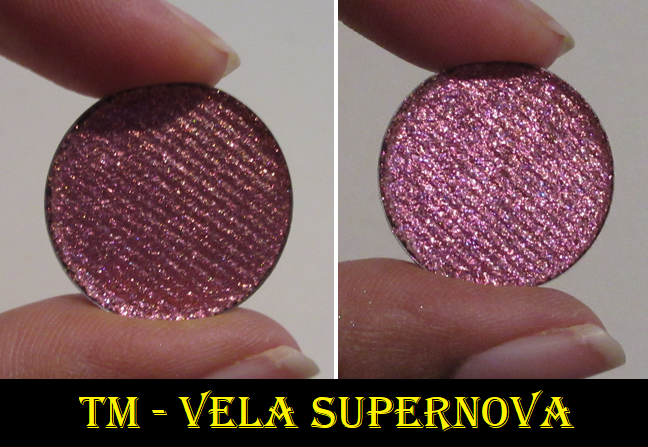
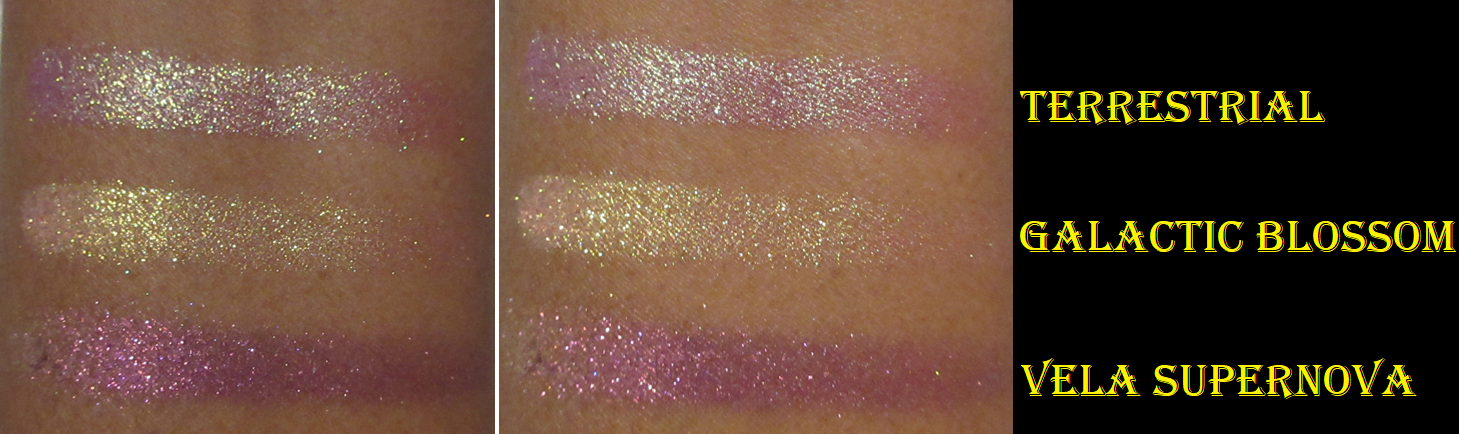
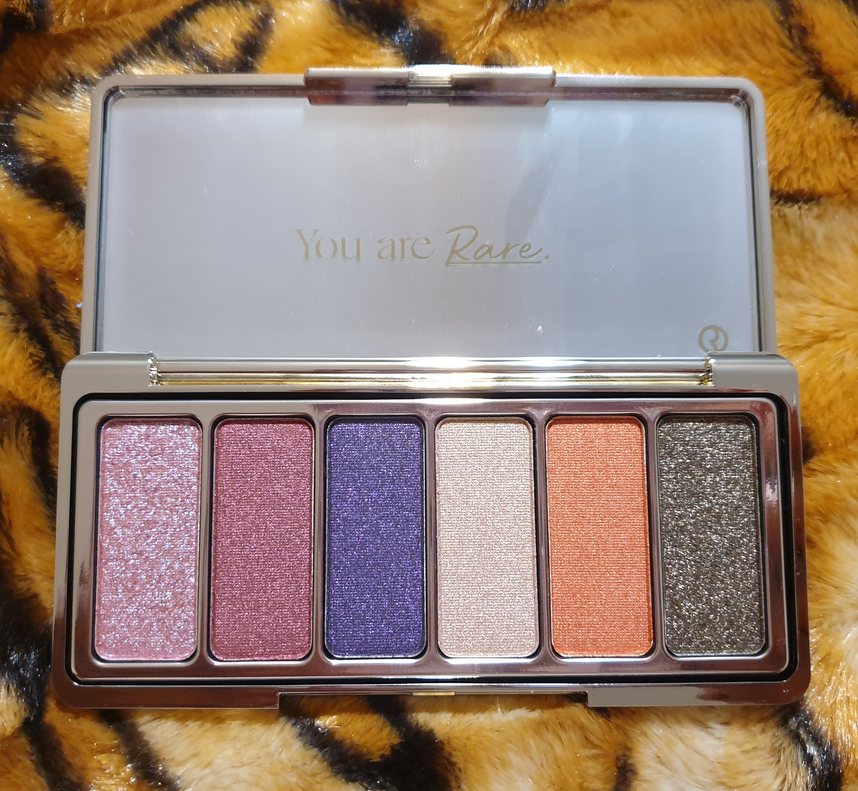
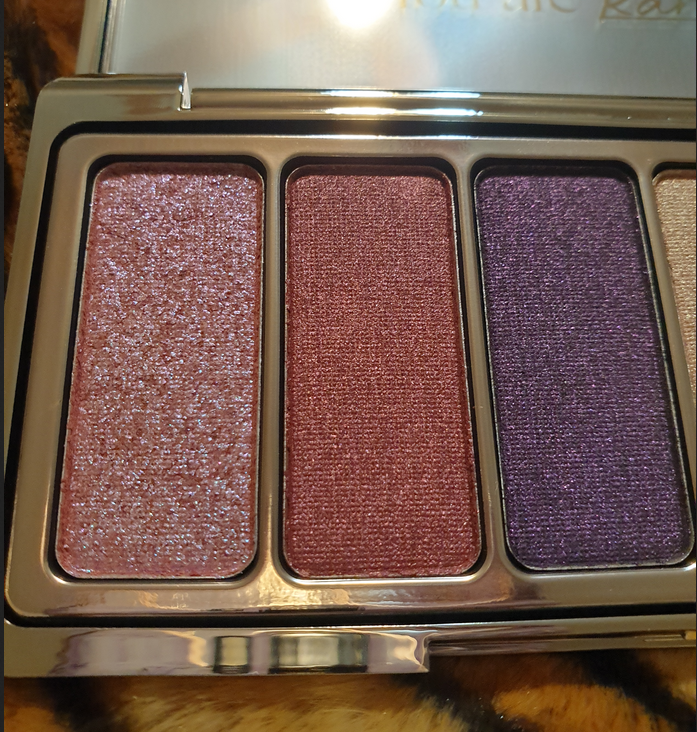
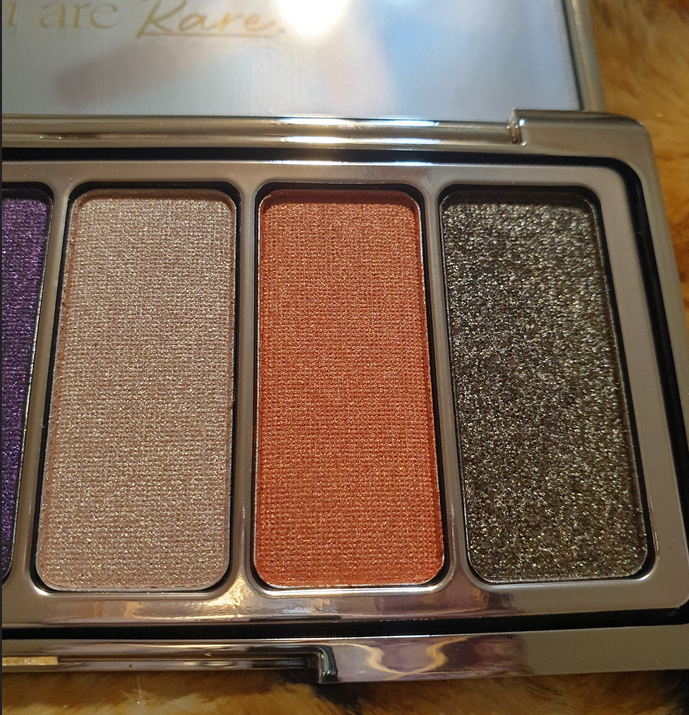
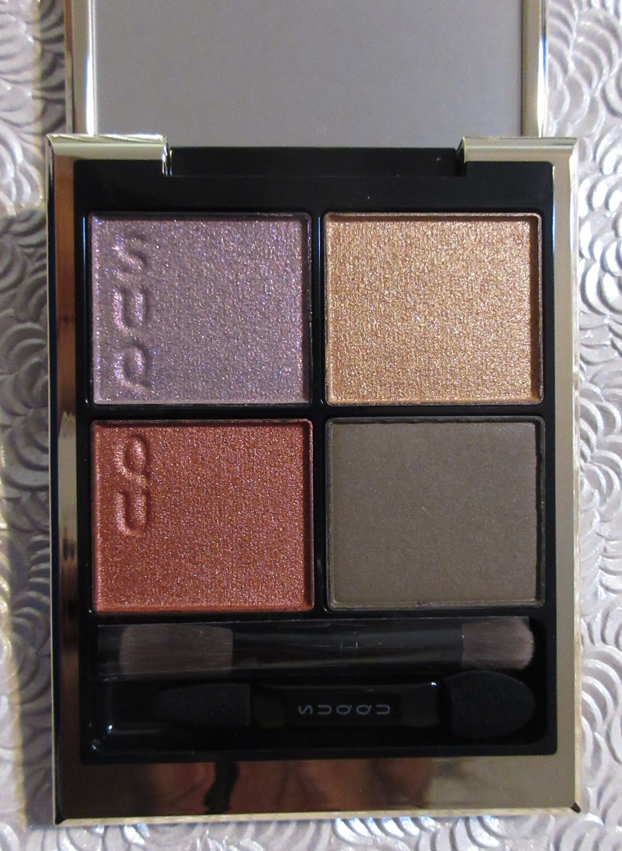
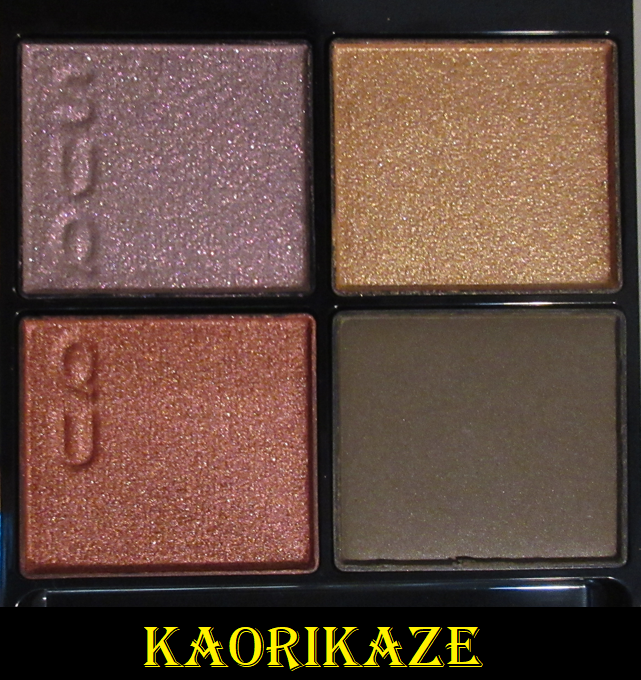
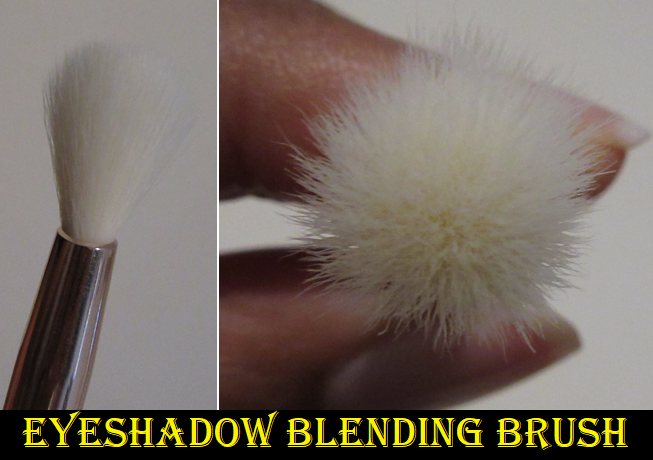
Eyeshadows
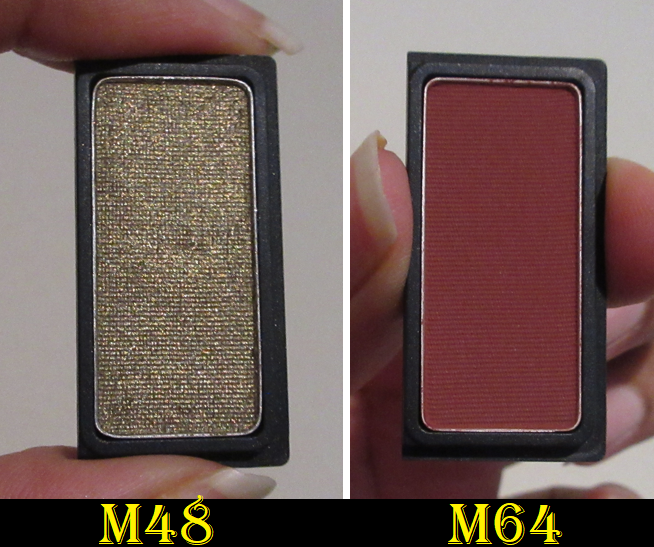
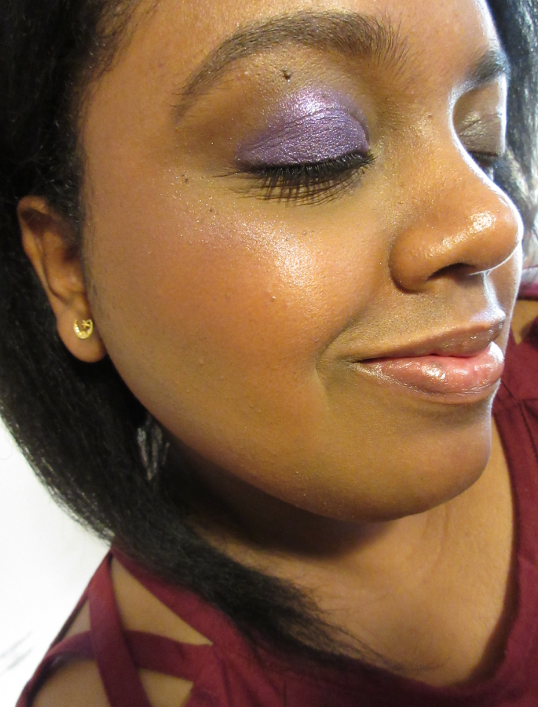
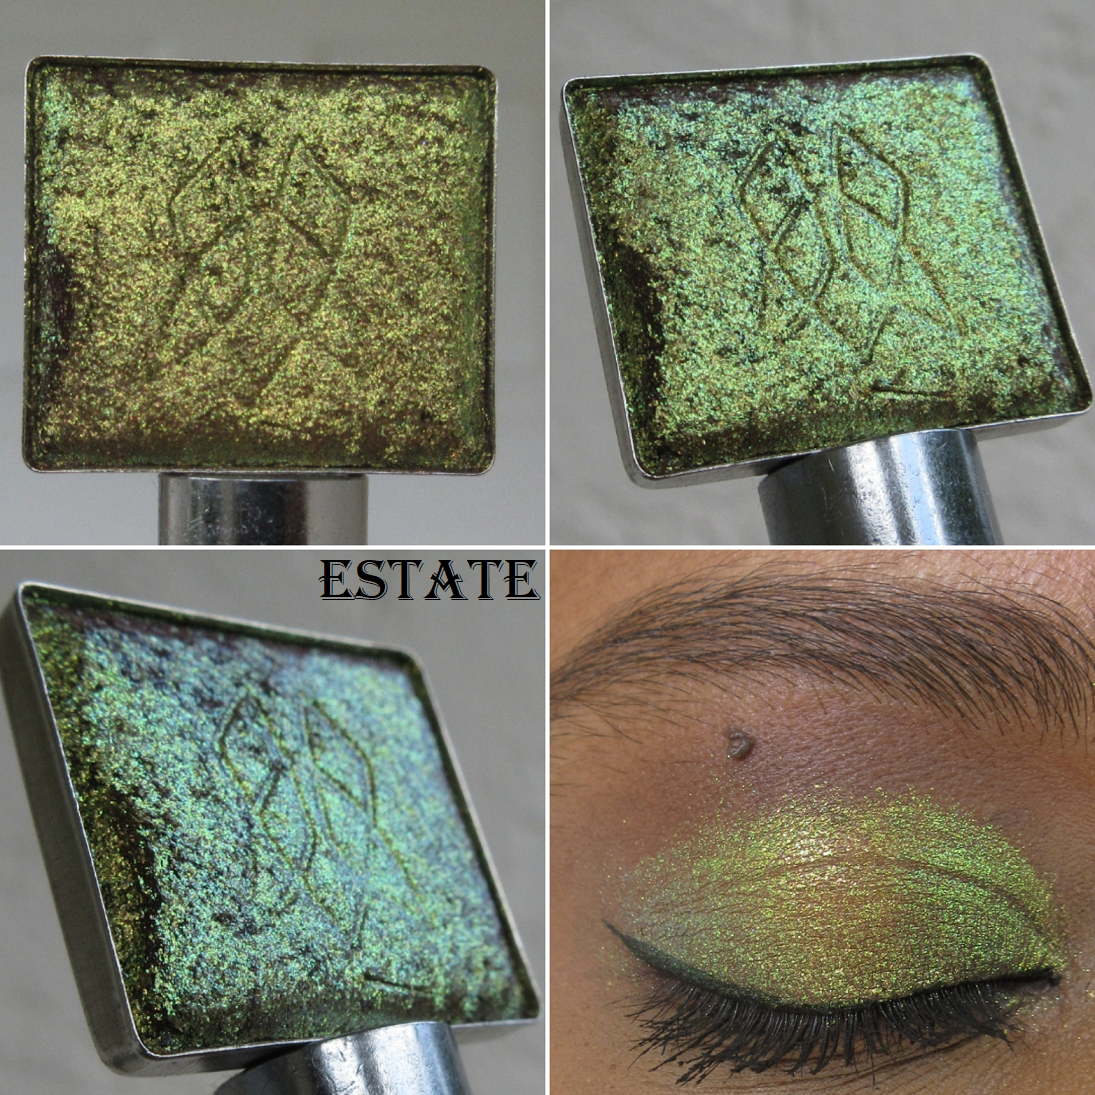
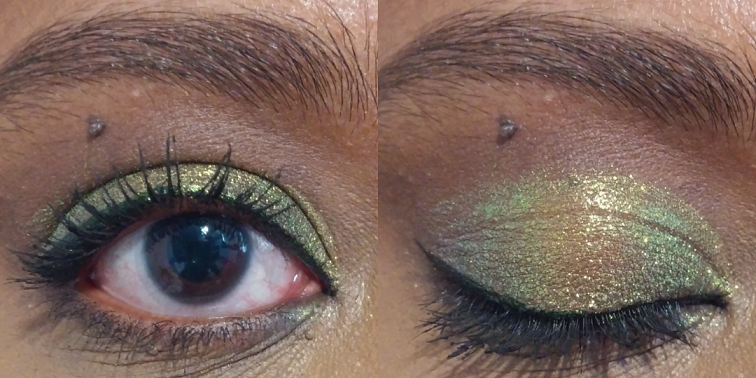
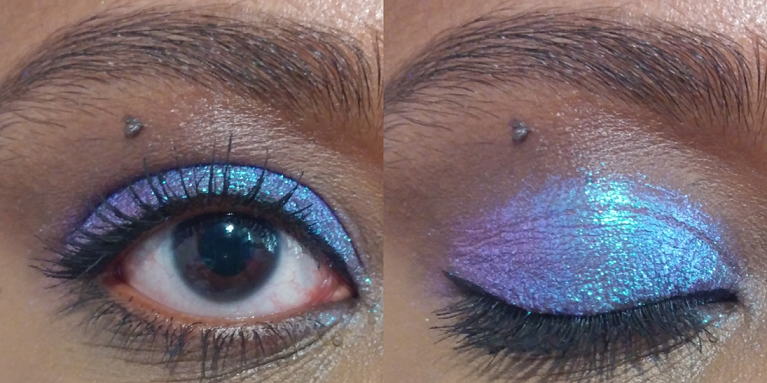
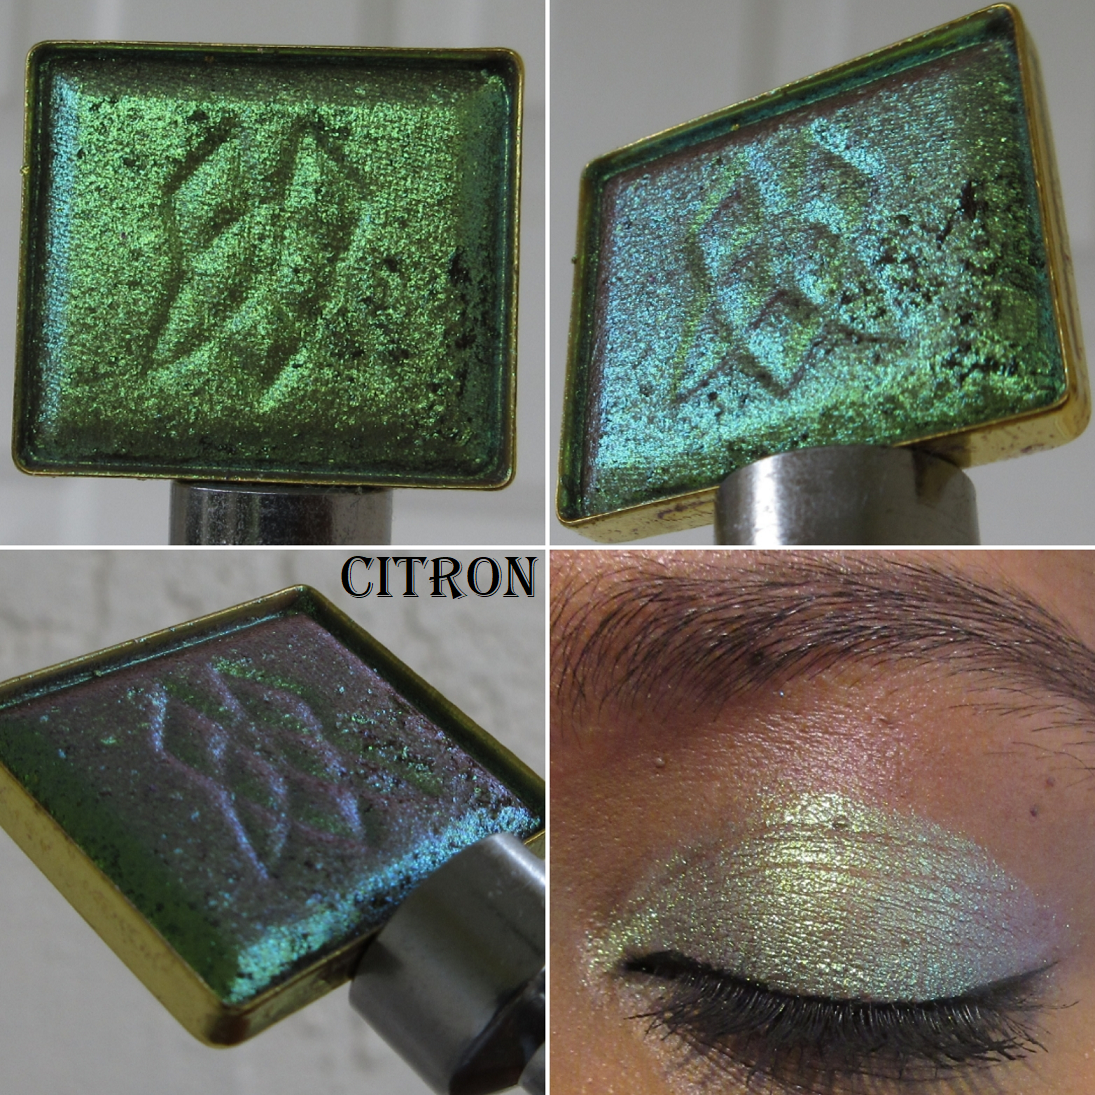
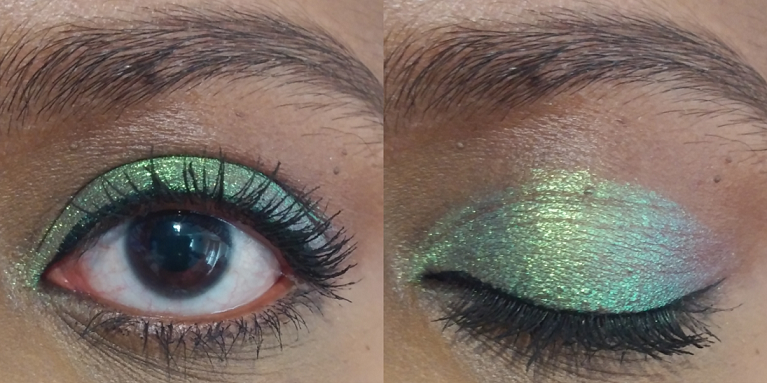
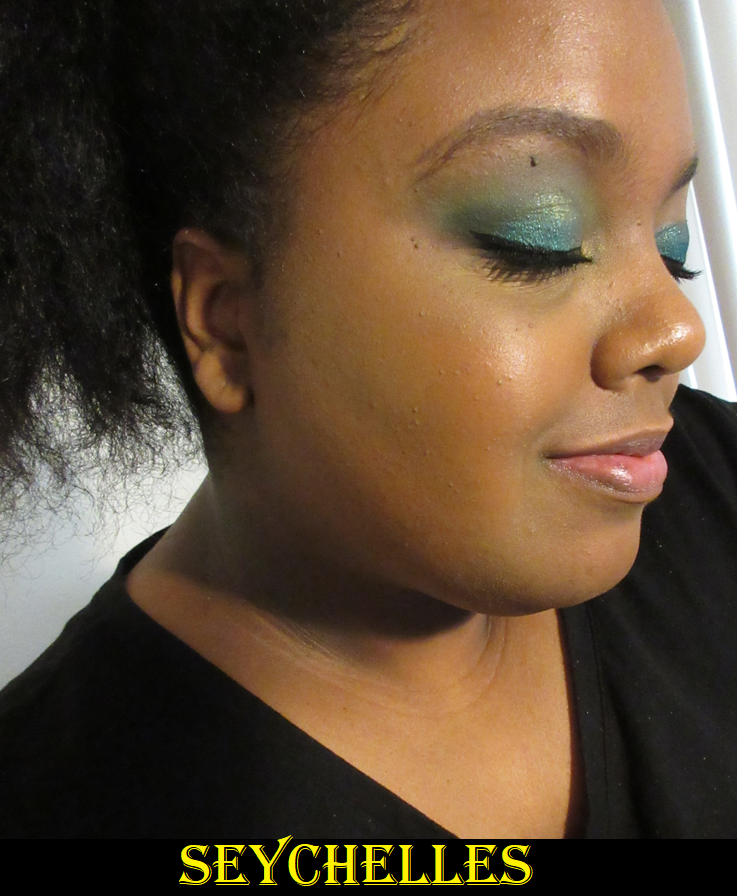
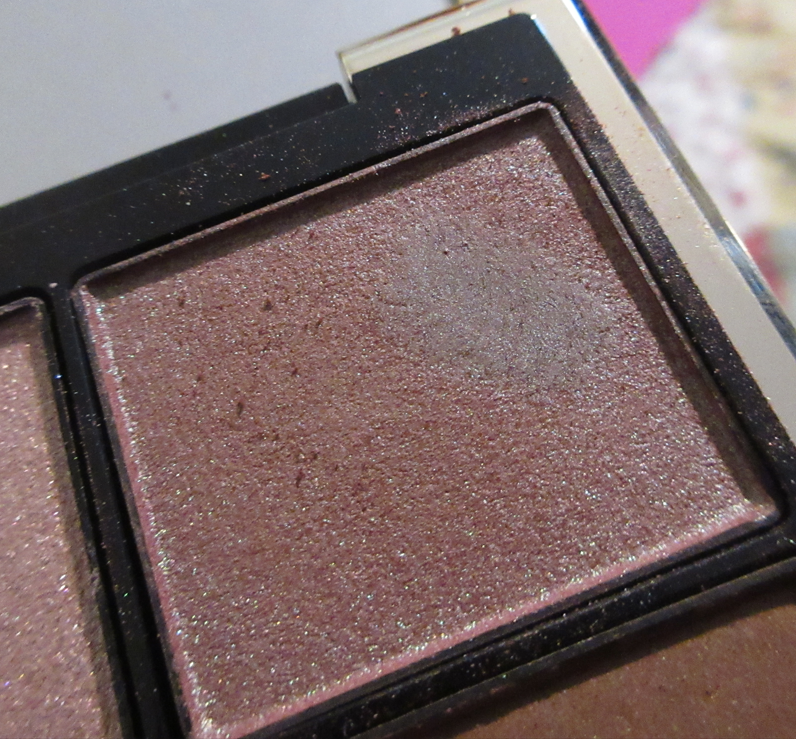
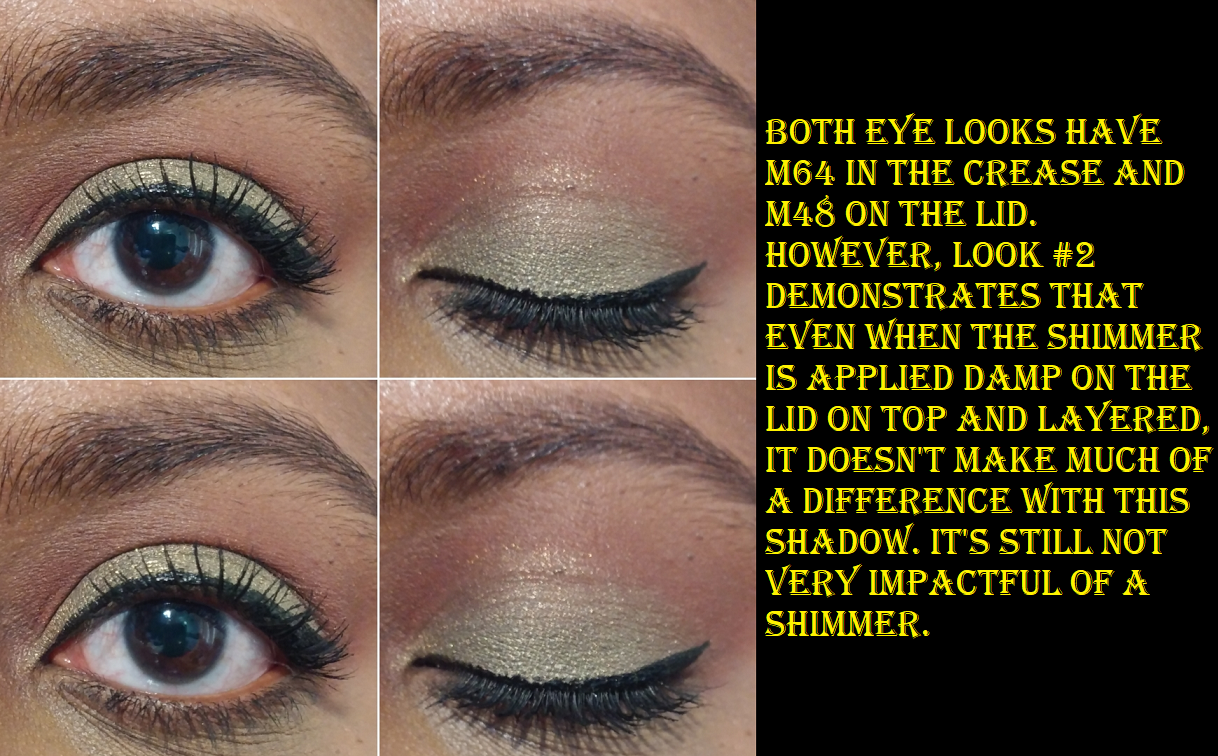
These are the two I chose. M48 is a shimmery olive. I like the color, but the shimmer particles are very low shine and not nearly reflective enough for my taste. Even when I apply the shadow damp, apply with my finger, or over the Nyx Glitter primer to crank up the intensity and pack on the shadow, it looks nearly unchanged afterwards. This is one of the rare times that my usual tricks fail to improve the eyeshadow look at all.
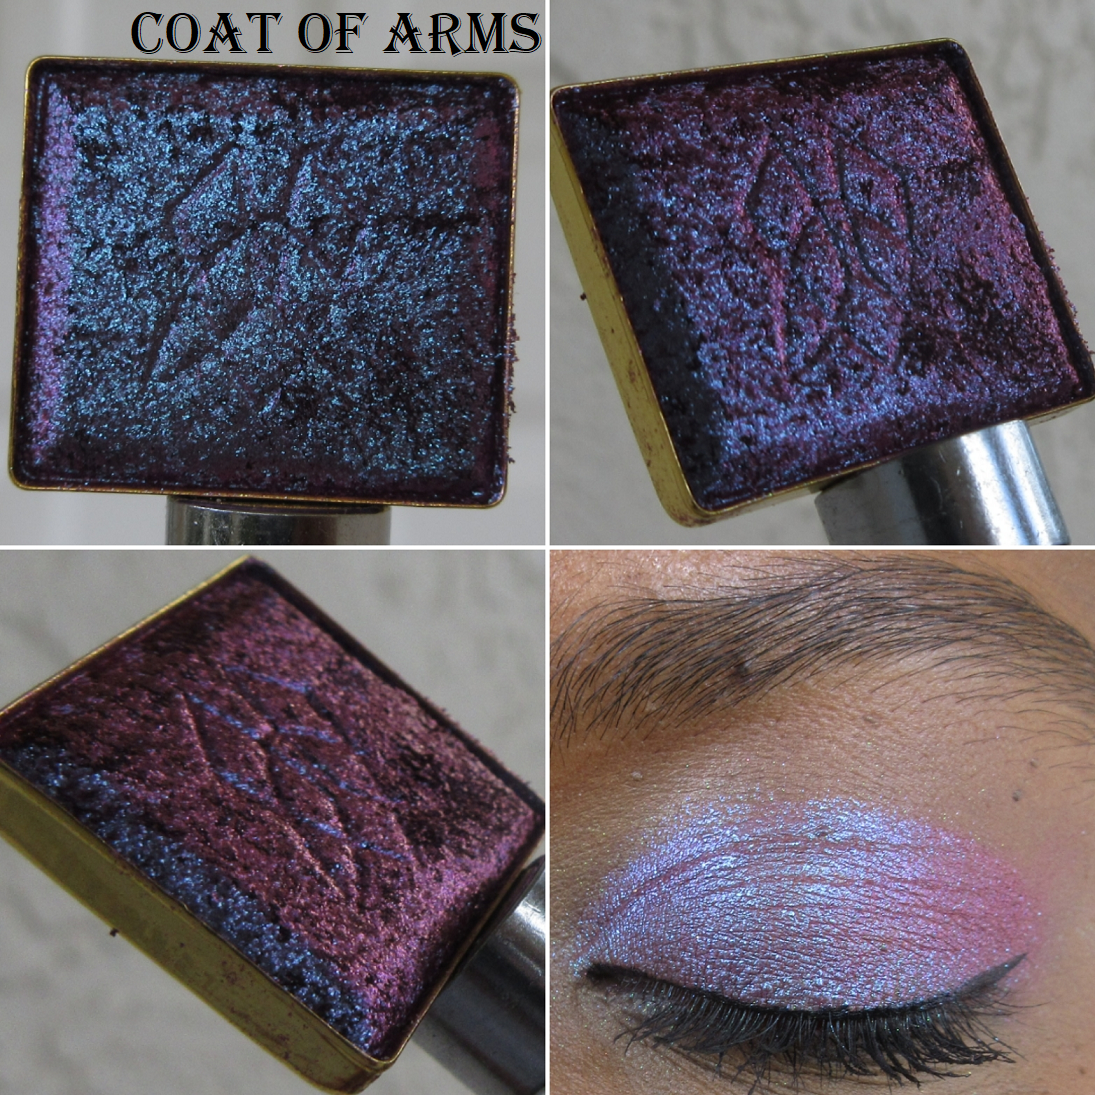
The M64 matte burgundy shadow is a bit stiff. Blending it in the crease takes some time and looks very drying on my eyes.
The shadows are my absolute least liked thing I bought from the brand. They’re way too lackluster for me. Anyone can make them work, so they aren’t completely terrible and it’s not like they don’t have pigment, but they are not enjoyable to use. There’s no creaminess to them, no smoothness or aid in the ability to be spread across the eyes. They’re able to be blended, but not as easily as I prefer. Preferences aside, I still don’t believe these are worth $12 each. I do not recommend purchasing the MOB Beauty eyeshadows.
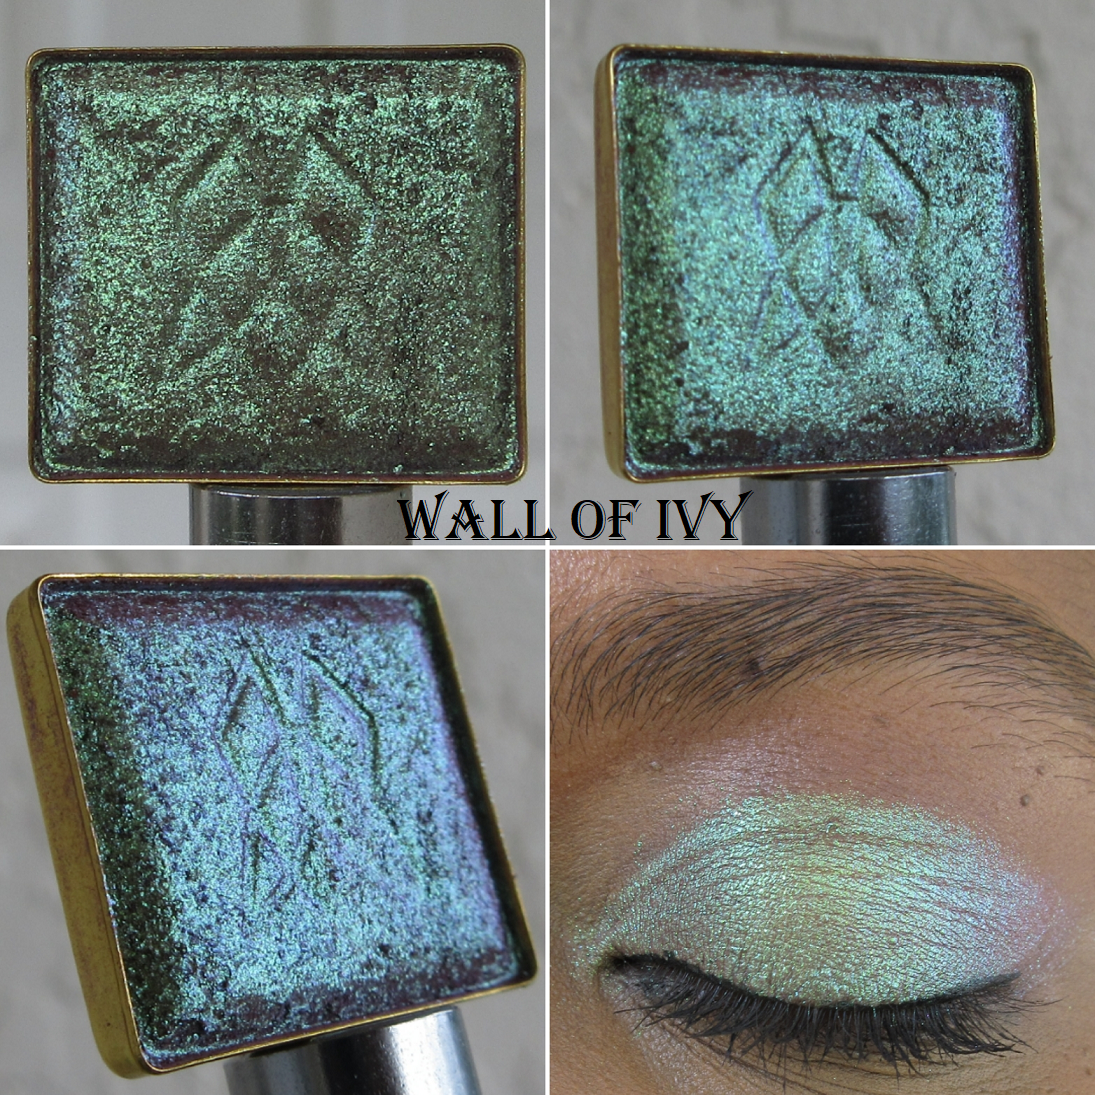
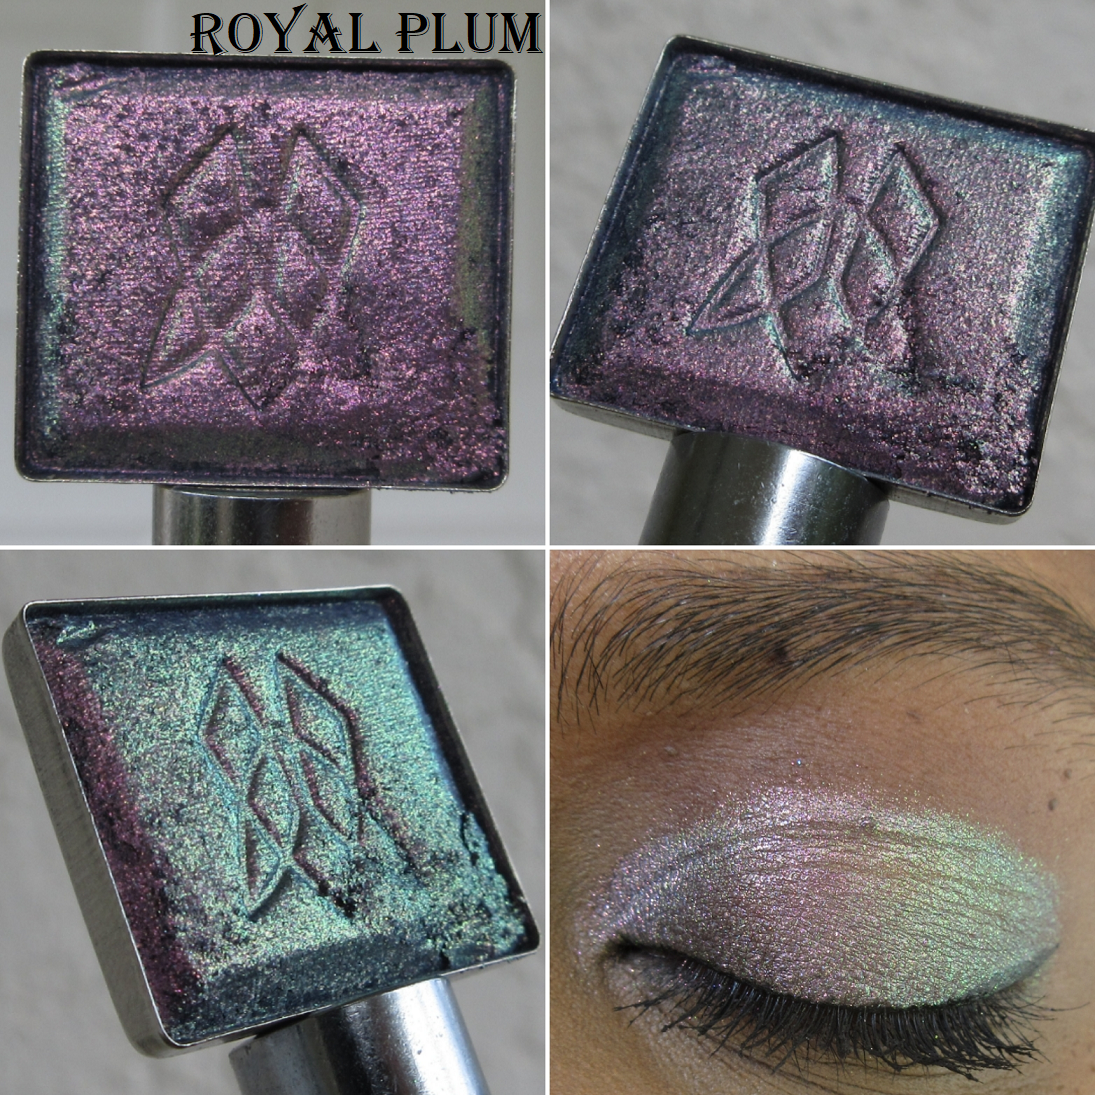
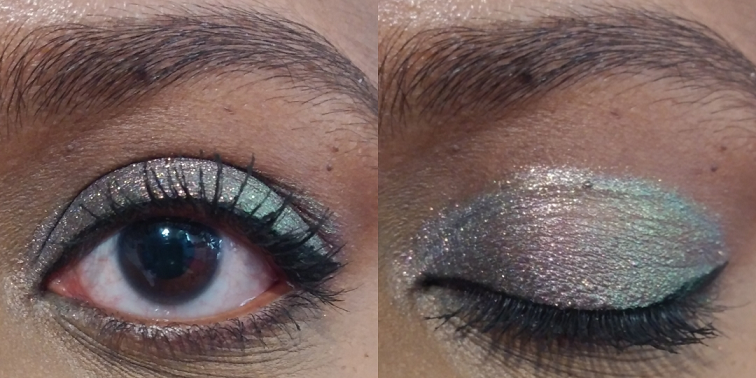
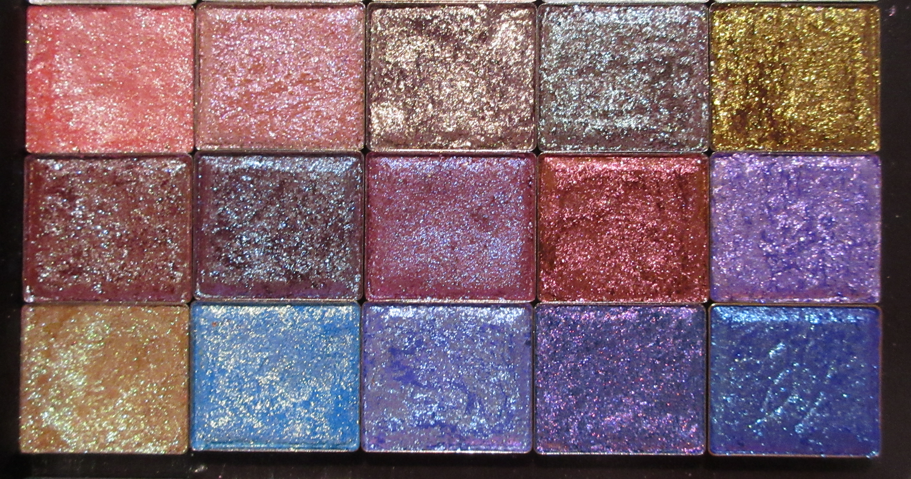
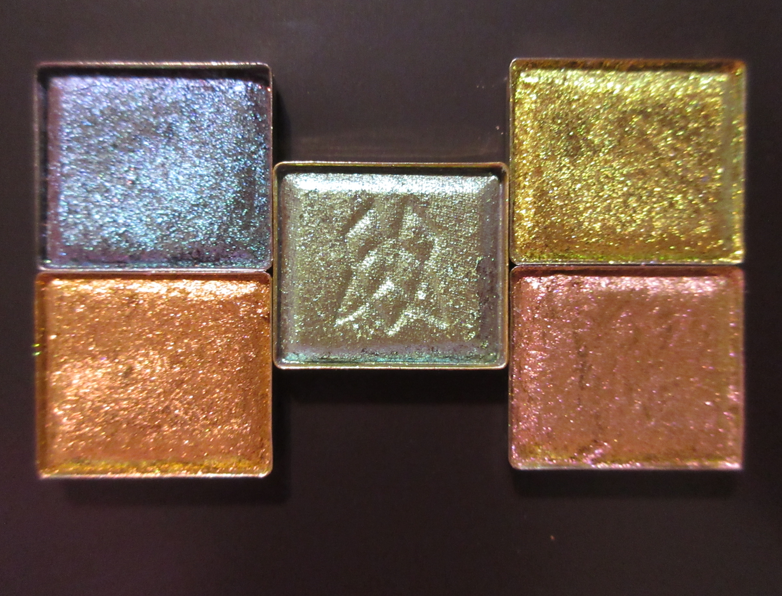
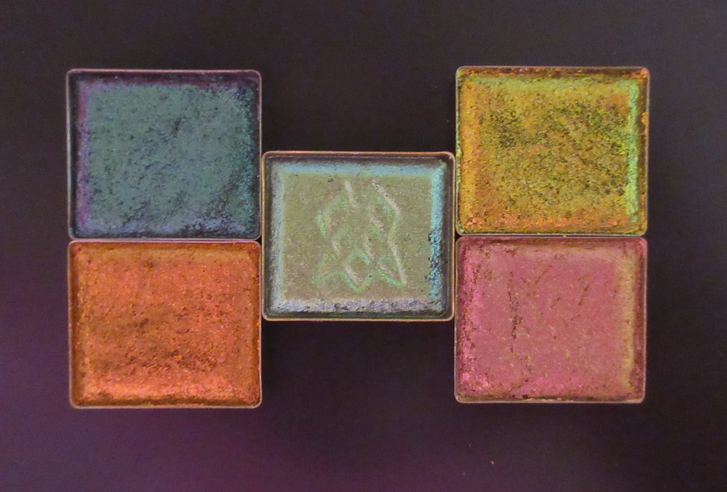
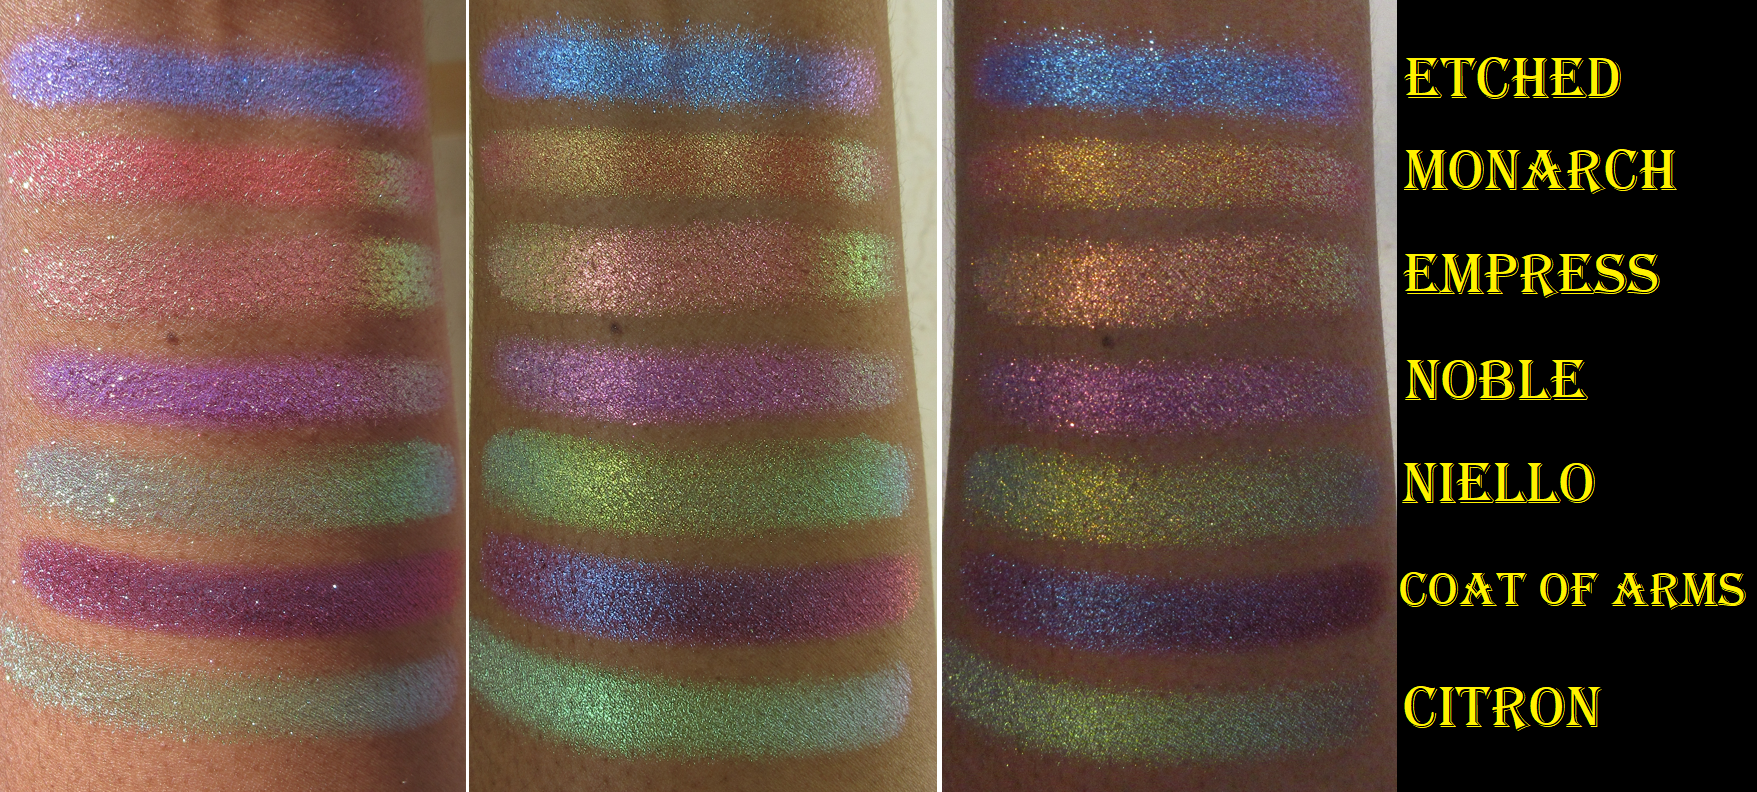
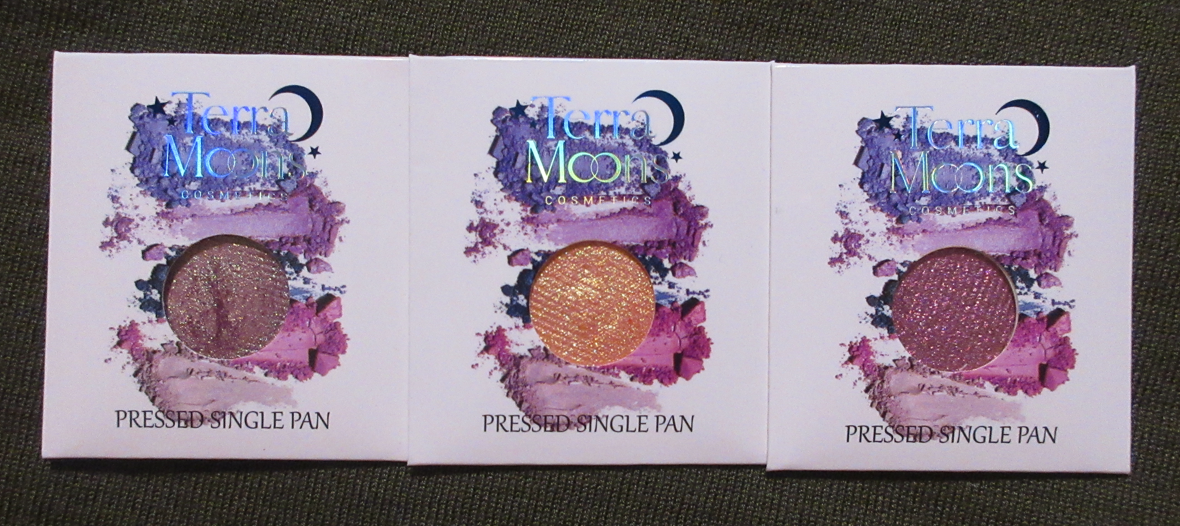
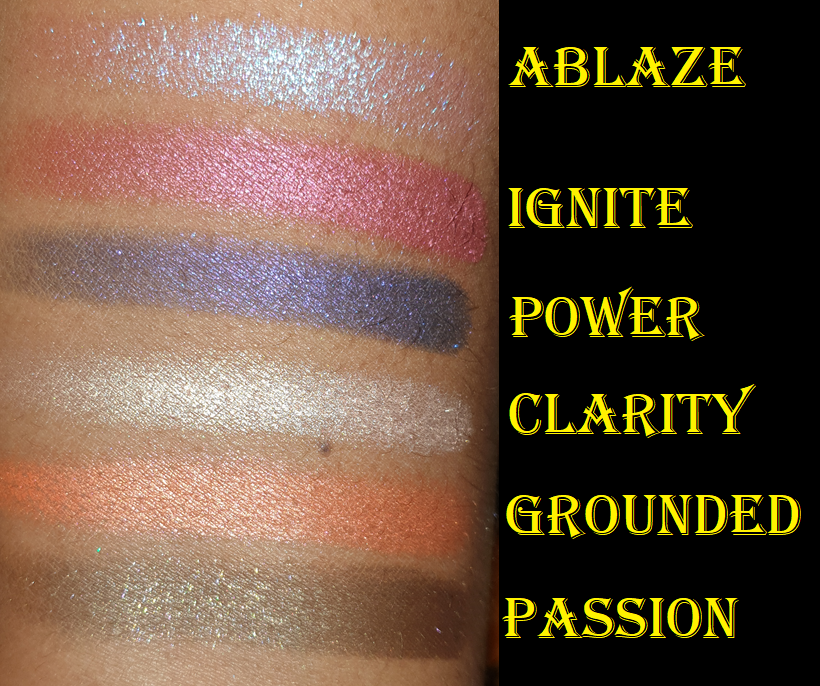
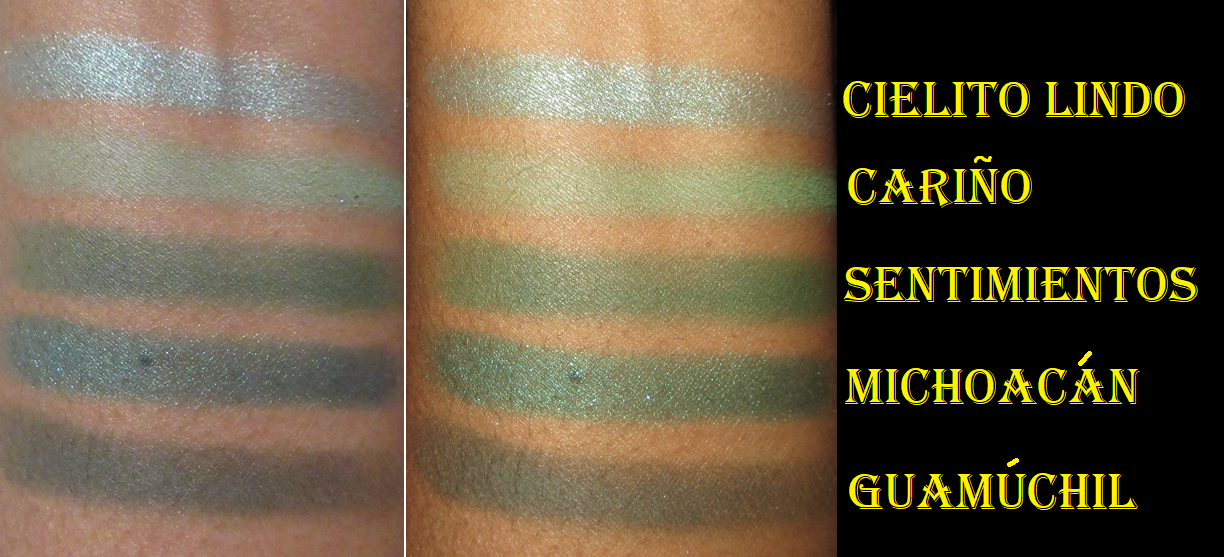
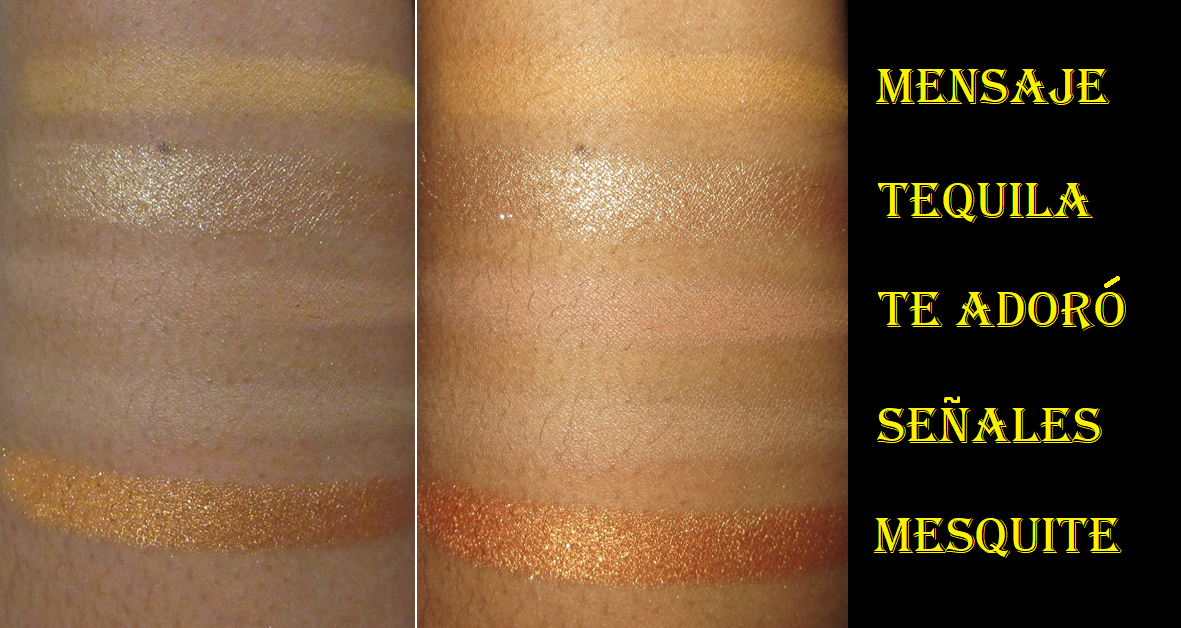
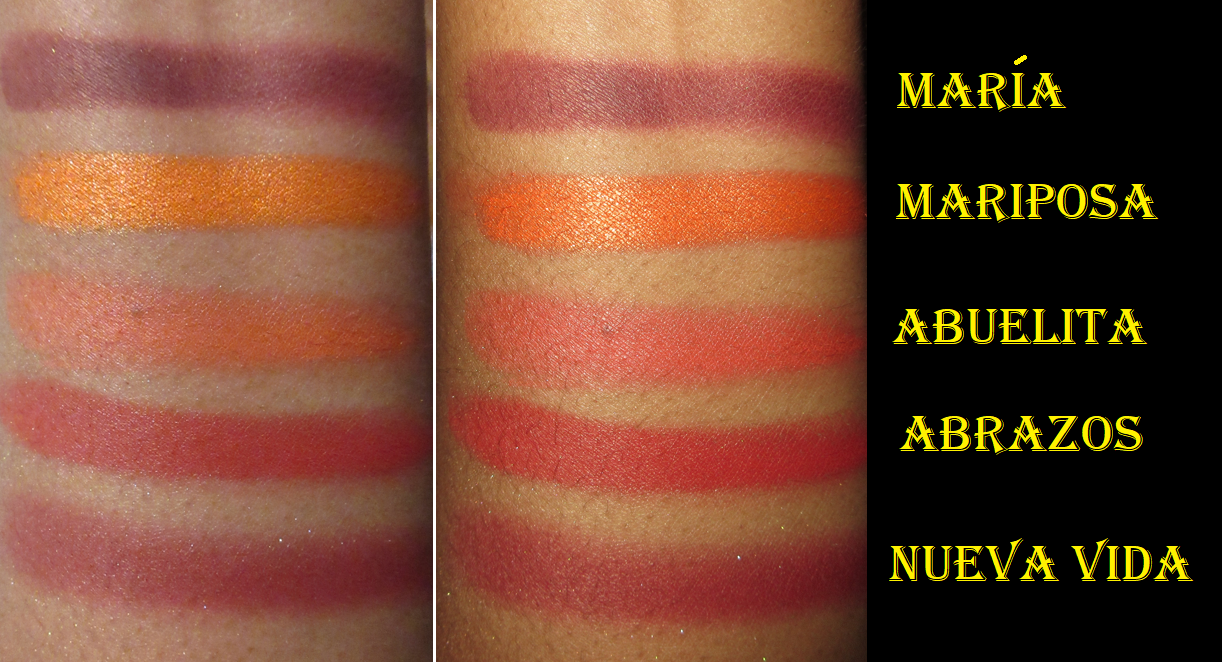
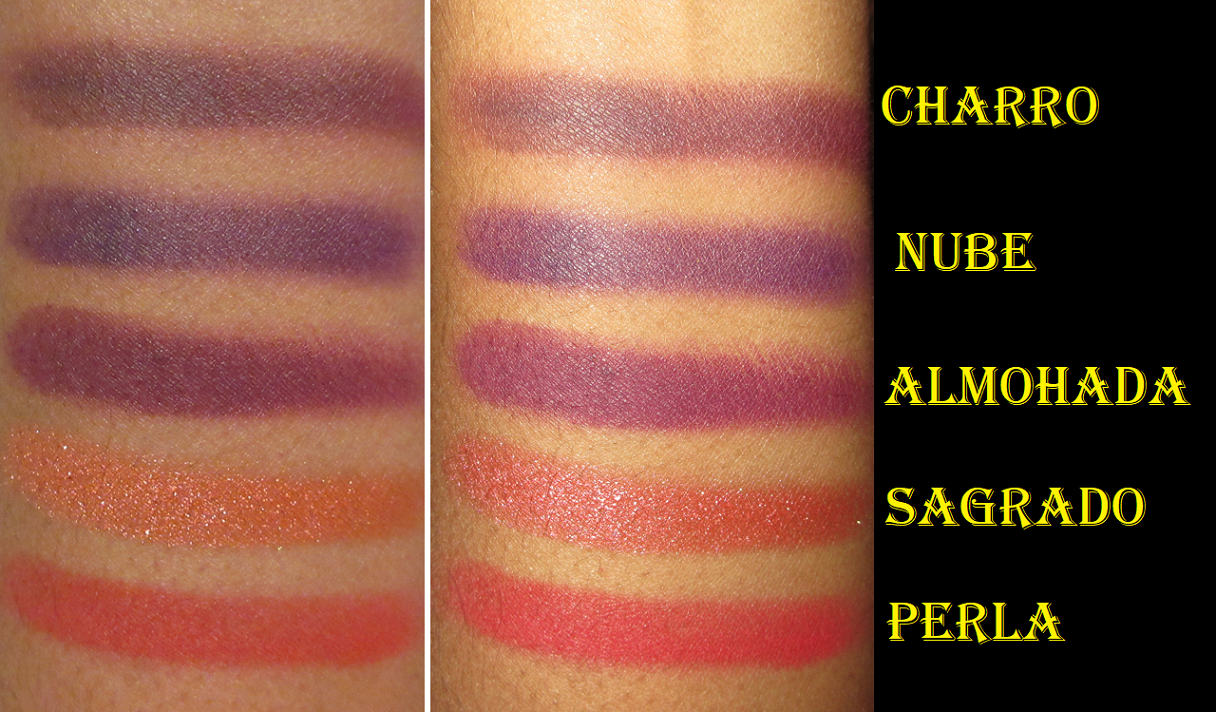
Main Product Swatches
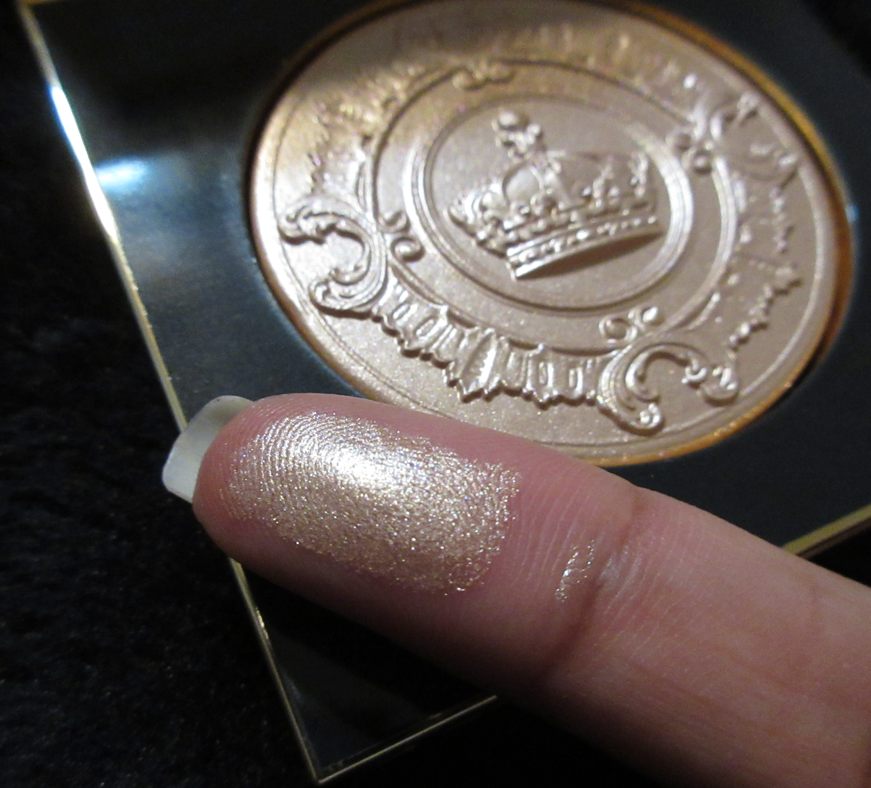
Free Mini Samples

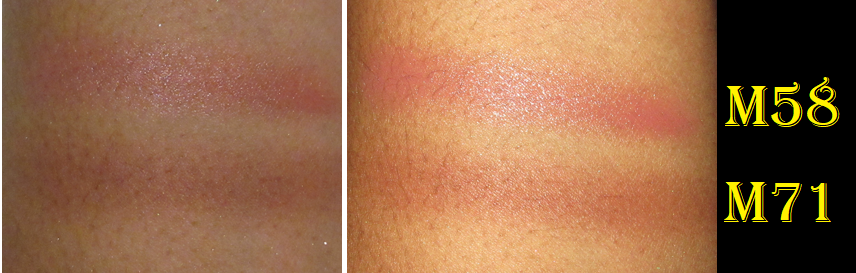
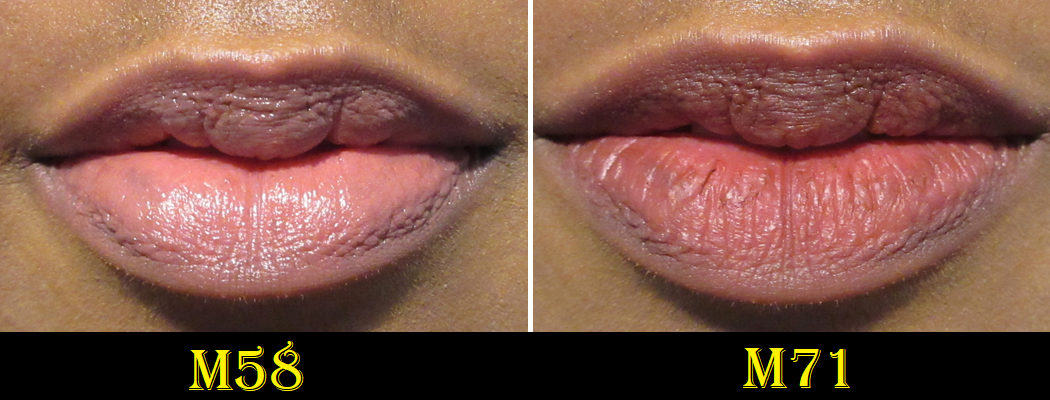
The mini sample of The Cream Lipstick in M58 had a pretty sheen on the lips but felt surprisingly dry, like it was drying out my lips from the inside. Also, this isn’t the kind of formula that that you can put over chapped lips and have it smooth things over. It sinks into every spot where the skin starts to pull up and just makes lips in poor condition look worse. The photo example is after I exfoliated my lips, so I could showcase the product in the best light. It was from my second batch of pictures because my original photos of M58 looked horrific and just too bad to show, especially with my lip split on one spot. If you don’t have issues with lips being dried out frequently and you can keep them conditioned regularly, you might like the formula. Because it made mine drier, I don’t recommend it.
By the time I got around to trying the mini of The Cream Clay Blush in M71, I forgot it was a blush and not a matte lipstick. So, I have a demonstration of what it looks like on my lips, but not my cheeks. I apologize for that. Shockingly, despite how drying it looks on my lips, it actually feels less drying than the cream lipstick! I actually like this color on the lips, but it’s not my usual type of blush color to wear. Also, by the time I remembered it was a blush, my sample was especially dried out, so I didn’t bother trying to wear it on my face or take photos. It already had cracks in it the day I got it, so one can imagine how dry it was weeks later.
Final Thoughts
One would have to know ahead of time exactly how many products they want currently and in the future in order to not have extra MOB Beauty palettes sitting around. This isn’t easy considering it’s still a fairly new brand, so their options are still a bit limited. How can one make space for a potential setting powder or cream foundation in a pan, like the Patrick Ta Creme Foundation and Finishing Powder Duos? What about powder foundation? What if you think you just want a bronzer, highlighter, and two blushes, but then they release a new product that you want and now would have to upgrade to a 6+ palette or hold onto a separate single? Perhaps this is just a me problem, but when I decided I wanted those 5 face powders, I instantly had to get the eyeshadows too in order to fill the palette. Holding onto a 6+ with only 5 of them filled for who knows how long was just not an option for me. It drives me nuts to have designated spaces for a product but to keep one or more slots empty. I need to have them all filled up. So, essentially, I purchase more things that I don’t need and spent more money because of the type of organization system they’ve got going on.
Creating a new brand and a new line of products is still adding to the world’s over-consumption problem. And the truth of the matter is that I’m never going to use up these products enough to need to replace them. I love what the brand is trying to do, but unless I make MOB’s products and system the only makeup I will ever buy again, I’m not making use of their refill aspect. If MOB does expand the range and make my perfect highlighter shade in the future, wouldn’t it be wasteful to try and get that one while I still have the old one? Would I just toss out the product and recycle the rest? I can’t actually send it in to recycle without there being 5-10 empty products, so I just hold it all indefinitely? Wait for everything to expire before trying to recycle things?
As someone who doesn’t use exclusively vegan products, clean products, and doesn’t have a firm stance on buying from companies that are not considered “cruelty free” because of the selling products in China regulation debate, I find myself feeling like I haven’t gained much by having these makeup items in my collection. I feel good about supporting a brand that cares so much about the environment, but without planning to make serious permanent changes, it’s just adding yet another thing to my collection and their best performers don’t top any of my favorites by a long shot. So, rather than continue pursuing my perfect palette I spent so much money trying to create, it’s best if I leave things where they are.
For those who are very strongly about minimizing their makeup collections and only using vegan, “clean,” and less waste products, this brand could be the miracle you’ve been looking for. They could be offering something that makes you want to give up buying from anyone else. So, for those people, I’d recommend this brand and their products. But for anyone else just curious to have great makeup and create their own custom face and eye palettes with the thought of continuing to buy from all other brands and their new releases (like me), I’d say perhaps the best thing to do for the environment is to actually just skip this one.
I hope I’ve conveyed my thoughts on this tactfully and clearly. I really do wish current brands were so dedicated in helping out the environment and I wish this could be the end all be all for me when it comes to makeup, but it’s not for me. I hope I will continue to get some use out of these products, but chances are high that I’ll keep using my favorites. However, as my ongoing attempts at a low-buy suggests, I am trying harder to make fewer makeup purchases. And in a way, that’s me attempting to do my part the best way that I can.
Thank you for reading.
-Lili ❤